.png)
How to Install BazziteUpdated 2 hours ago

Bazzite is a gaming focused version of Linux. It runs as a normal desktop with everything you need to start playing already included. This guide covers getting your USB installer, booting from it, running the installer, and first boot setup.
There are two ways to get your installer, and you only need one of them. If you bought a Bazzite system from us, the recovery drive shipped in the accessory bag and is ready to use as is. If not, you will need to download the image from Bazzite and write it to a USB drive first.
⚠️ WARNING: INSTALLING BAZZITE WILL ERASE EVERYTHING ON THE DRIVE YOU INSTALL IT TO. PLEASE BACKUP ANY IMPORTANT DATA BEFORE CONTINUING. META PC IS NOT RESPONSIBLE FOR DATA LOSS INCLUDING BUT NOT LIMITED TO PERSONAL FILES, APPLICATIONS, CONFIGURATION SETTINGS, PICTURES, OR VIDEOS.
GOOD TO KNOW BEFORE YOU SWITCH
Bazzite is a completely different operating system from Windows, so a few things work differently. Worth knowing before you wipe anything:
- Bazzite runs on AMD and NVIDIA graphics, but each has its own download. You will pick the one that matches your card in the steps below
- Windows apps and utilities do not run, including Armoury Crate, Polychrome, iCUE, and HYTE Nexus. RGB control on Bazzite is handled by community software, so our RGB guides do not apply once you switch
- You do not install graphics drivers manually. They are built in and come with system updates
- You can keep Windows by installing Bazzite to a separate physical drive. Sharing one drive is not recommended, as Windows updates can break the Bazzite bootloader. Guide here: How to install or reseat an M.2 SSD
⚠️ WARNING: IF YOUR PC HAS MORE THAN ONE DRIVE (SSD/HDD) INSTALLED, DOUBLE CHECK WHICH DRIVE YOU SELECT IN THE INSTALLER. IF YOU ARE NOT KEEPING WINDOWS, DISCONNECT ANY DRIVE YOU ARE NOT INSTALLING TO BEFORE YOU START!
If you would rather not open the system up, bring it by the shop and we can disconnect the extra drives for you.
GETTING YOUR BAZZITE USB DRIVE
USING THE RECOVERY DRIVE THAT CAME WITH YOUR SYSTEM
IF YOUR SYSTEM DID NOT COME WITH BAZZITE, OR YOU CANNOT FIND YOUR RECOVERY DRIVE, SKIP THIS SECTION AND FOLLOW CREATING YOUR OWN BAZZITE USB DRIVE BELOW INSTEAD.
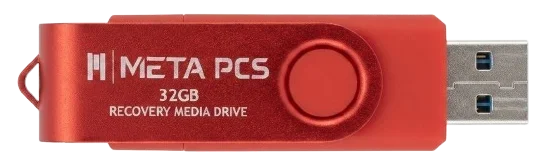
Every Bazzite system we build ships with a Bazzite recovery drive in the accessory bag. It is already written and ready to go, so there is nothing to download or format. All you need is the drive, a wired keyboard and mouse, and an internet connection.
- Find the flash drive labeled Bazzite Recovery in your accessory bag
- Plug it into a port on the back of the PC
- Skip ahead to Booting From The USB Drive below
✏️ PLEASE NOTE: Hang onto this drive. It is the fastest way to get your system back if Bazzite ever stops booting, and it saves you the download later.
CREATING YOUR OWN BAZZITE USB DRIVE
If your system did not ship with a recovery drive, or you have lost yours, you can build one yourself in a few minutes.
WHAT YOU WILL NEED:
- A USB flash drive, 16GB or larger
- A working Windows PC to prepare the drive
- A wired keyboard and mouse
- An internet connection, wired Ethernet is easiest but Wi-Fi works. The download is around 5GB
- A backup of anything important on the PC
⚠️ WARNING: EVERYTHING ON THE FLASH DRIVE WILL BE ERASED DURING THIS PROCESS
STEP ONE: DOWNLOAD THE BAZZITE IMAGE
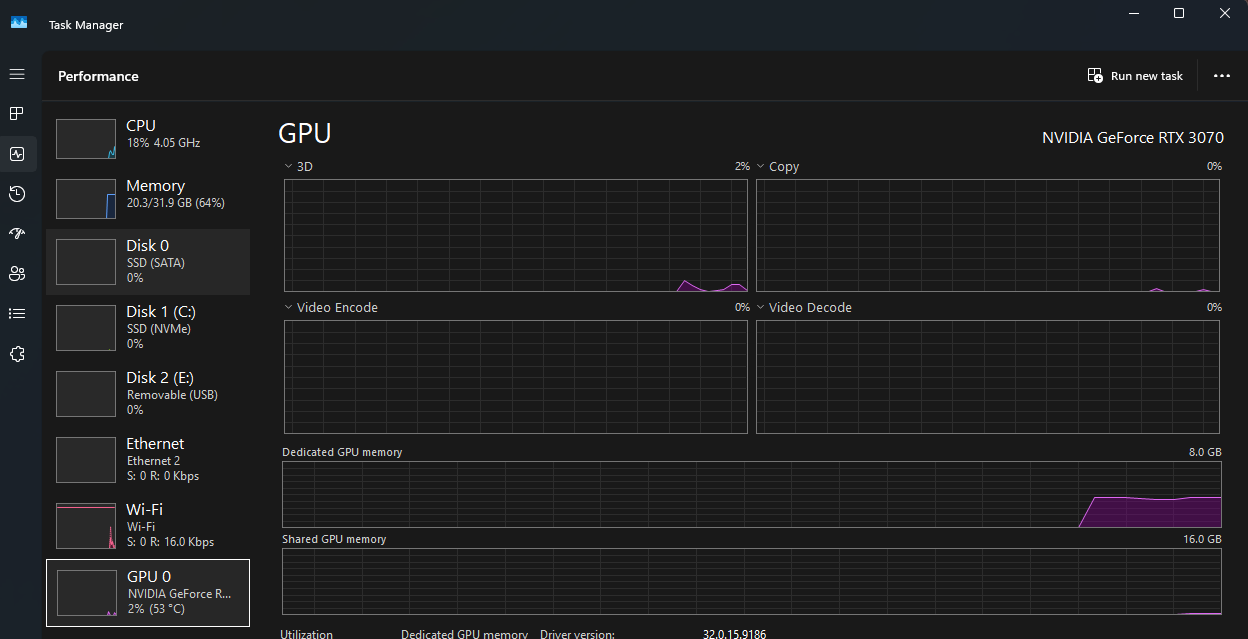
Bazzite builds a different image for different hardware, so the download page asks a few quick questions before it gives you a link.
- Go to bazzite.gg and scroll down to the download section
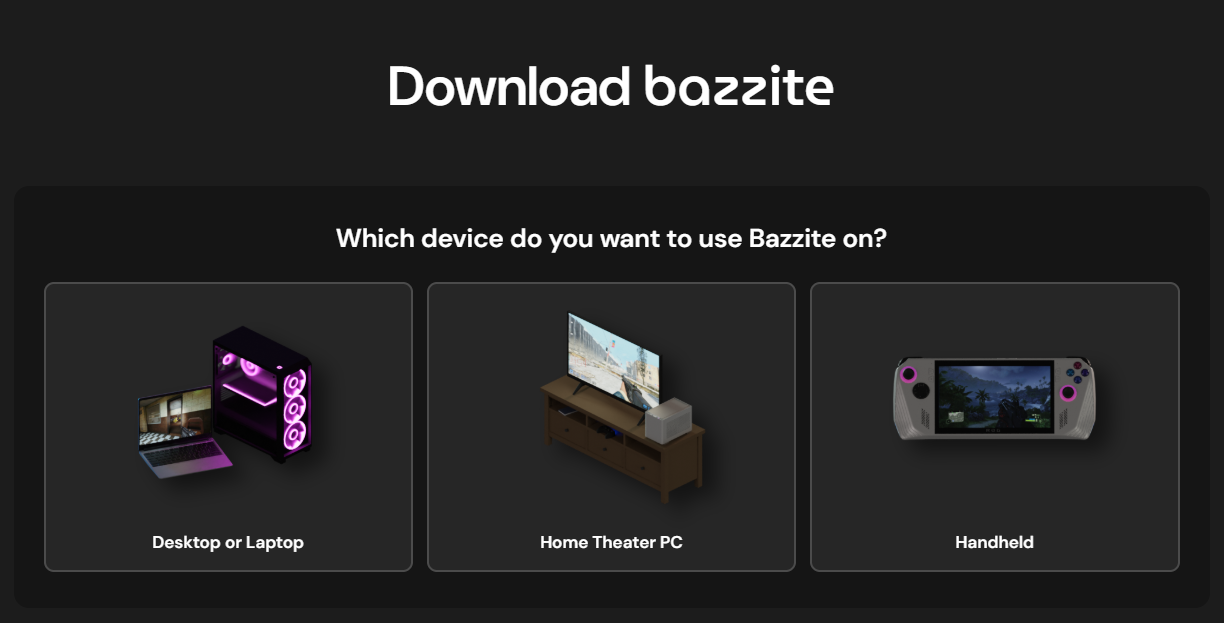
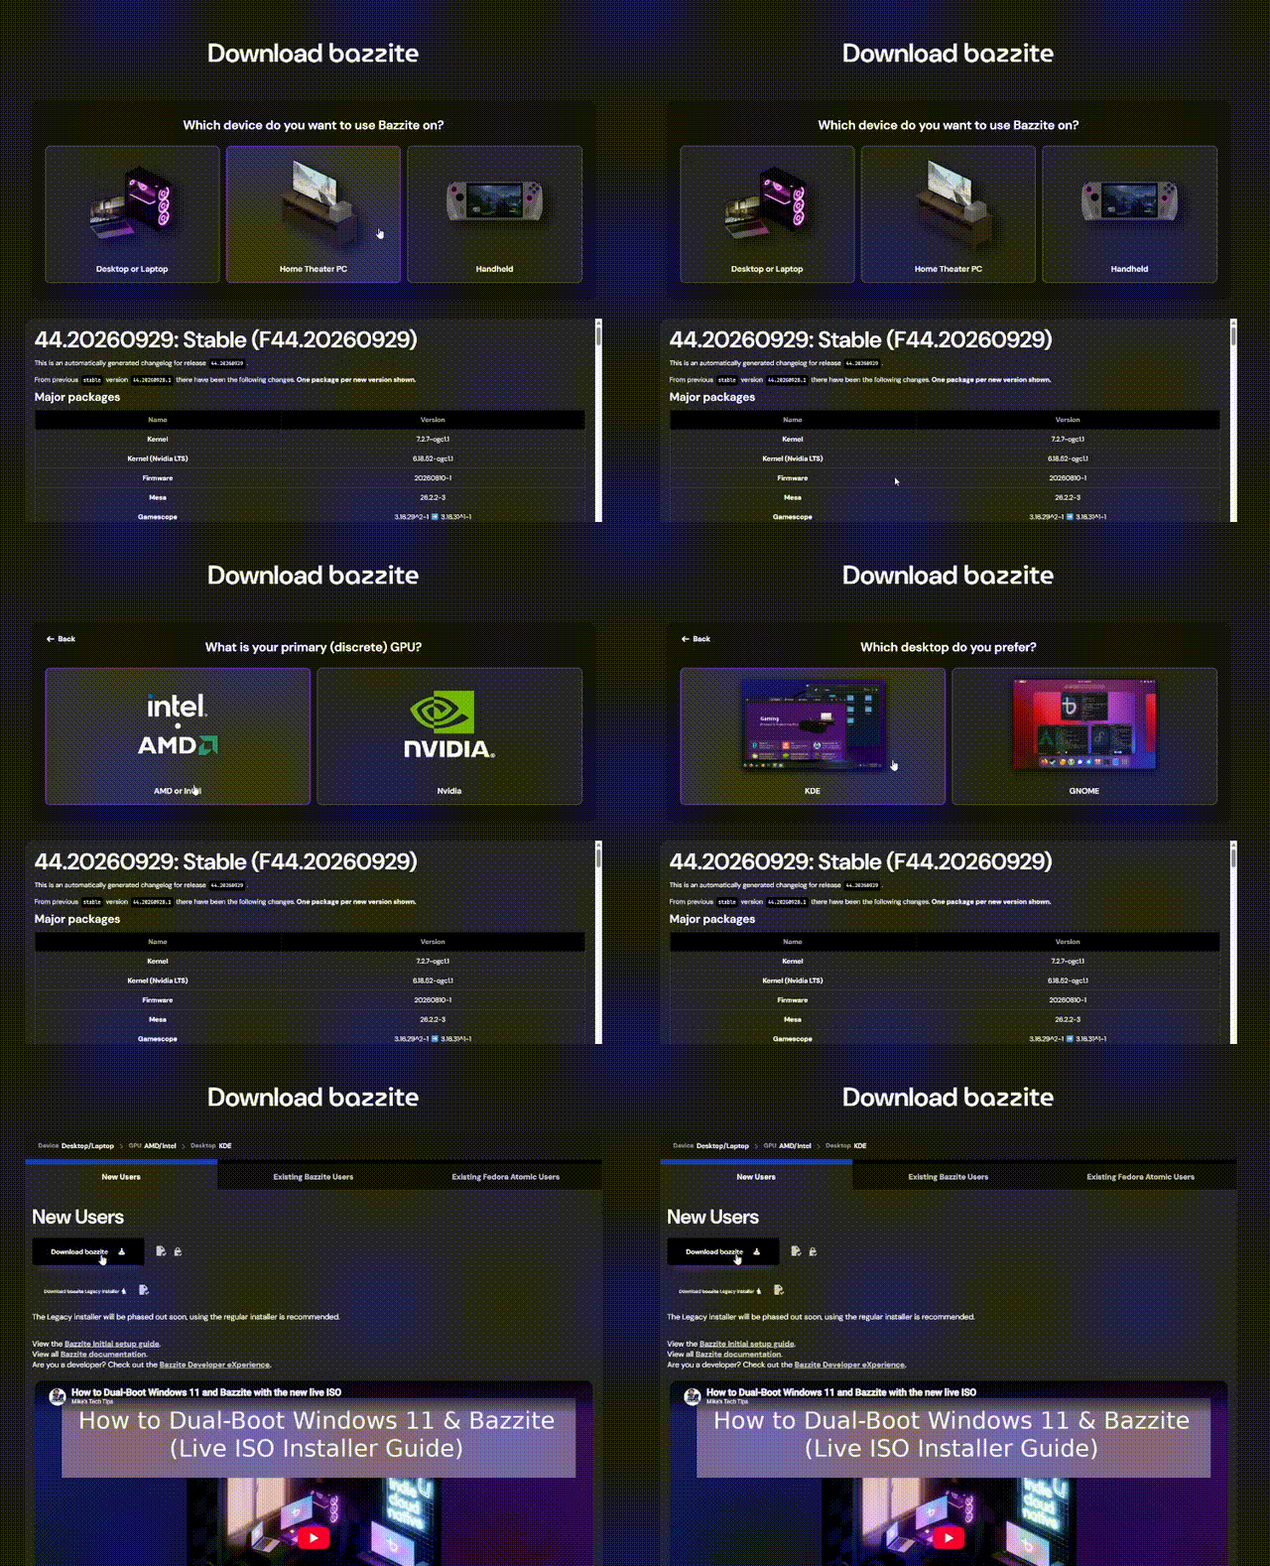
- Device: pick Desktop or Laptop
- GPU: pick AMD or Intel, or Nvidia, to match the card in your system
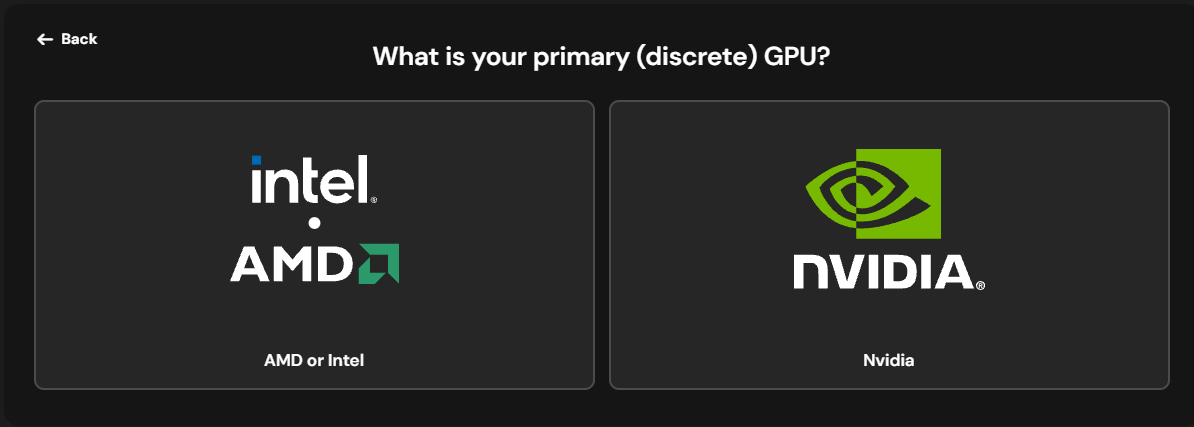
- If you picked Nvidia, it asks which card you have. Pick GTX 16xx or RTX series for most cards, or GTX 1080 or older (LTS) for older ones
- Desktop: pick KDE
- Under New Users, click the big Download bazzite button, not the Legacy installer link below it. Leave the file in your Downloads folder
STEP TWO: DOWNLOAD RUFUS
Rufus is a free tool that writes the image onto your flash drive.
- Go to rufus.ie and download the standard version or the portable
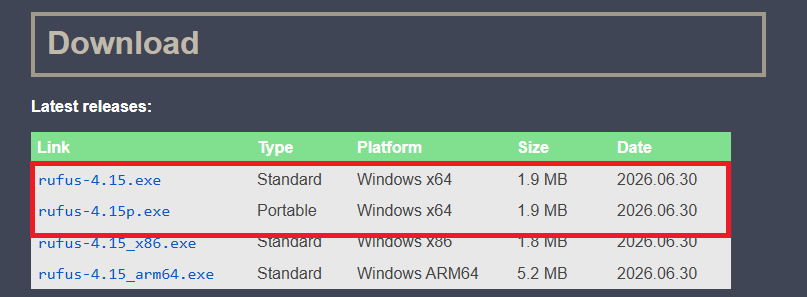
- Rufus portable does not install, just double click the file you downloaded to run it
- Click Yes if Windows asks for permission
STEP THREE: WRITE THE IMAGE TO YOUR USB DRIVE
- Plug in your USB flash drive and open Rufus
- Under Device, select your flash drive
⚠️ WARNING: DOUBLE CHECK YOU HAVE PICKED THE RIGHT DRIVE. RUFUS WILL ERASE AN EXTERNAL HARD DRIVE JUST AS HAPPILY AS A FLASH DRIVE!
- Click SELECT and choose the Bazzite .iso file you downloaded
- Leave Partition scheme on GPT and Target system on UEFI (non CSM)
- Click START. If Rufus asks whether to write in ISO Image mode or DD Image mode, choose DD Image mode
- Click OK on the warning
- Wait for the status bar to read READY, then close Rufus and eject the drive
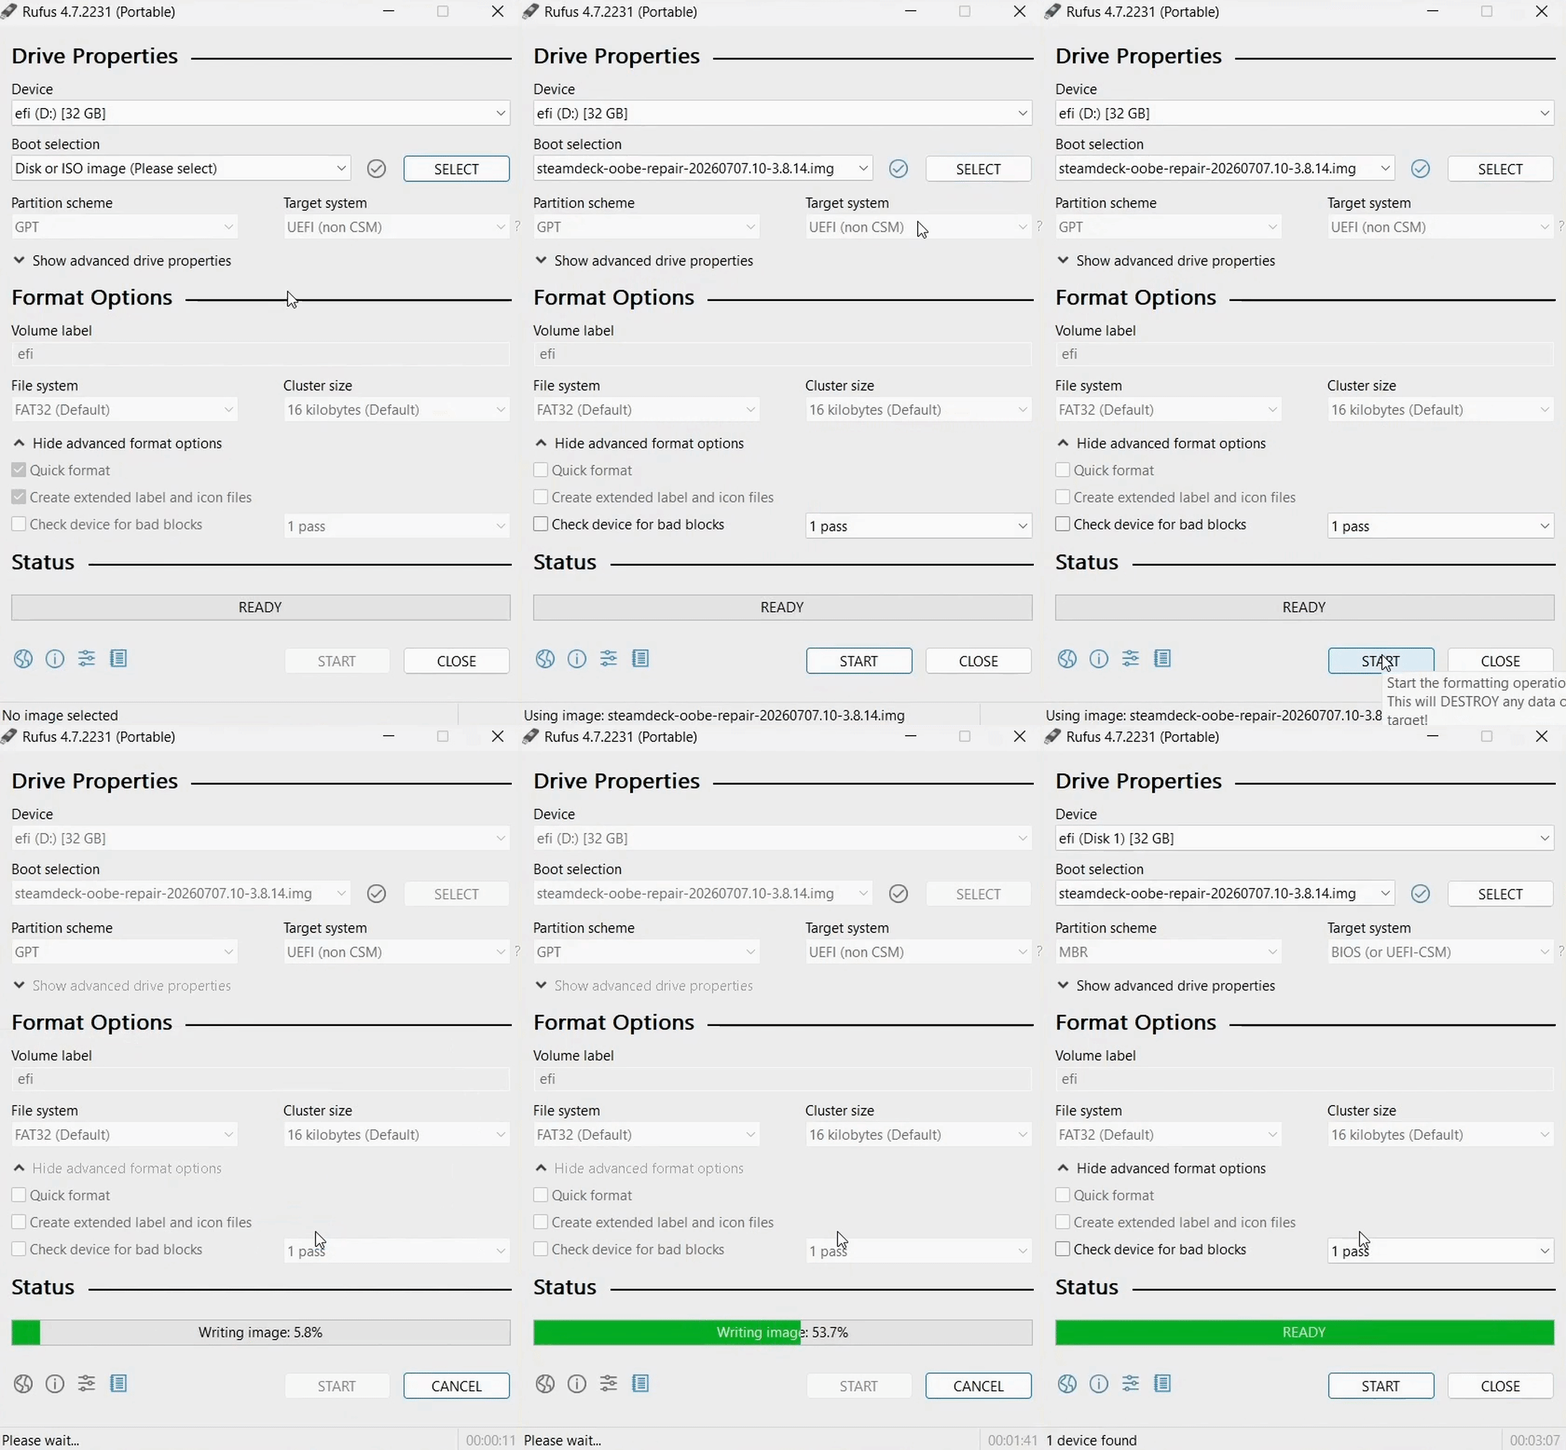
Once your drive is written, please move onto Booting From The USB Drive below.
INSTALLING BAZZITE
BOOTING FROM THE USB DRIVE
Bazzite works with Secure Boot turned on, so there is nothing to change in your BIOS. You will add Bazzite's security key during first boot.
- Shut the PC down completely and plug the USB drive into a port on the back of the PC. Front panel ports, hubs, and USB-C adapters are unreliable during install
- Power the system on and repeatedly tap your motherboard's boot menu key as soon as it starts:
ASUS: F8 | ASROCK: F11 | MSI: F11 | GIGABYTE: F12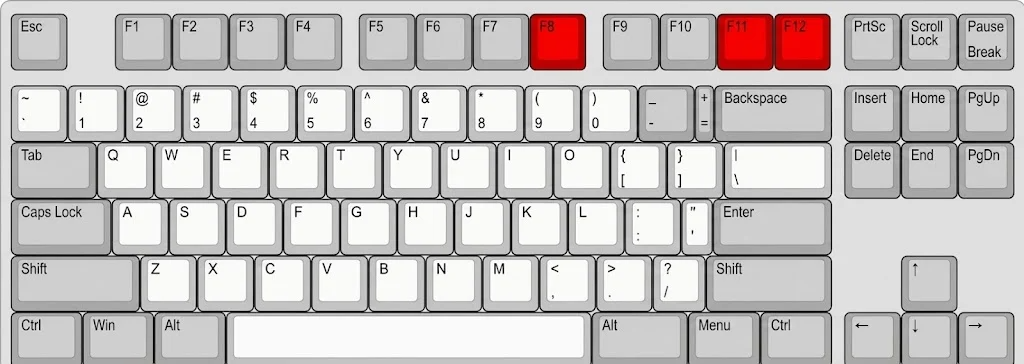
- Select your USB drive from the boot menu, it may show up as UEFI: [your drive's name]
- Pick the first option on the boot screen and let it load. The live desktop takes a minute or two to come up
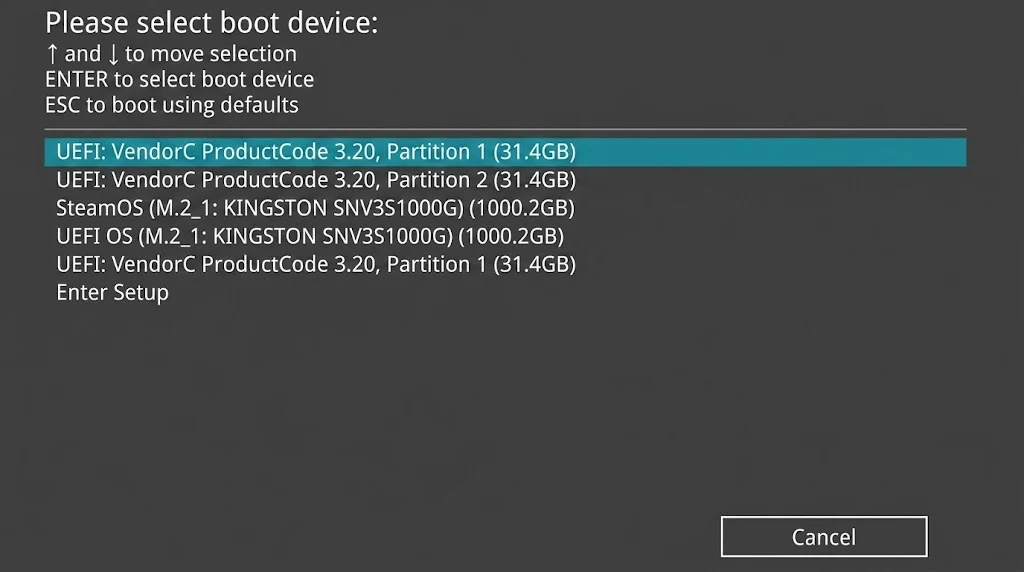
✏️ PLEASE NOTE: Most systems we build use an ASUS motherboard, so your boot menu key is most likely F8. If you are not sure, the model name is printed on the board itself, usually between the PCIe slots or along the top edge near the RAM. It is also shown at the top of the screen once you are in the BIOS.
RUNNING THE INSTALLER
You will land on a desktop. This is Bazzite running off the flash drive, nothing has been installed yet. If the installer is not already open, open it from the icon on the desktop.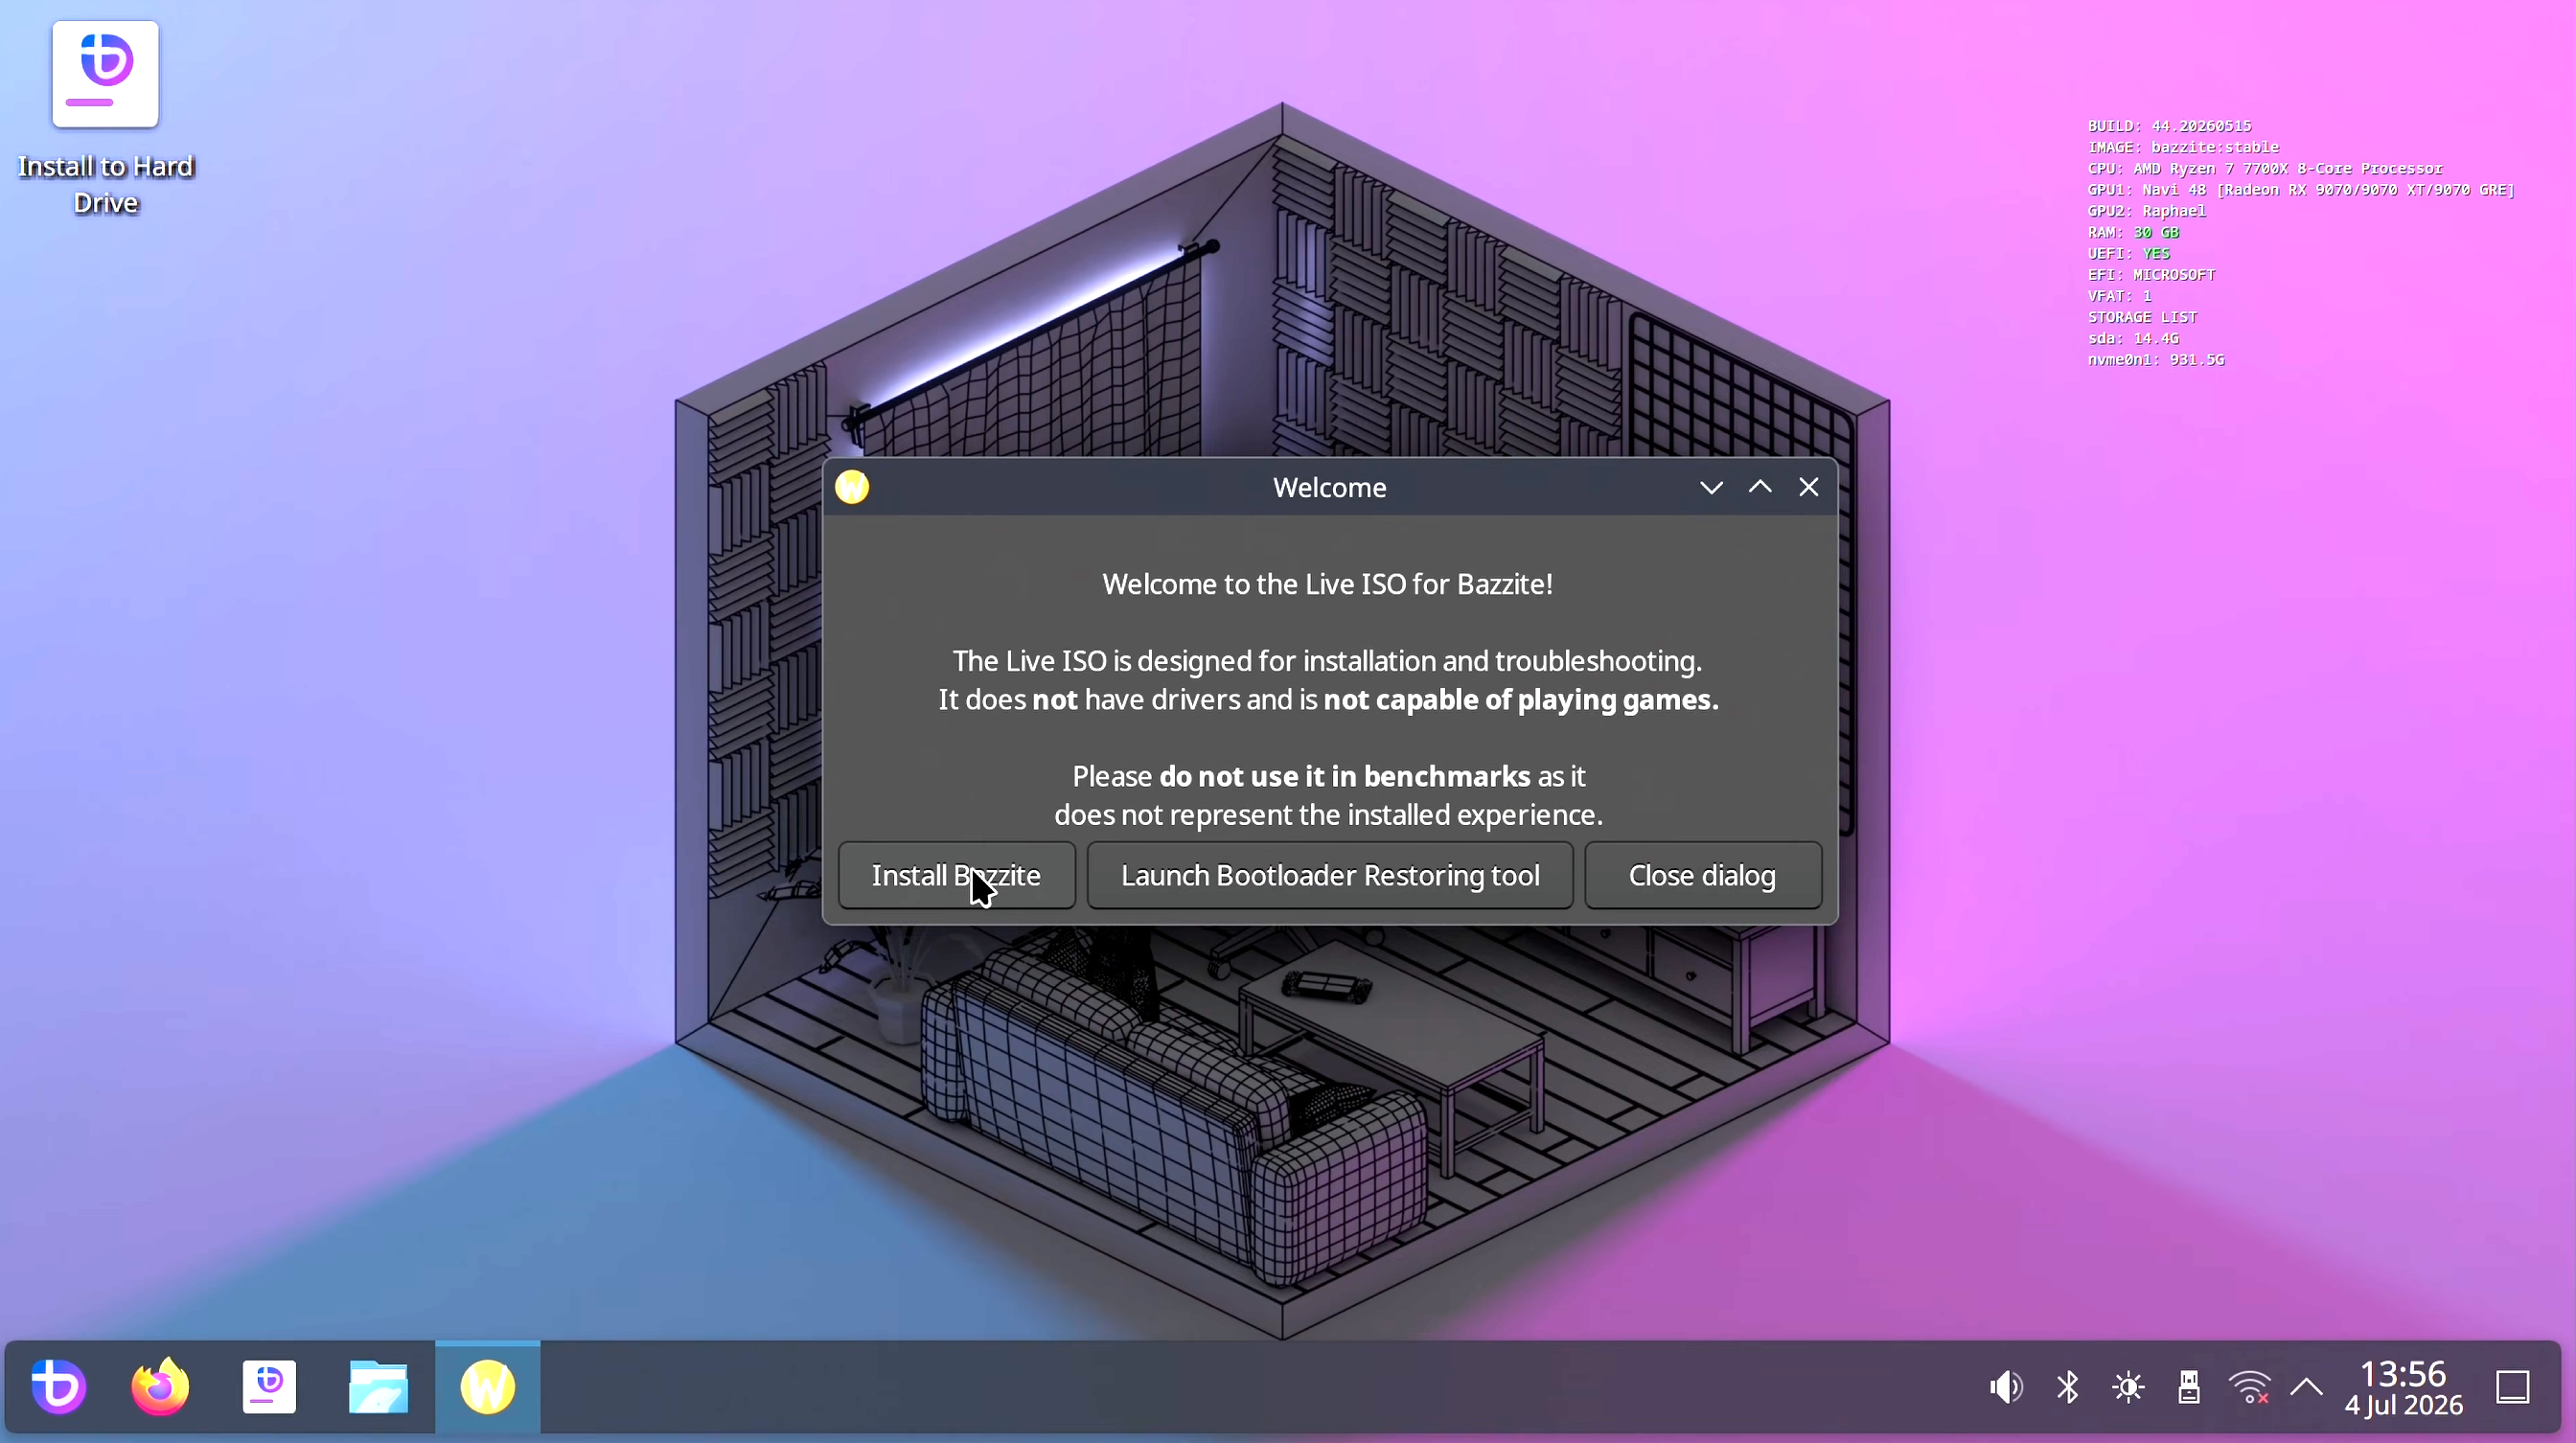
⚠️ WARNING: THIS STEP FORMATS THE DRIVE YOU SELECT AND INSTALLS A FRESH COPY OF BAZZITE
- Pick your language and click Continue
- Choose your keyboard layout and time zone
- Under Installation Destination, select the drive you want Bazzite on
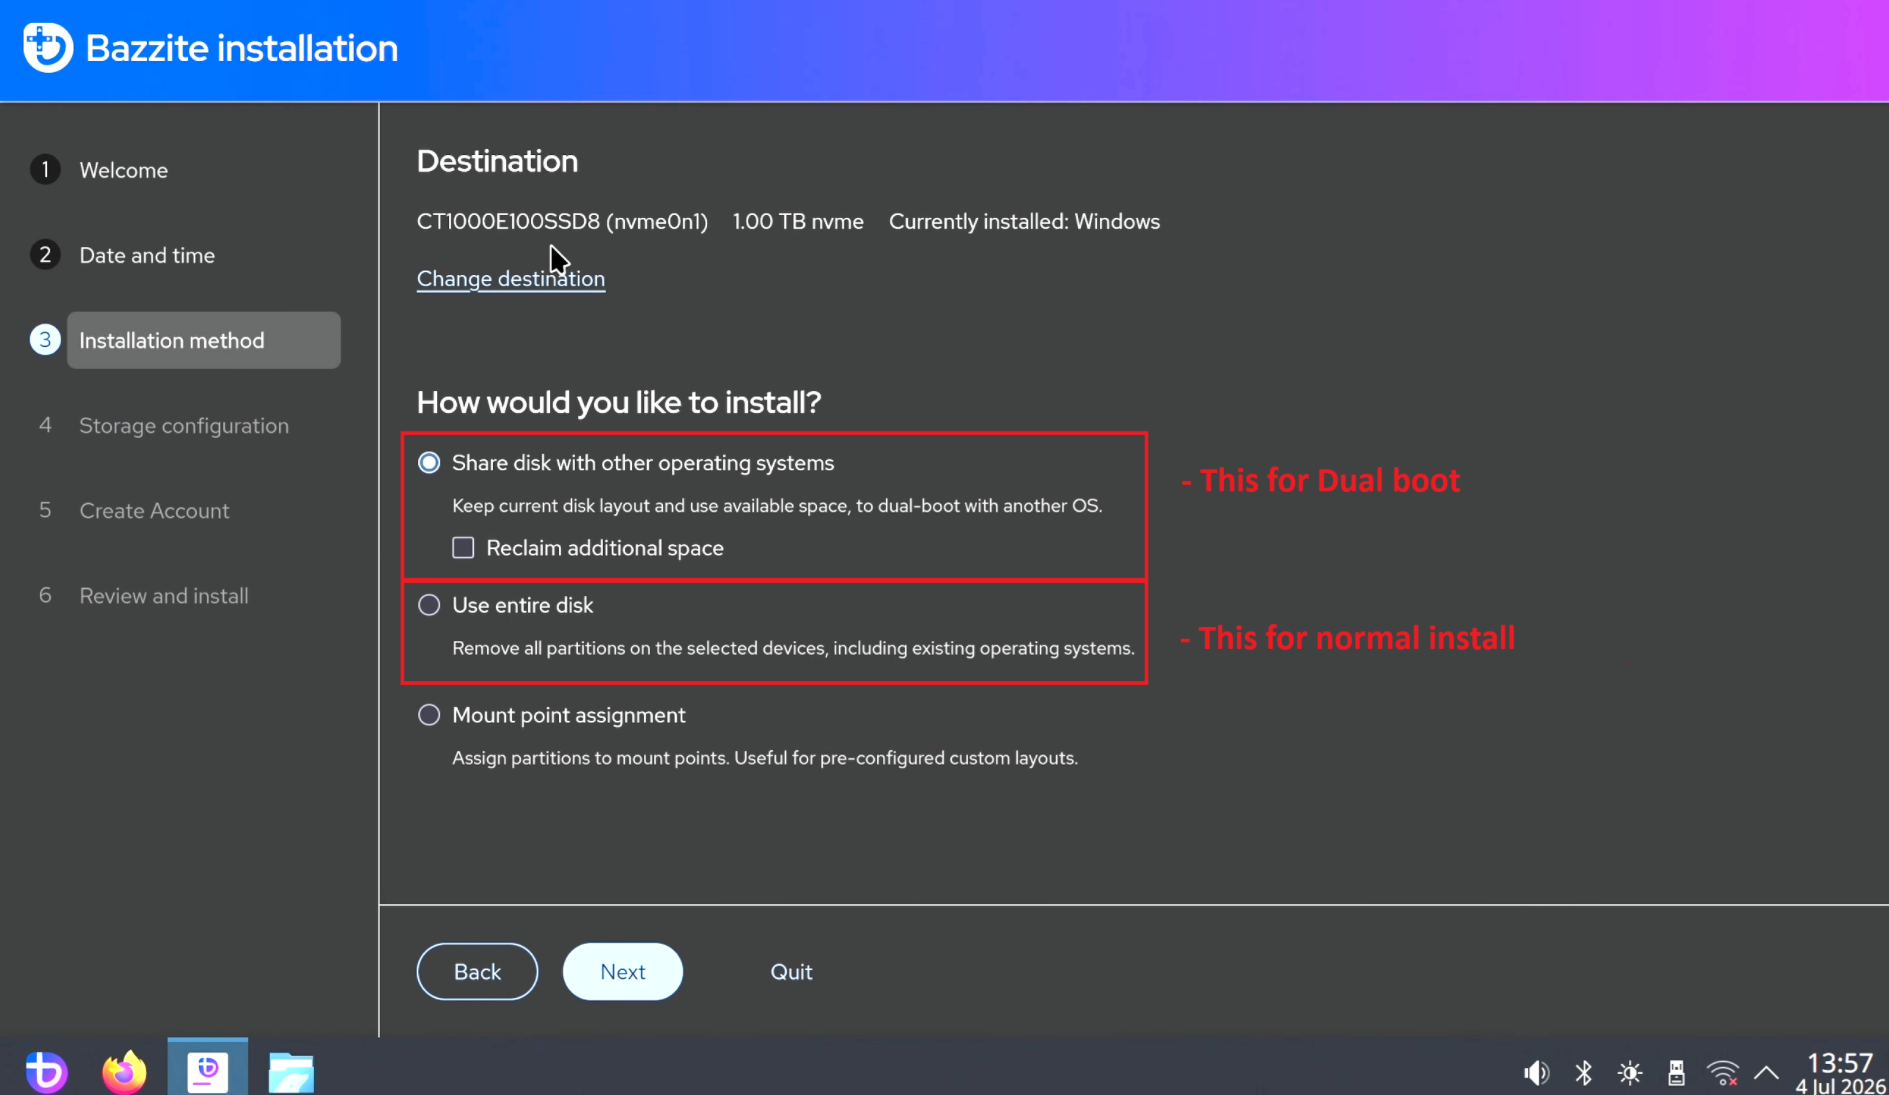
⚠️ DOUBLE CHECK THE DRIVE YOU PICK HERE. THIS IS THE STEP THAT ERASES DATA.
- Leave the storage configuration on Automatic
- If it offers to encrypt the drive, leave it off
- Create your username and password when it asks. Write these down, you will need the password later for system settings
- Review the summary and click Begin Installation
- Let it run. This takes several minutes depending on your drive
- ⚠️ DO NOT TURN THE SYSTEM OFF WHILE THIS IS RUNNING!
- When it finishes you will get a prompt to reboot. Remove the USB drive once the system reboots fully
ENROLLING THE SECURE BOOT KEY
The first time the system boots after install you may get a blue screen with a short menu on it. This is normal and it is not an error. It is asking permission to add Bazzite's security key so Secure Boot will trust it.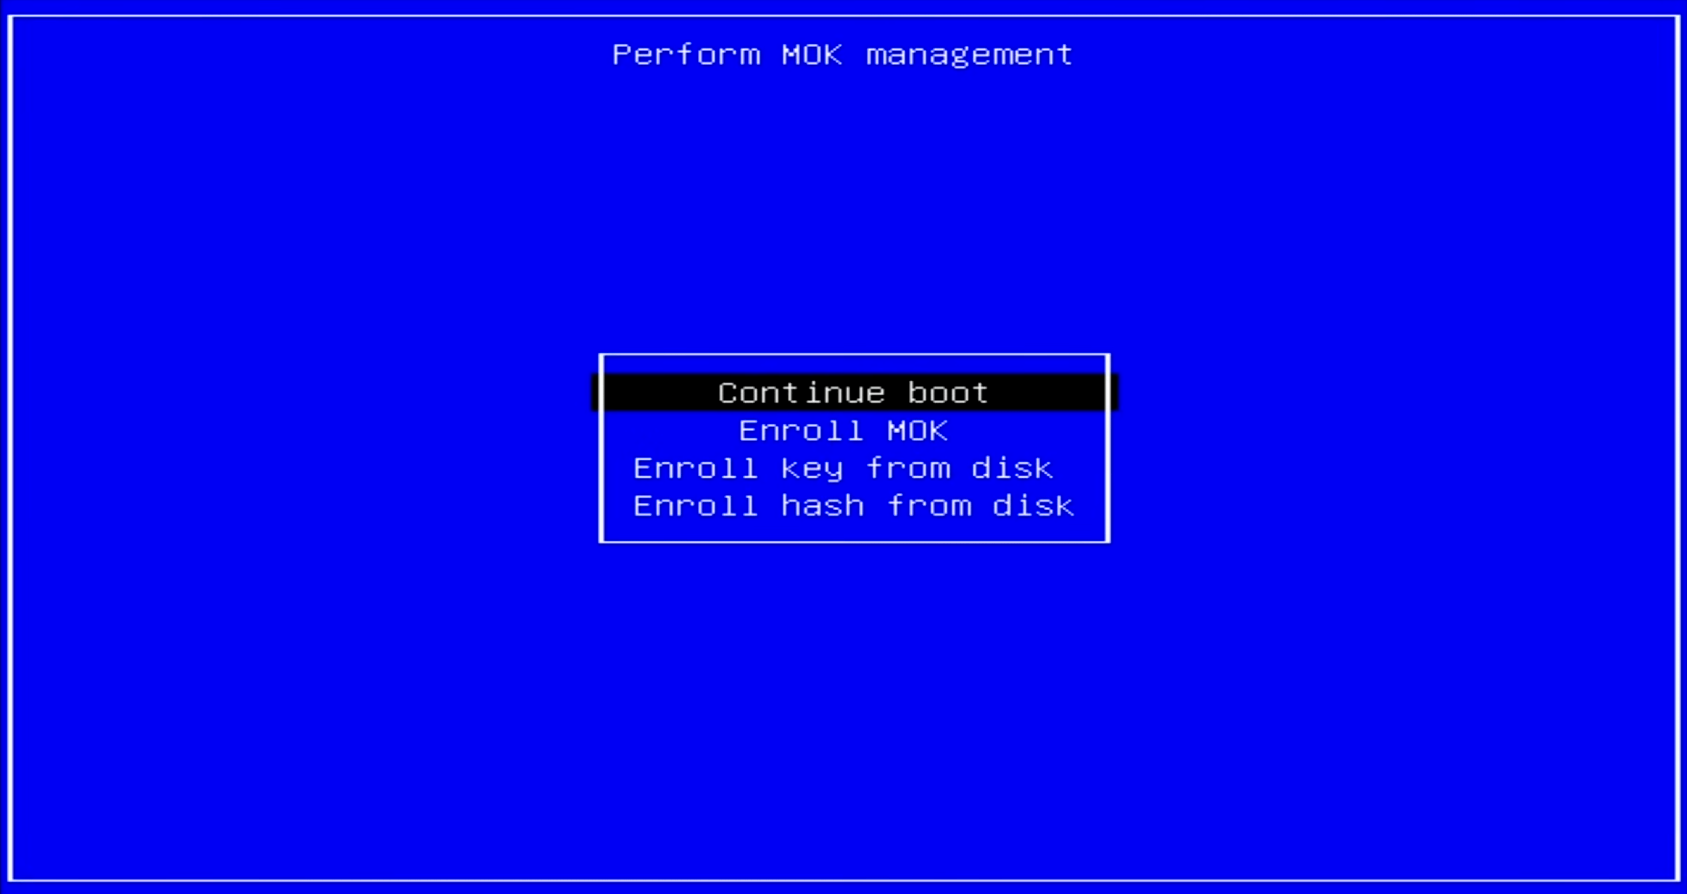
- Choose Enroll MOK
- Choose Continue, then Yes
- When it asks for a password, type universalblue and press Enter
- The system reboots on its own and boots into Bazzite
✏️ PLEASE NOTE: The password prompt always uses a standard US keyboard layout, so type it exactly as written even if your keyboard is set up differently. Nothing shows on screen as you type, that is normal.
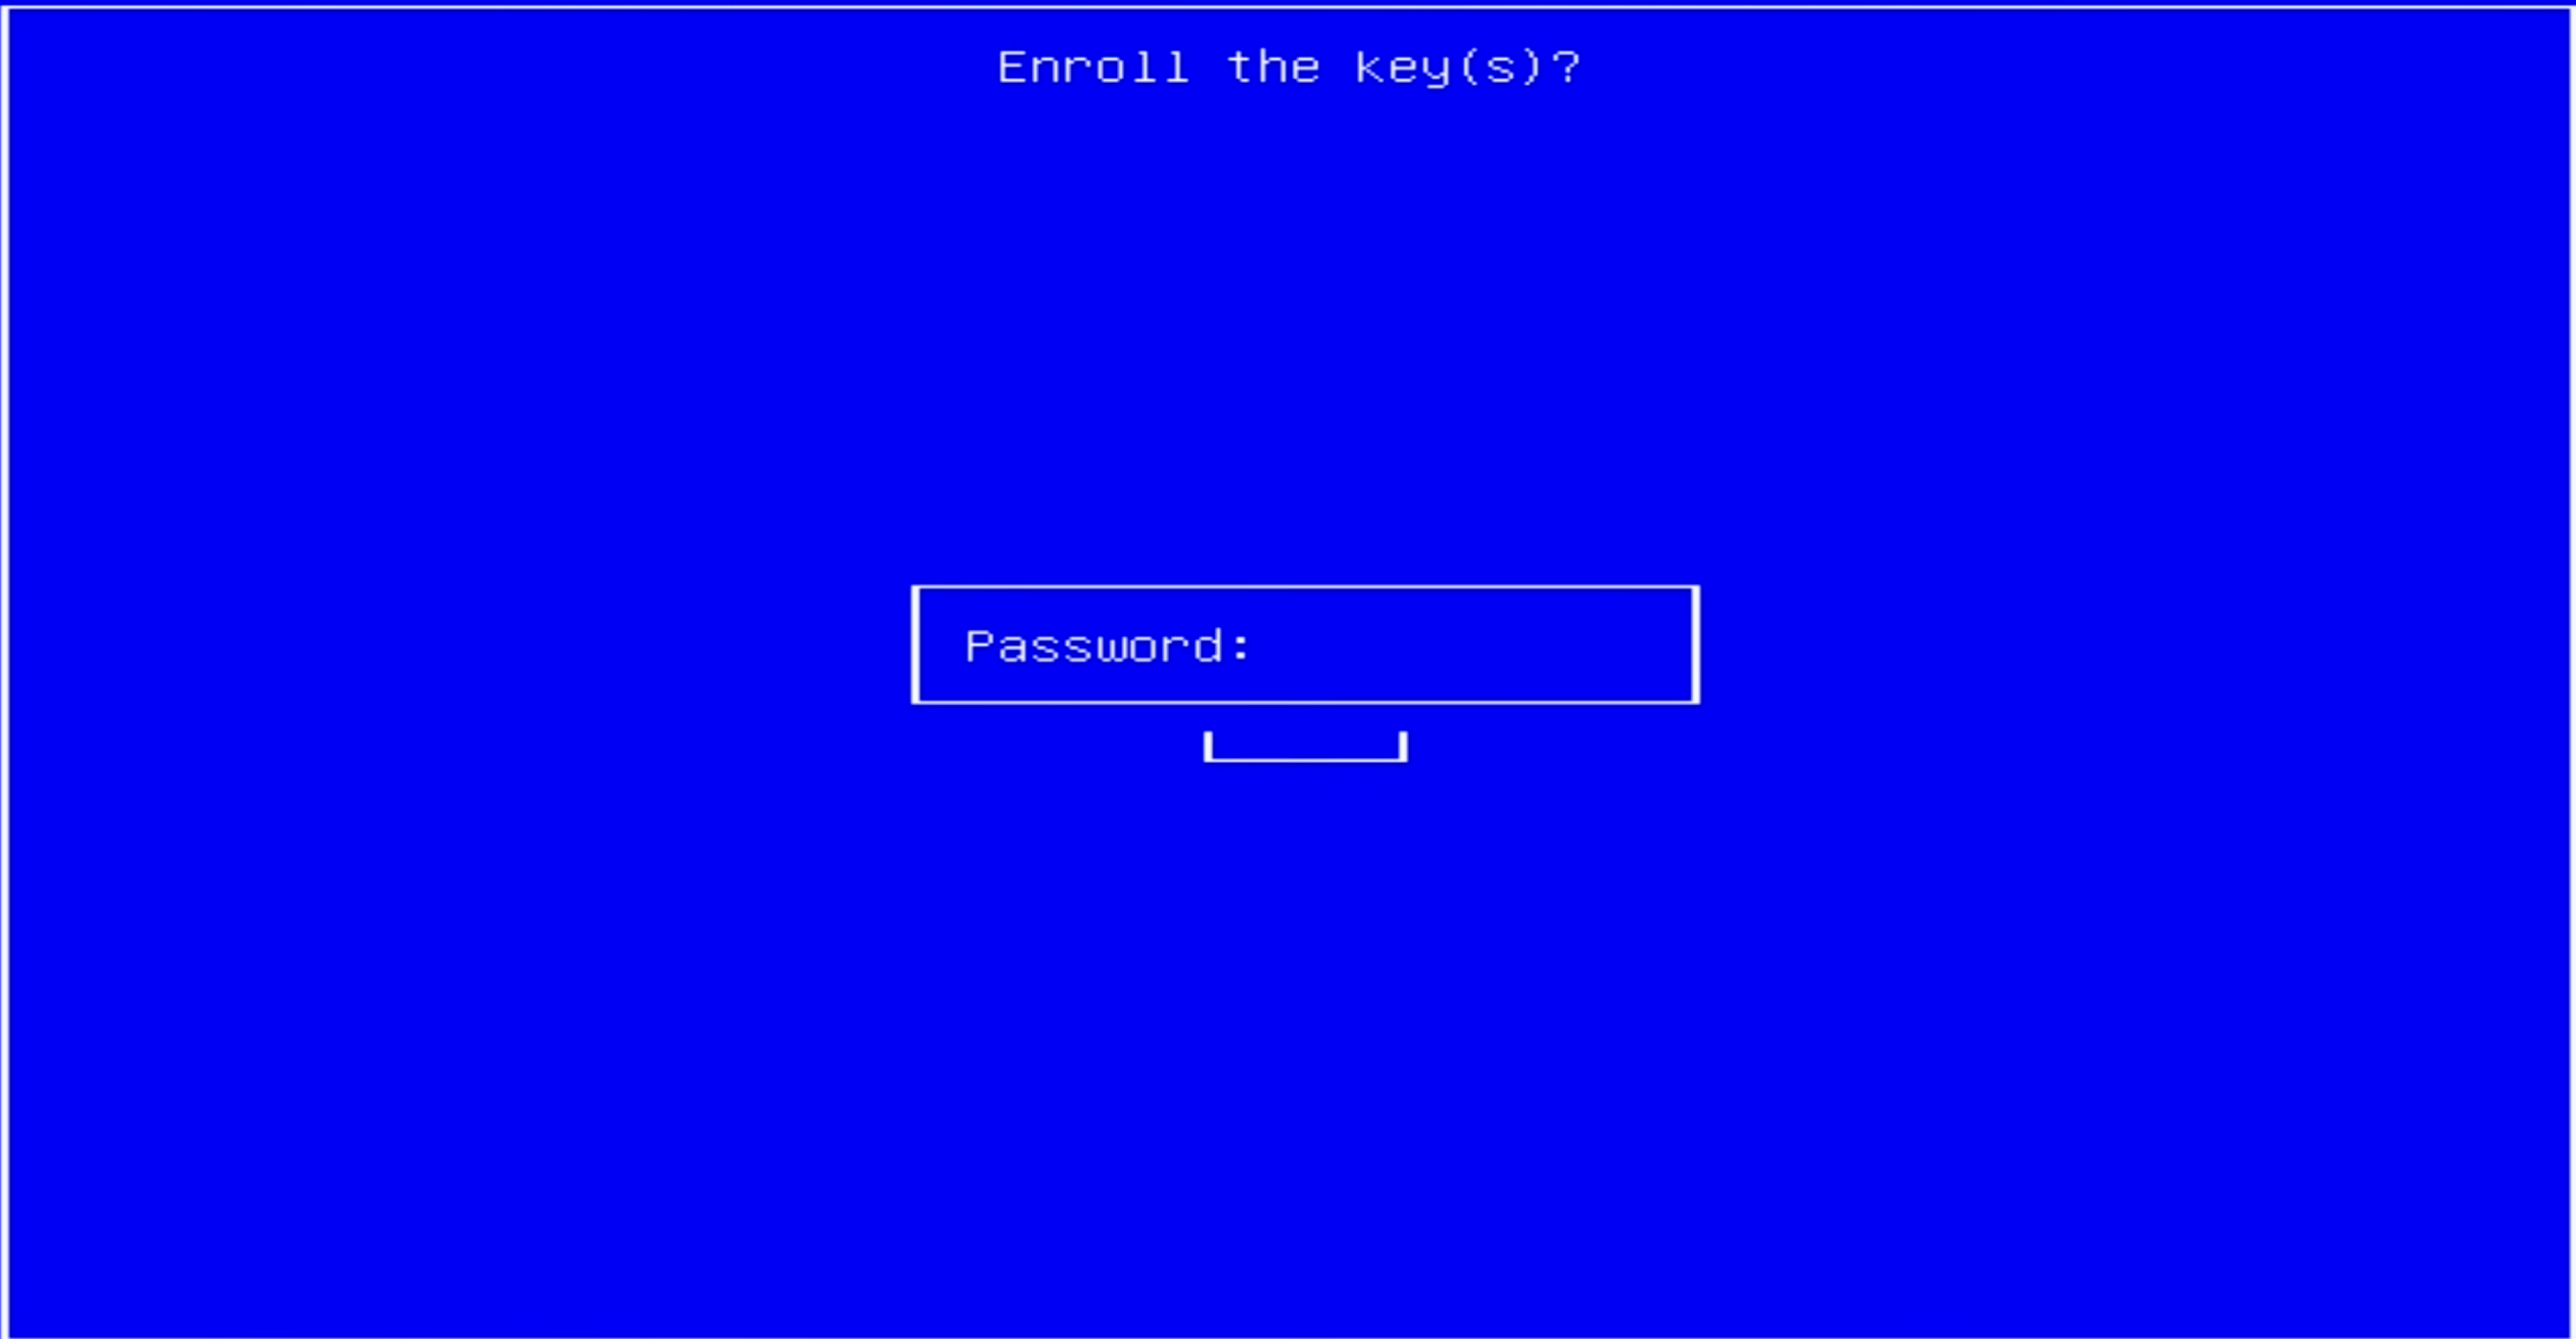
✏️ PLEASE NOTE: If the blue screen does not show up and the PC will not boot past the motherboard logo, follow If The Blue Screen Never Showed Up at the bottom of this article.
FIRST BOOT SETUP
Now that you've rebooted it's time to start setting up the OS.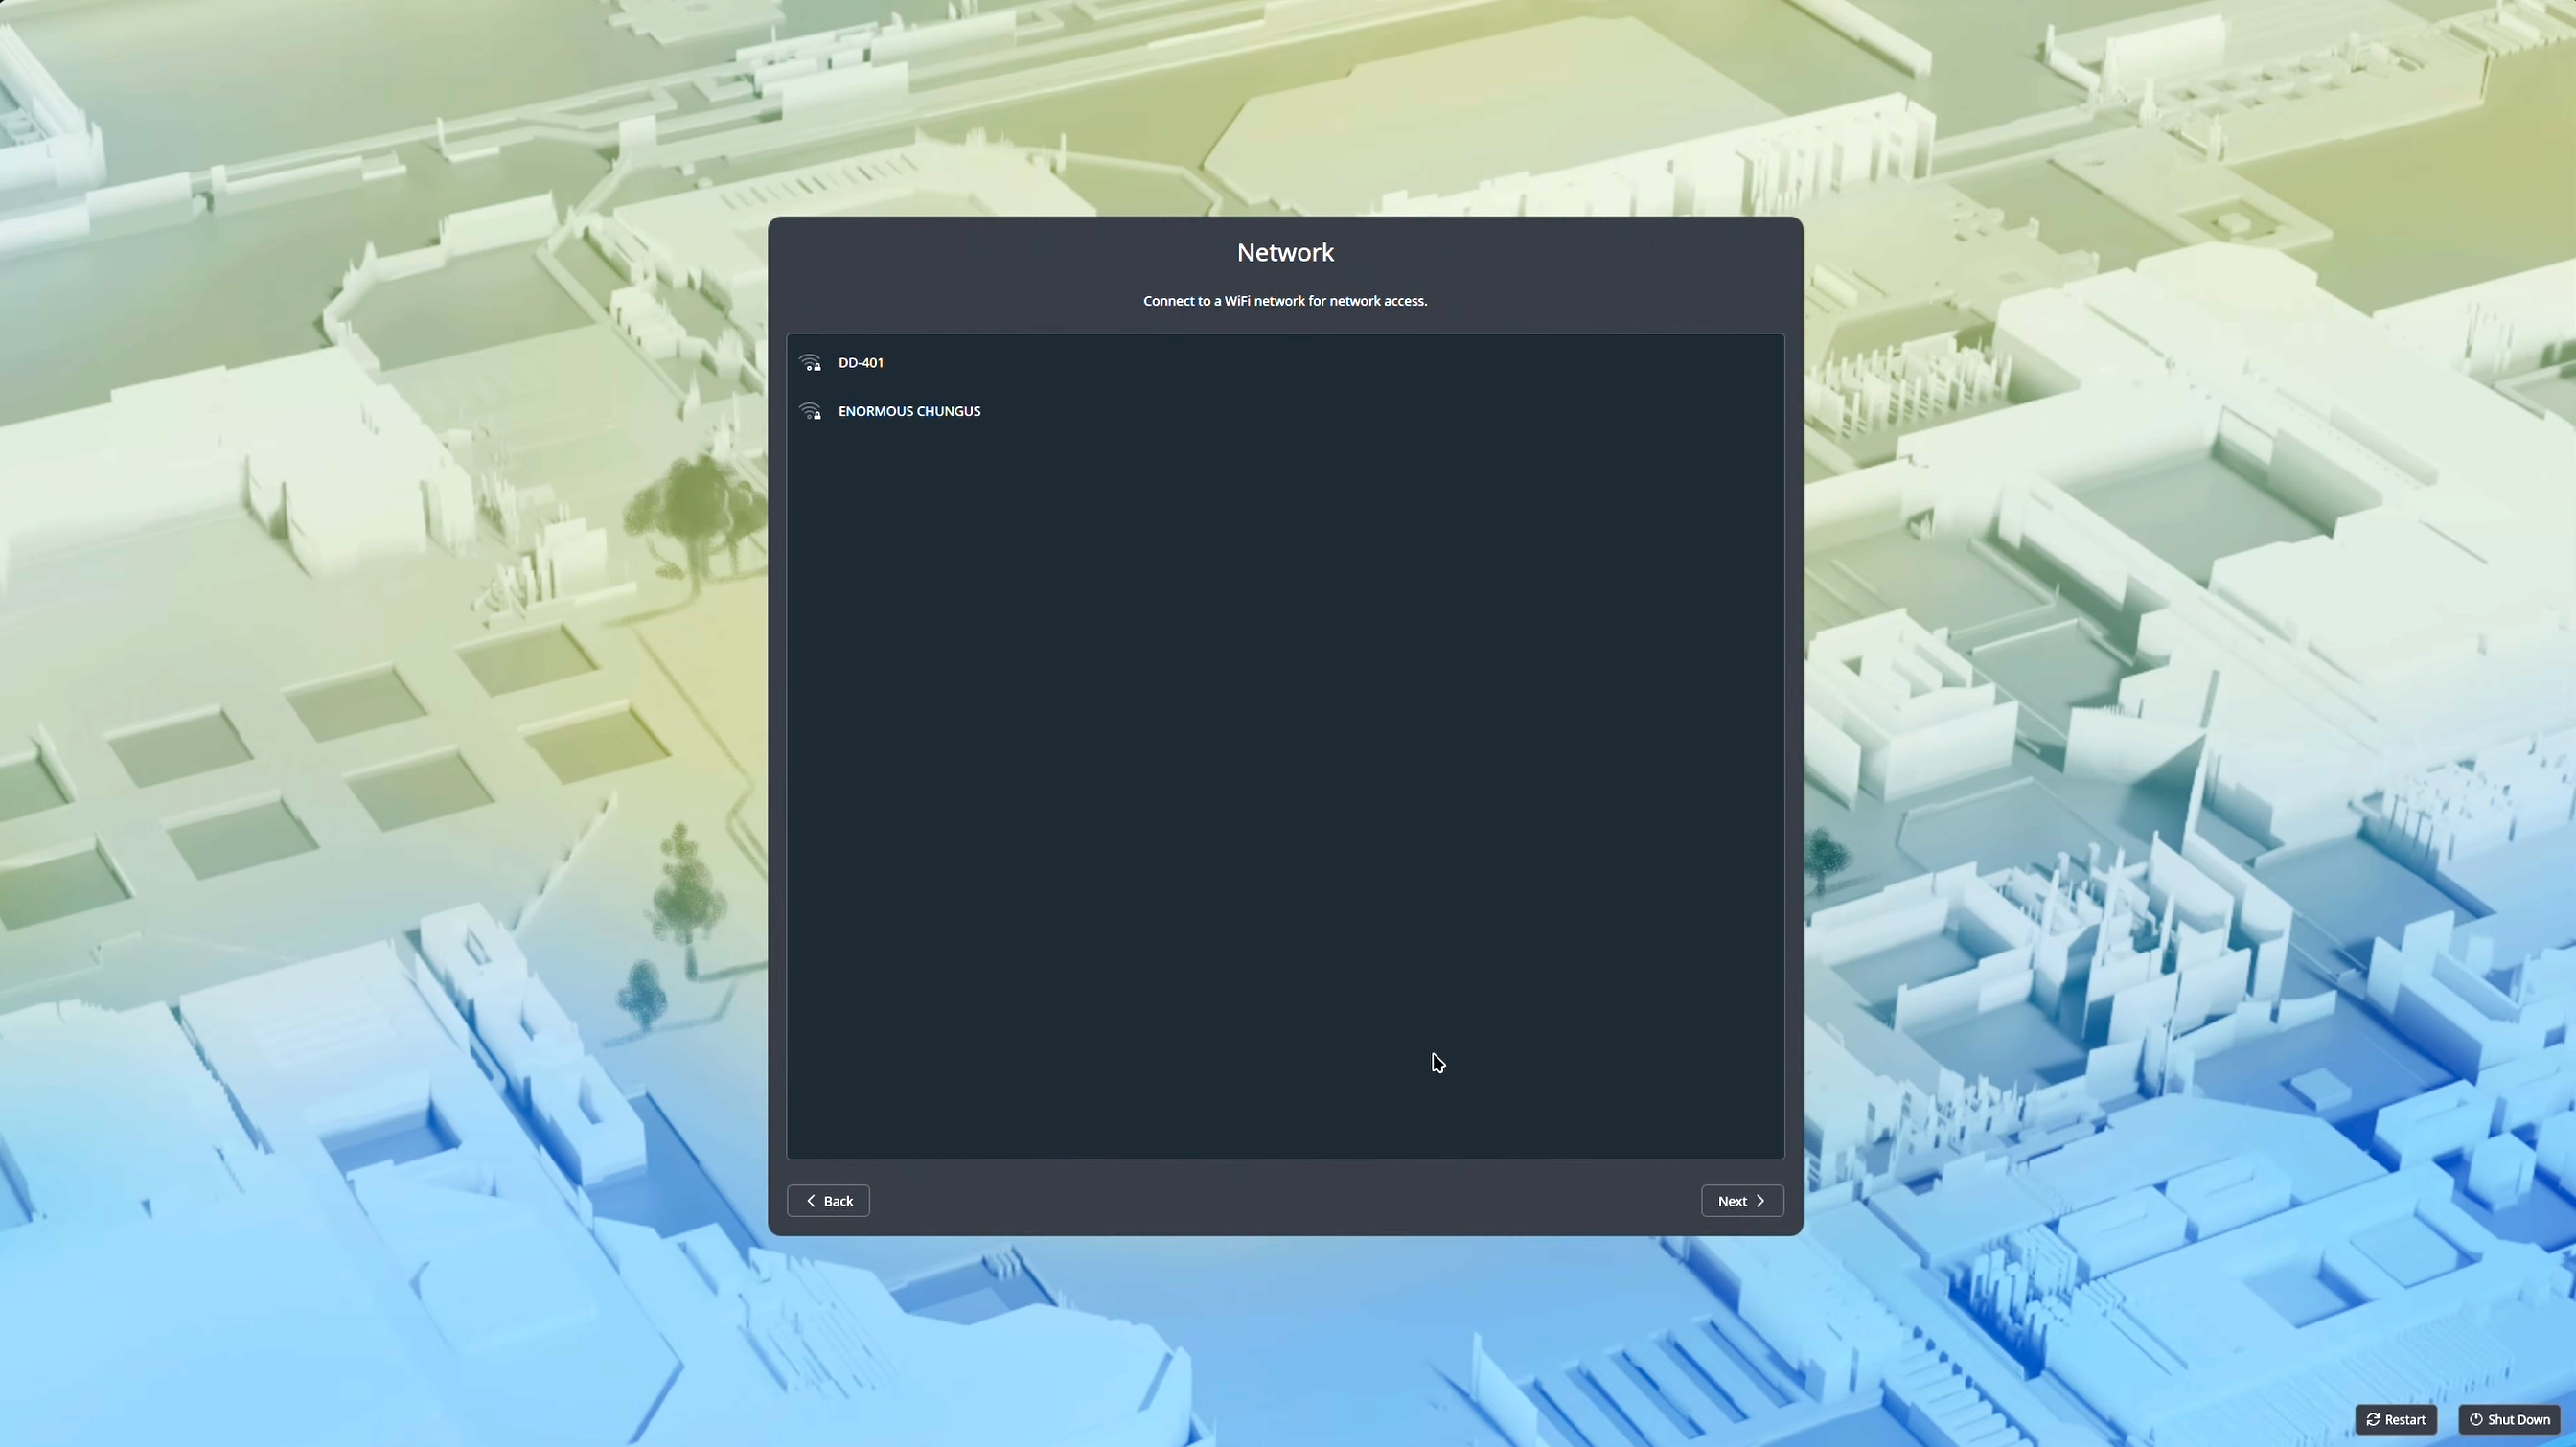
- Sign in with the username and password you made during the install
- Connect to Wi-Fi, or plug in Ethernet
- Work through the welcome screens and sign into your Steam account
- Let the system check for updates and install them, then reboot once more
This first update matters. Install images go stale, and the update pulls in the current graphics drivers. On newer GPUs it is often the difference between working and not.
We also recommend staying on the Stable update channel. The testing channels regularly ship broken Wi-Fi, audio, and controller behavior.
✏️ PLEASE NOTE: If the PC does not boot into Bazzite after the install, first try booting from the flash drive again and reinstalling. If that does not work, enter the BIOS and set the drive you installed to as boot option #1. If your BIOS settings are in a strange state after all this, you can start clean: How to reset the CMOS
GOING BACK TO WINDOWS
Changed your mind? Nothing here is permanent. Installing Windows over Bazzite works the same as any other clean install, and you will want to re-enable Secure Boot afterward so anti-cheat games work again.
IF THE BLUE SCREEN NEVER SHOWED UP
If the blue Secure Boot screen never showed up after the install and Bazzite will not boot past the motherboard logo, you can add the security key yourself:
- If you are keeping Windows on another drive, grab your BitLocker recovery key first: How do I locate my BitLocker recovery key?
- In the BIOS, set Secure Boot to Disabled or Other OS. Our guide has the menu location for each brand: How to enable Secure Boot
- Boot into Bazzite, open the terminal, and run 1ujust enroll-secure-boot-key
- Use universalblue as the password, reboot, and turn Secure Boot back on
WHAT'S NEXT
Now that Bazzite is up and running, our next guide walks you through getting your apps installed with Bazaar, Bazzite's built in app store: How to install apps on Bazzite
If you have worked through the steps above and are still stuck, reach out to our support team with your order numberand what you have already tried, and we will pick it up from there.
.png)