How to reset the CMOSUpdated 5 months ago
 Resetting the CMOS clears your motherboard’s stored BIOS settings and restores them to factory defaults. This can be helpful if your system is not booting properly, if you’ve made incorrect BIOS changes, POST (Power-On Self-Test) errors, incorrect hardware detection, and overclocking-related problems.
By resetting the CMOS, you are essentially giving your motherboard a "fresh start", and your BIOS will be restored to its default settings, allowing you to reconfigure your system from scratch.
There are three main ways to do this, depending on your motherboard. We’ll walk you through each method below.
WHAT YOU WILL NEED
- A screwdriver
- Your motherboard manual (helpful for locating the CMOS jumper or battery)
- Anti-static precautions (i.e. touch a grounded metal surface or use a wrist strap)
PREPARE FOR THE CMOS RESET
- Turn off and unplug your system from power
- With the system unplugged from power, press and hold the power button for 10-15 seconds to discharge any remaining power
💡Tip: Have the motherboard manual ready in case you need to help identifying where the CMOS battery and CMOS jump pins are located.
METHOD ONE: CLEAR CMOS BUTTON
This is the quickest way to reset the CMOS if your motherboard has a clear CMOS button on the back. If your motherboard does not have a one, please continue to the next method. Please follow the prepare for the CMOS reset instructions at the beginning of this article before continuing.
To use the button, simply press and hold it for 10-15 seconds with the PC completely powered off, then release the button and try starting the PC normally.
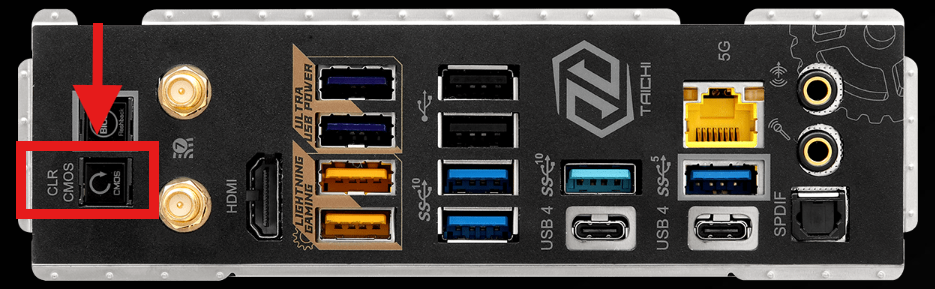 ASRock X870E Taichi WiFi rear I/O with a CLR CMOS button
METHOD TWO: REMOVE THE CMOS BATTERY
Please follow the prepare for the CMOS reset instructions at the beginning of this article before continuing.
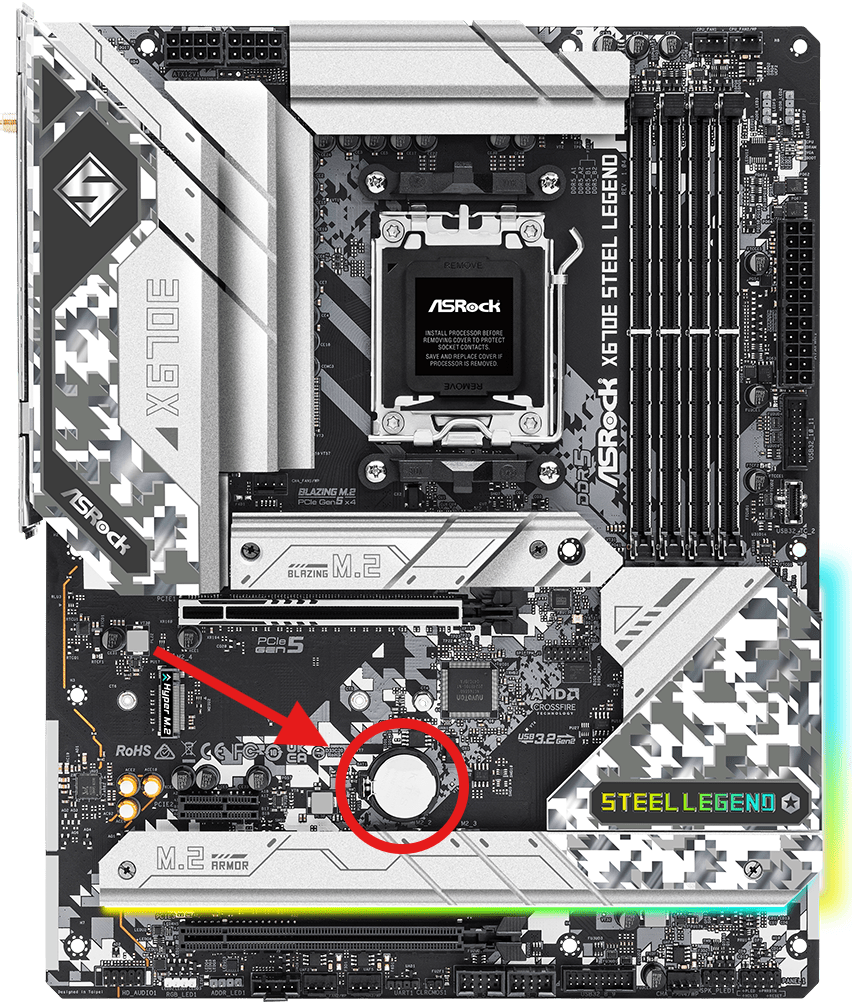
- Remove the side panel to access the motherboard
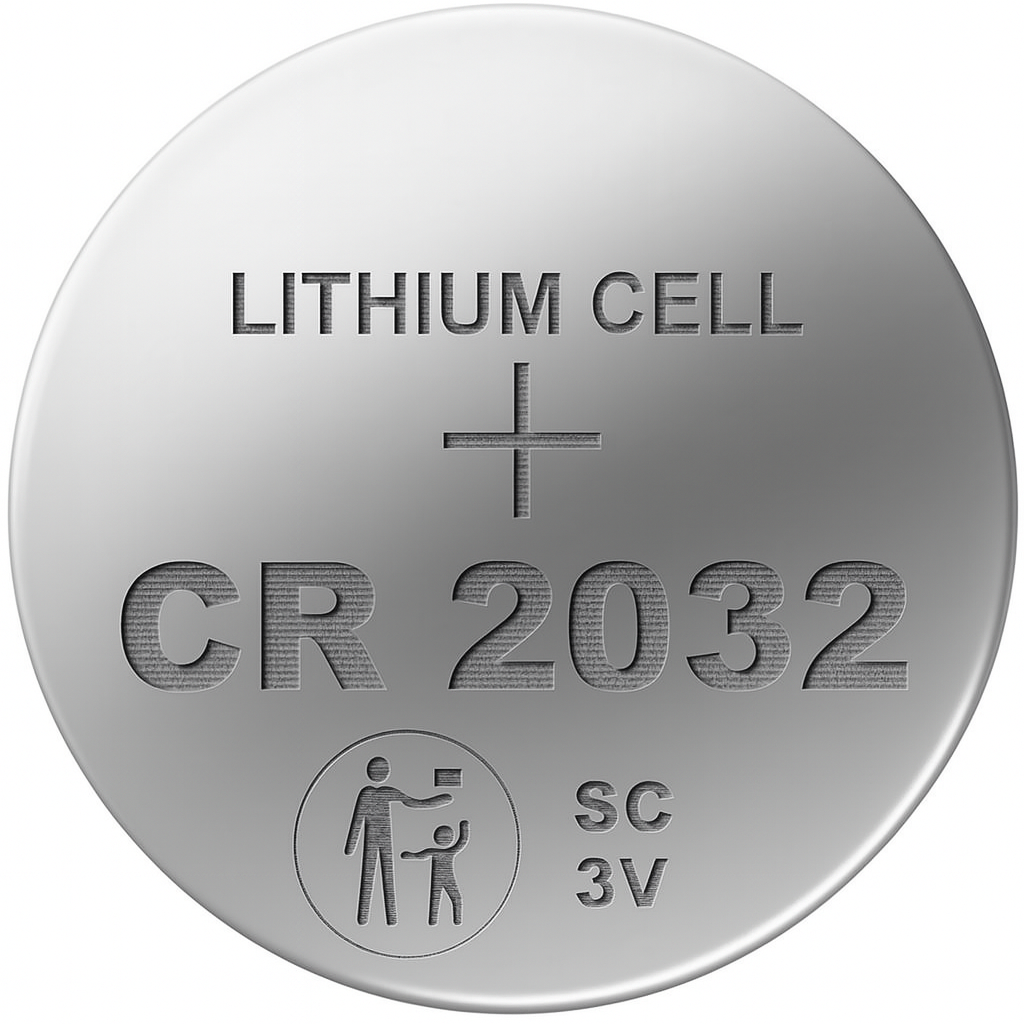
- Find the coin-shaped silver battery (CR2032)
- Using a screwdriver or pry tool, push the latch aside and gently pop the battery out
- Wait 5-10 minutes as some motherboards clear instantly, but waiting ensures all power drains from the CMOS chip and the settings reset
- Reinsert the battery with the positive (+) side facing up, reconnect power, and boot the system
| CMOS BATTERY ON MOTHERBOARD | CMOS (CR2032) BATTERY |
|---|---|
 |  |
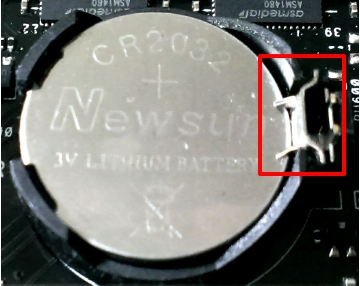 | 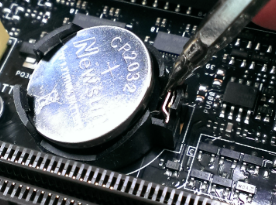 |
| CMOS BATTERY LATCH | CMOS BATTERY LATCH RELEASED |
💡Tip: With some motherboards, CMOS batteries may be difficult to locate because they are under heatsinks or hidden behind components like your GPU. Refer to your motherboard manual if you need assistance locating the battery.
METHOD THREE: CLEAR CMOS JUMPER
Many modern motherboards include a dedicated Clear CMOS button or a small jumper specifically for this purpose. CMOS jump pins have a few names, but usually are labeled RESET_BIOS, CLR_CMOS, CLEAR_CMOS, CLR_BIOS, or JBAT1.
Please follow the prepare for the CMOS reset instructions at the beginning of this article before continuing.
- Identify your motherboard model and download the manual
- Locate the Clear CMOS jumper. Check your motherboard manual Motherboard Layout page for the exact location—it’s usually labeled CLEAR CMOS, CLRTC, or JBAT1
- Use a screwdriver to connect the two pins and hold for 5-10 seconds (see bottom right image below)
- Reconnect the power and boot the system. BIOS settings will be reset to default.
| MOTHERBOARD LAYOUT | MOTHERBOARD LAYOUT INDEX |
|---|---|
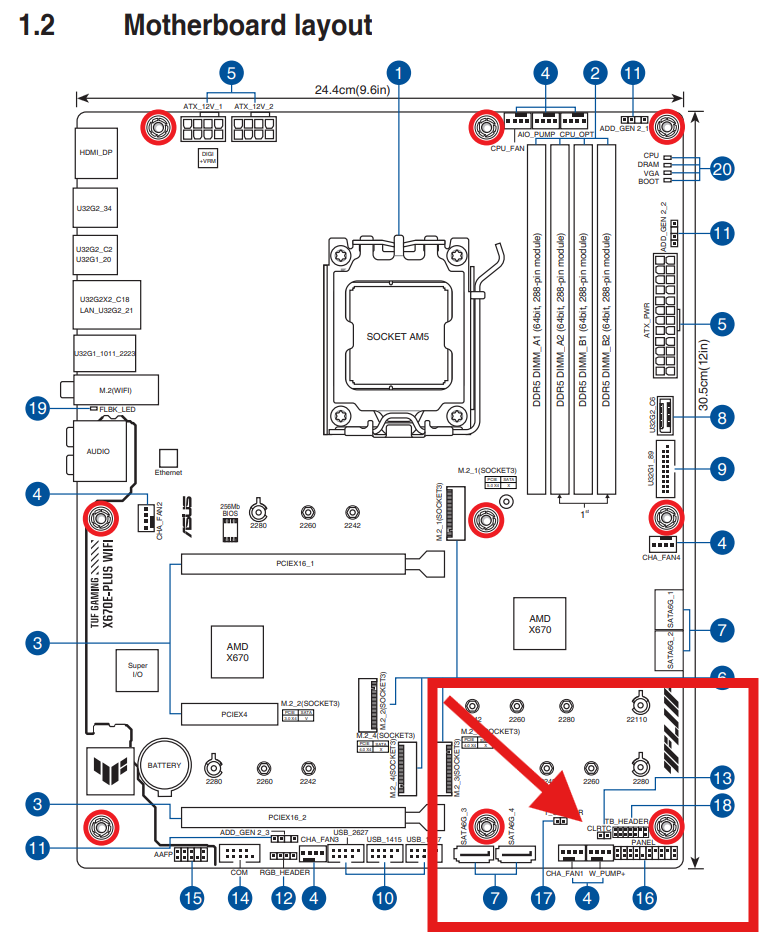 | 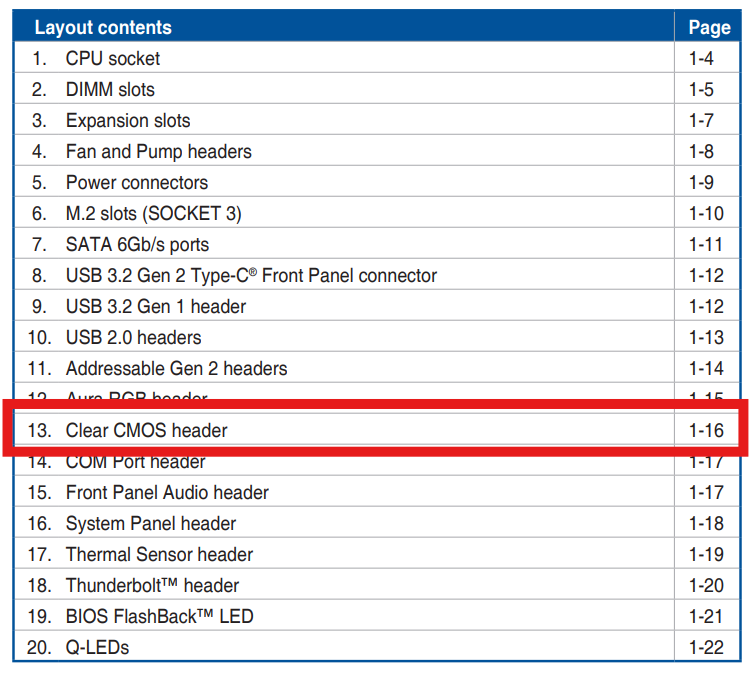 |
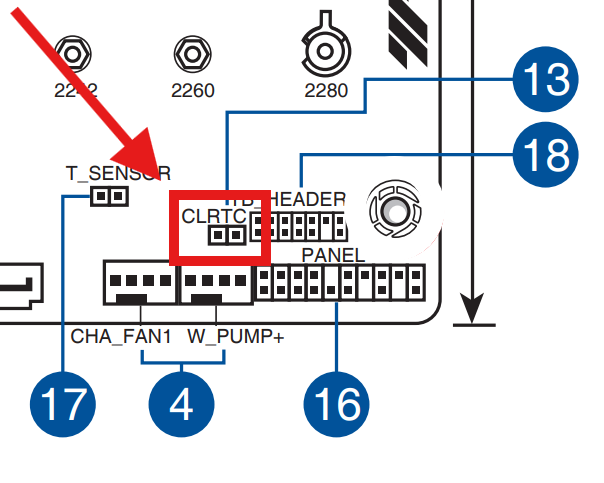 | 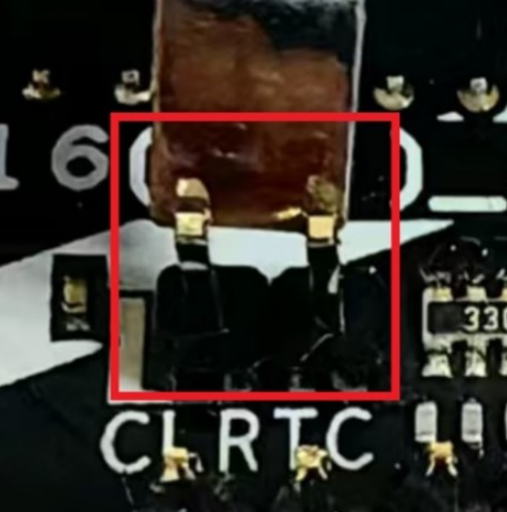 |
| CLOSE UP OF LAYOUT SHOWING CLRTC | SCREWDRIVER CONNECTING PINS |
💡 Why This Works: The button or jumper briefly cuts power to the CMOS chip, erasing the saved settings.