How to enable Secure BootUpdated 5 months ago
Secure Boot helps protect your PC by only allowing trusted software to load during startup. It’s also required by some games for anti-cheat measures, including Valorant, Battlefield 6, and Call of Duty. This guide will show you how to enable it in your BIOS.
IDENTIFY YOUR MOTHERBOARD MANUFACTURER
- Open the start menu
- Type, "msinfo", and open System Information
- To the right of BIOS Version/Date is the installed BIOS version
- To the right of BaseBoard Manufacturer is the motherboard manufacturer
- Follow instructions below for your manufacturer

ASROCK
- Boot to the BIOS by tapping F2 on startup
- Ensure you are in Advanced View (toggle with F6)
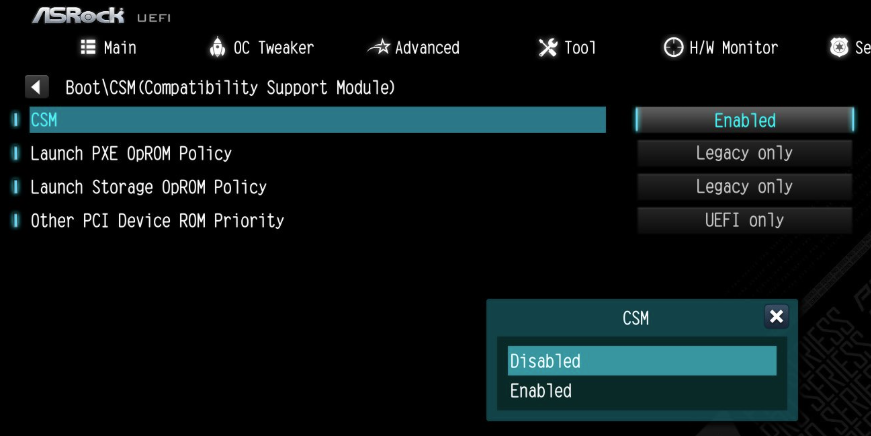
- Go to Boot > CSM (Compatibility Support Module) and set CSM to Disabled
- Press F10 to save configuration changes and reset, go back into BIOS after by tapping F2
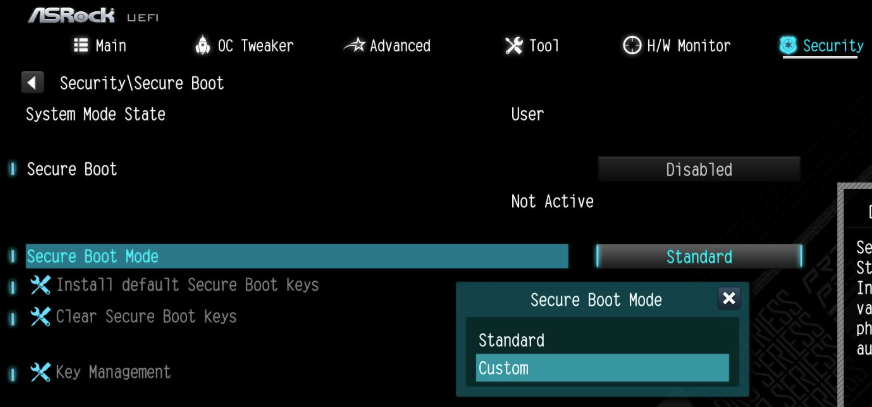
- Go to Security > Secure Boot and set Secure Boot Mode to Custom
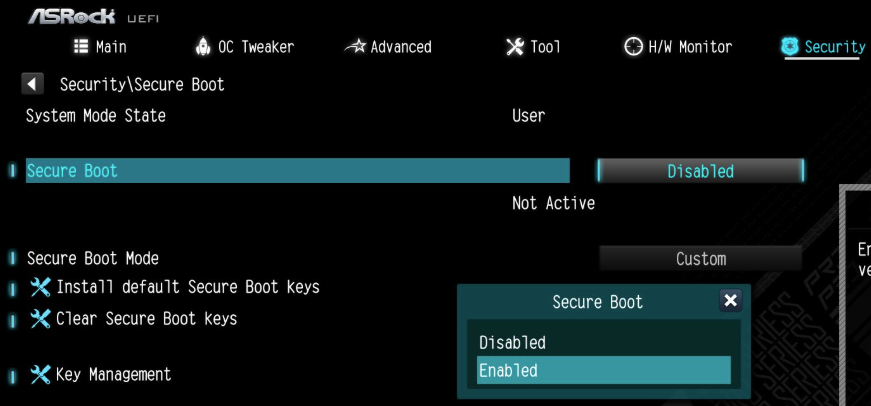
- Now, go to Key Management, and select install default Secure Boot keys, then when prompted to Install Default Secure Variables click Yes
- Press Install default Secure Boot keys and select "Yes" to install Secure Boot keys
- Then press the F10 key to save configuration changes and reset
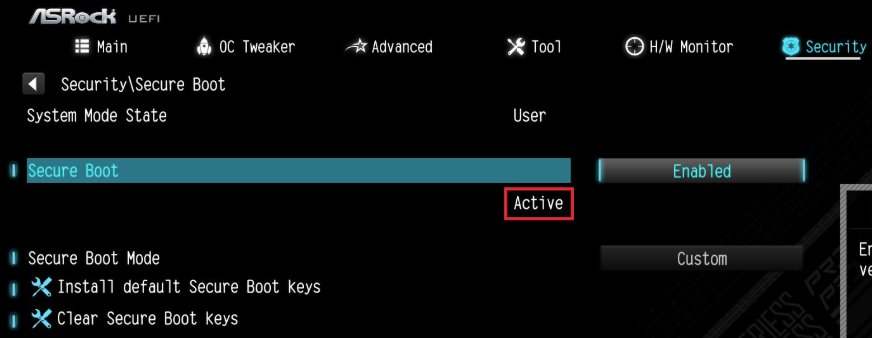
- After the system restarts, go to Security then Secure Boot, and make sure that Secure Boot is showing Active.

ASUS
- Boot to the motherboard BIOS by tapping F2 on startup
- Press F7 to switch to Advanced Mode
- Go to the Boot menu, then Secure Boot
- Enable Windows UEFI Mode
- Set secure boot mode to Standard
- Press F10 then save changes and exit
- Secure boot should be enabled!

MSI
- Boot to the motherboard BIOS by tapping Del on startup
- Ensure you are in Advanced Mode (toggle with F7)
- Go to Settings > Advanced and ensure BIOS CSM/UEFI Mode is set to UEFI
- Go back to the main menu (Esc)
- Go to Security > Secure Boot and set Secure Boot to Enabled
- Hit F10 to save and exit the changes, and reboot your system
- Secure boot should be enabled!