How to install or reseat an M.2 SSDUpdated 5 months ago
Reseating an M.2 SSD or installing a new one are common steps when upgrading storage or troubleshooting drive detection issues. Reseating involves removing the existing M.2 SSD and installing it again to ensure it is properly connected. Installing the M.2 SSD involves finding an open M.2 slot on the motherboard. Both of these steps may require you to remove the M.2 heatsinks, please refer to your motherboards manual to locate M.2 slots if unsure.
⚠ Warning: Turn off the PC, flip the power switch to "O" option on the power supply, hold the power button on your case for 10-15 seconds to discharge any remaining electricity
HOW DO I LOCATE MY MOTHERBOARD MODEL?
Press Windows + R on your keyboard
Type "msinfo32" and press Enter
In the System Summary, look for:
BaseBoard Manufacturer
BaseBoard Product
INSTALLING OR RESEATING THE M.2
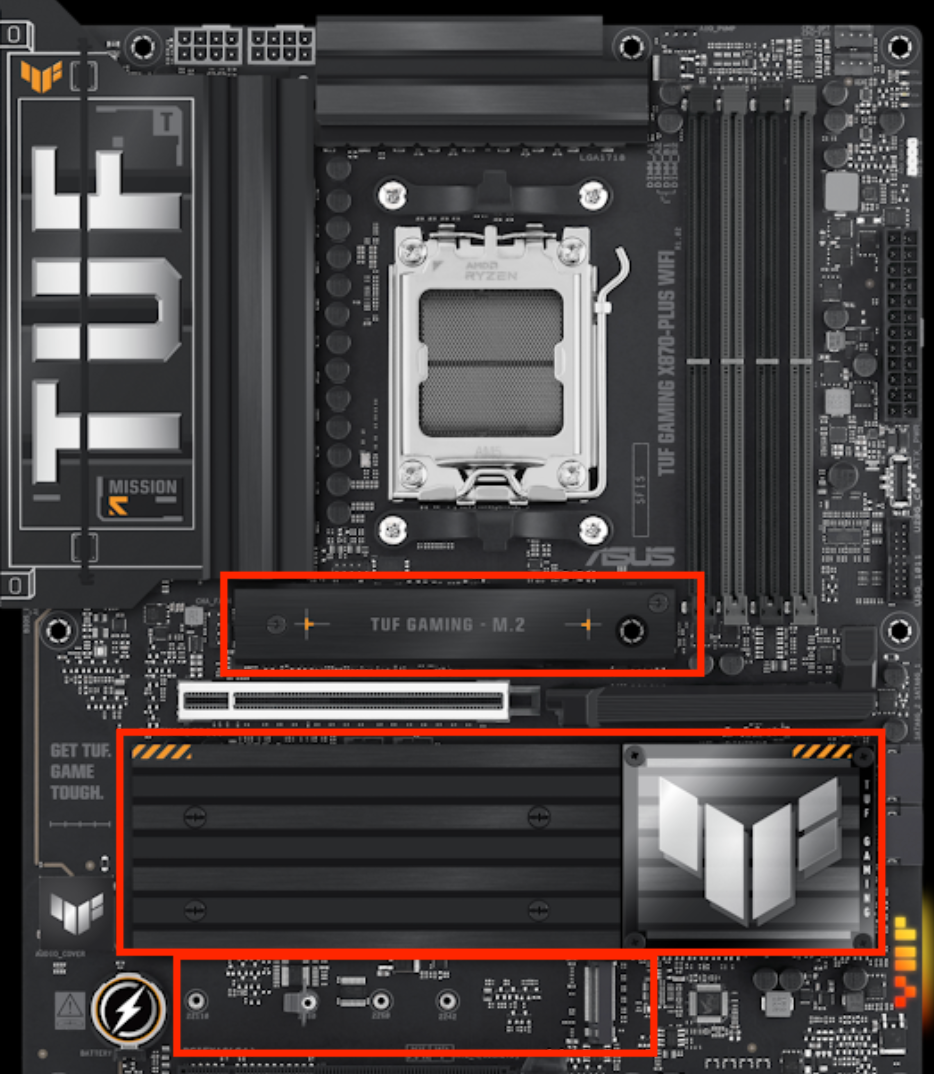 Depending on your motherboard model, you will need to take off the heatsink to get to the M.2.
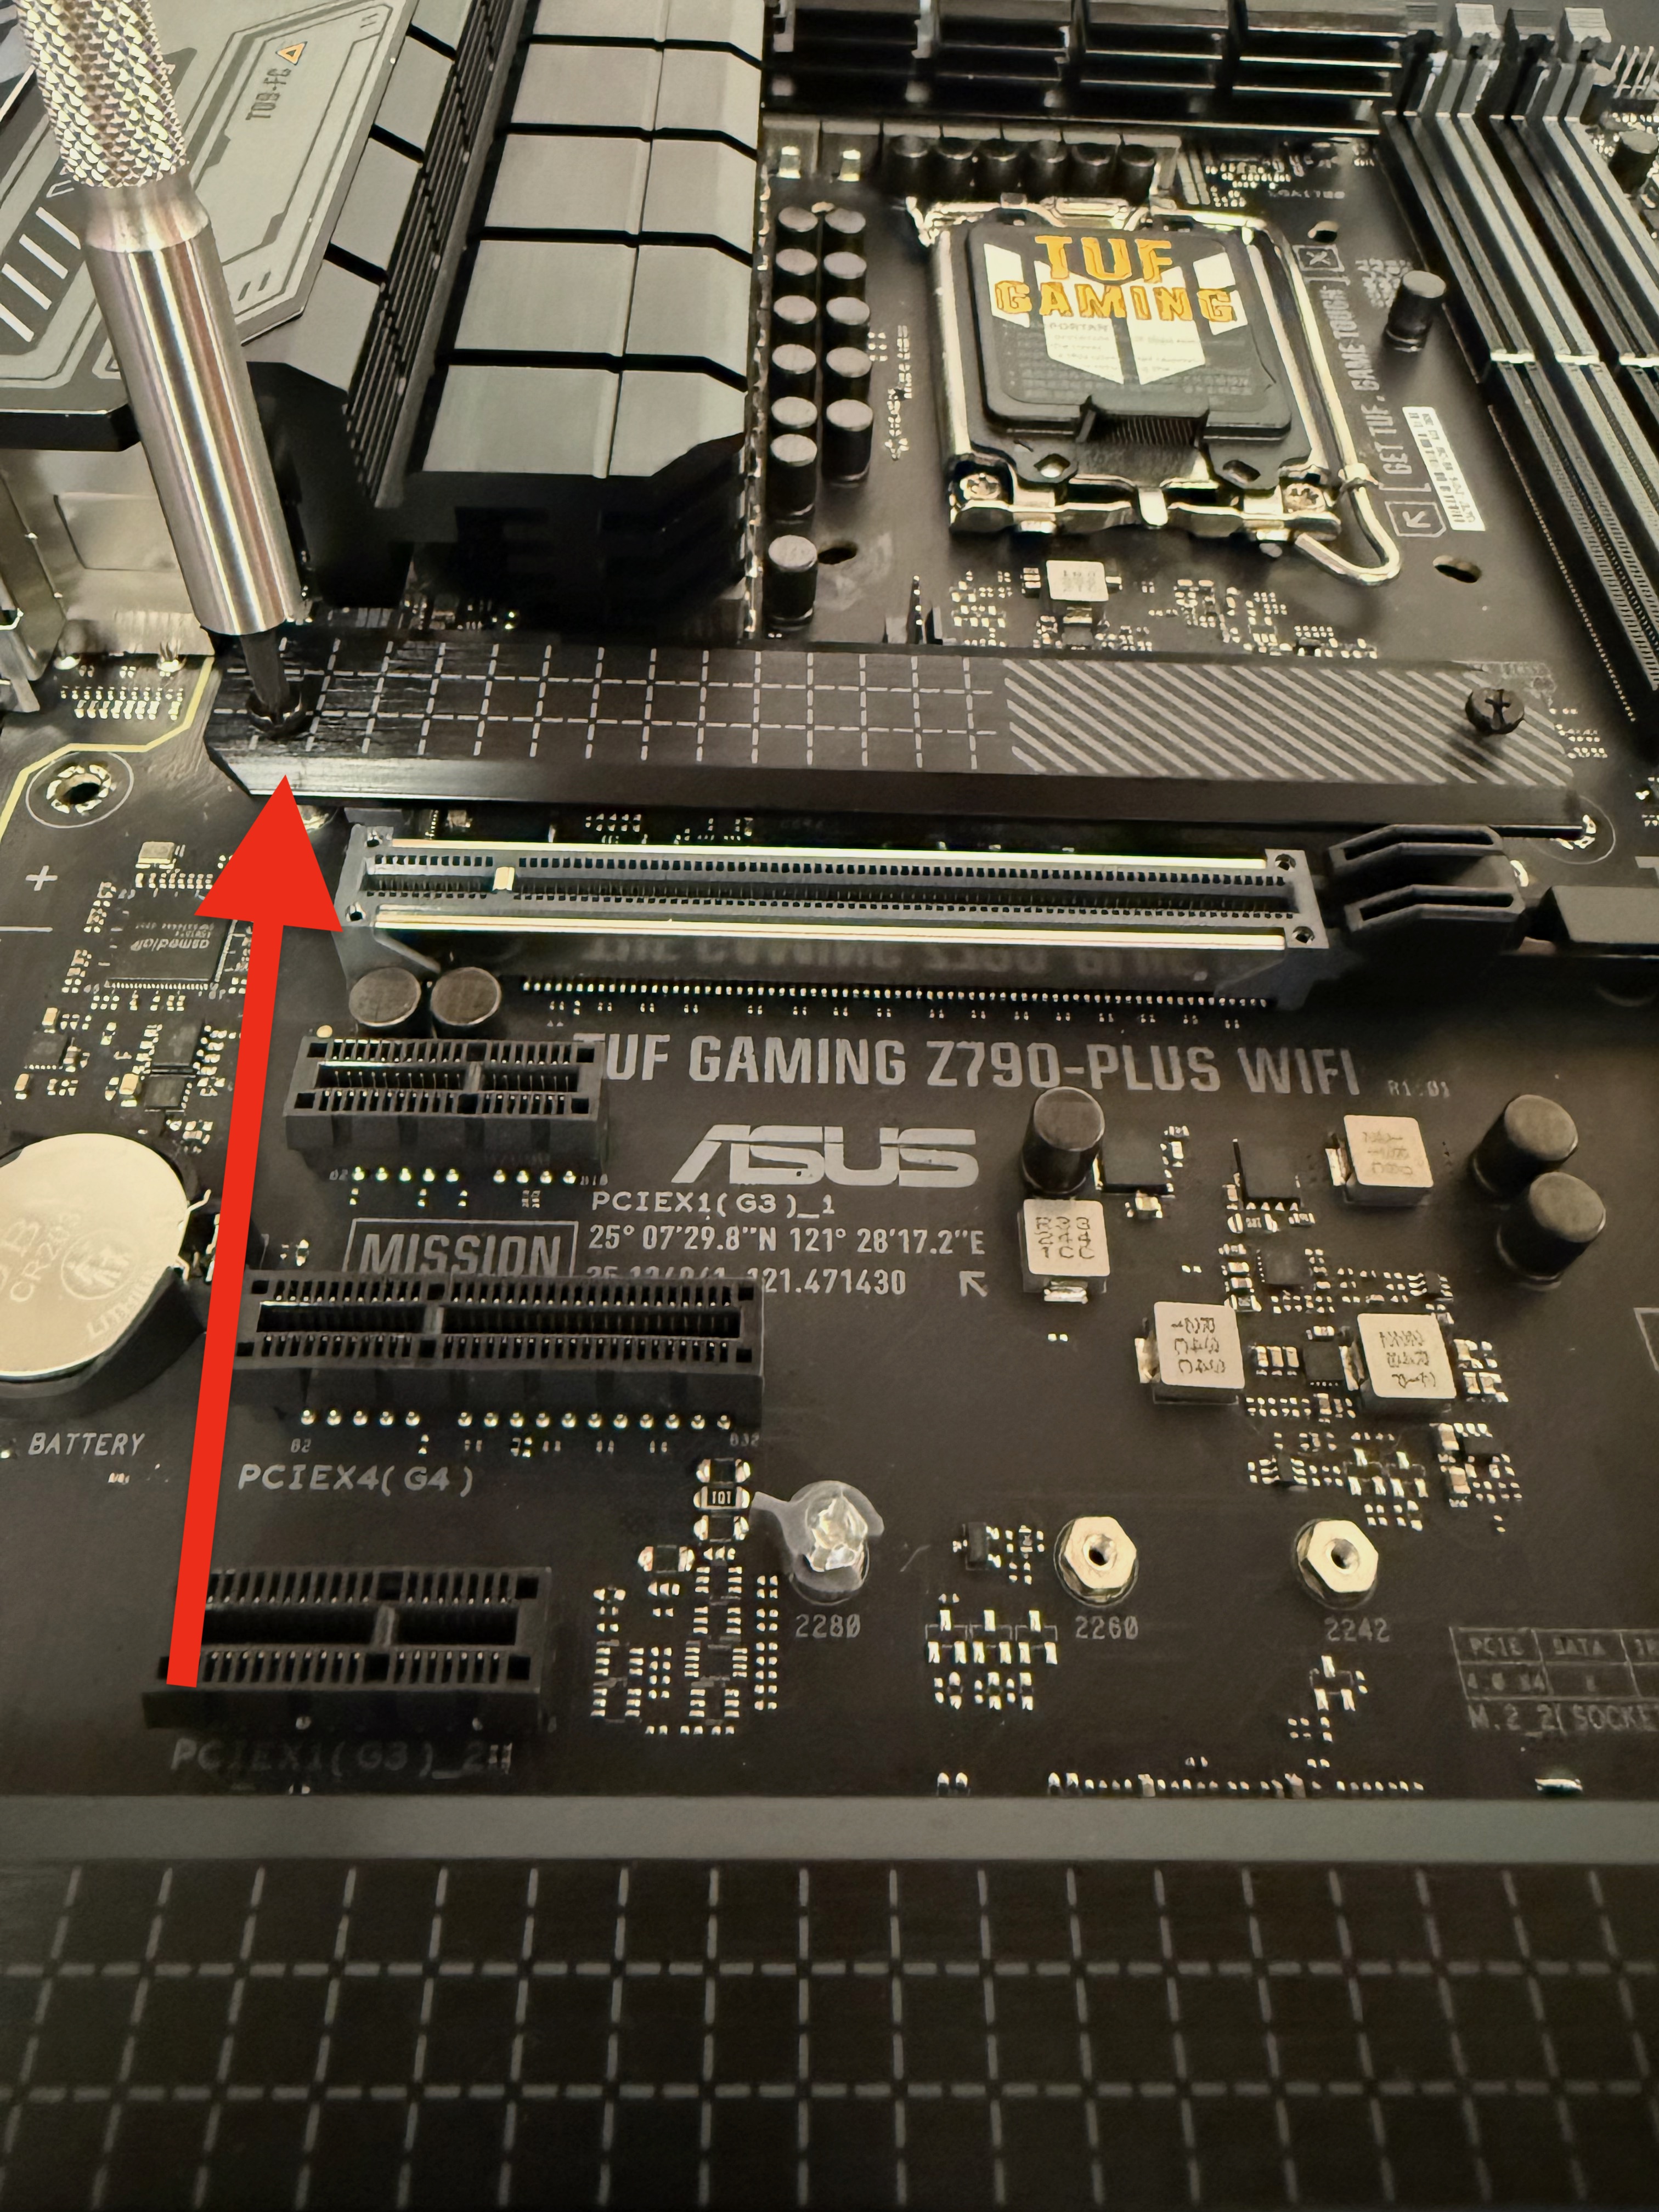 Locate the heatsink screws | 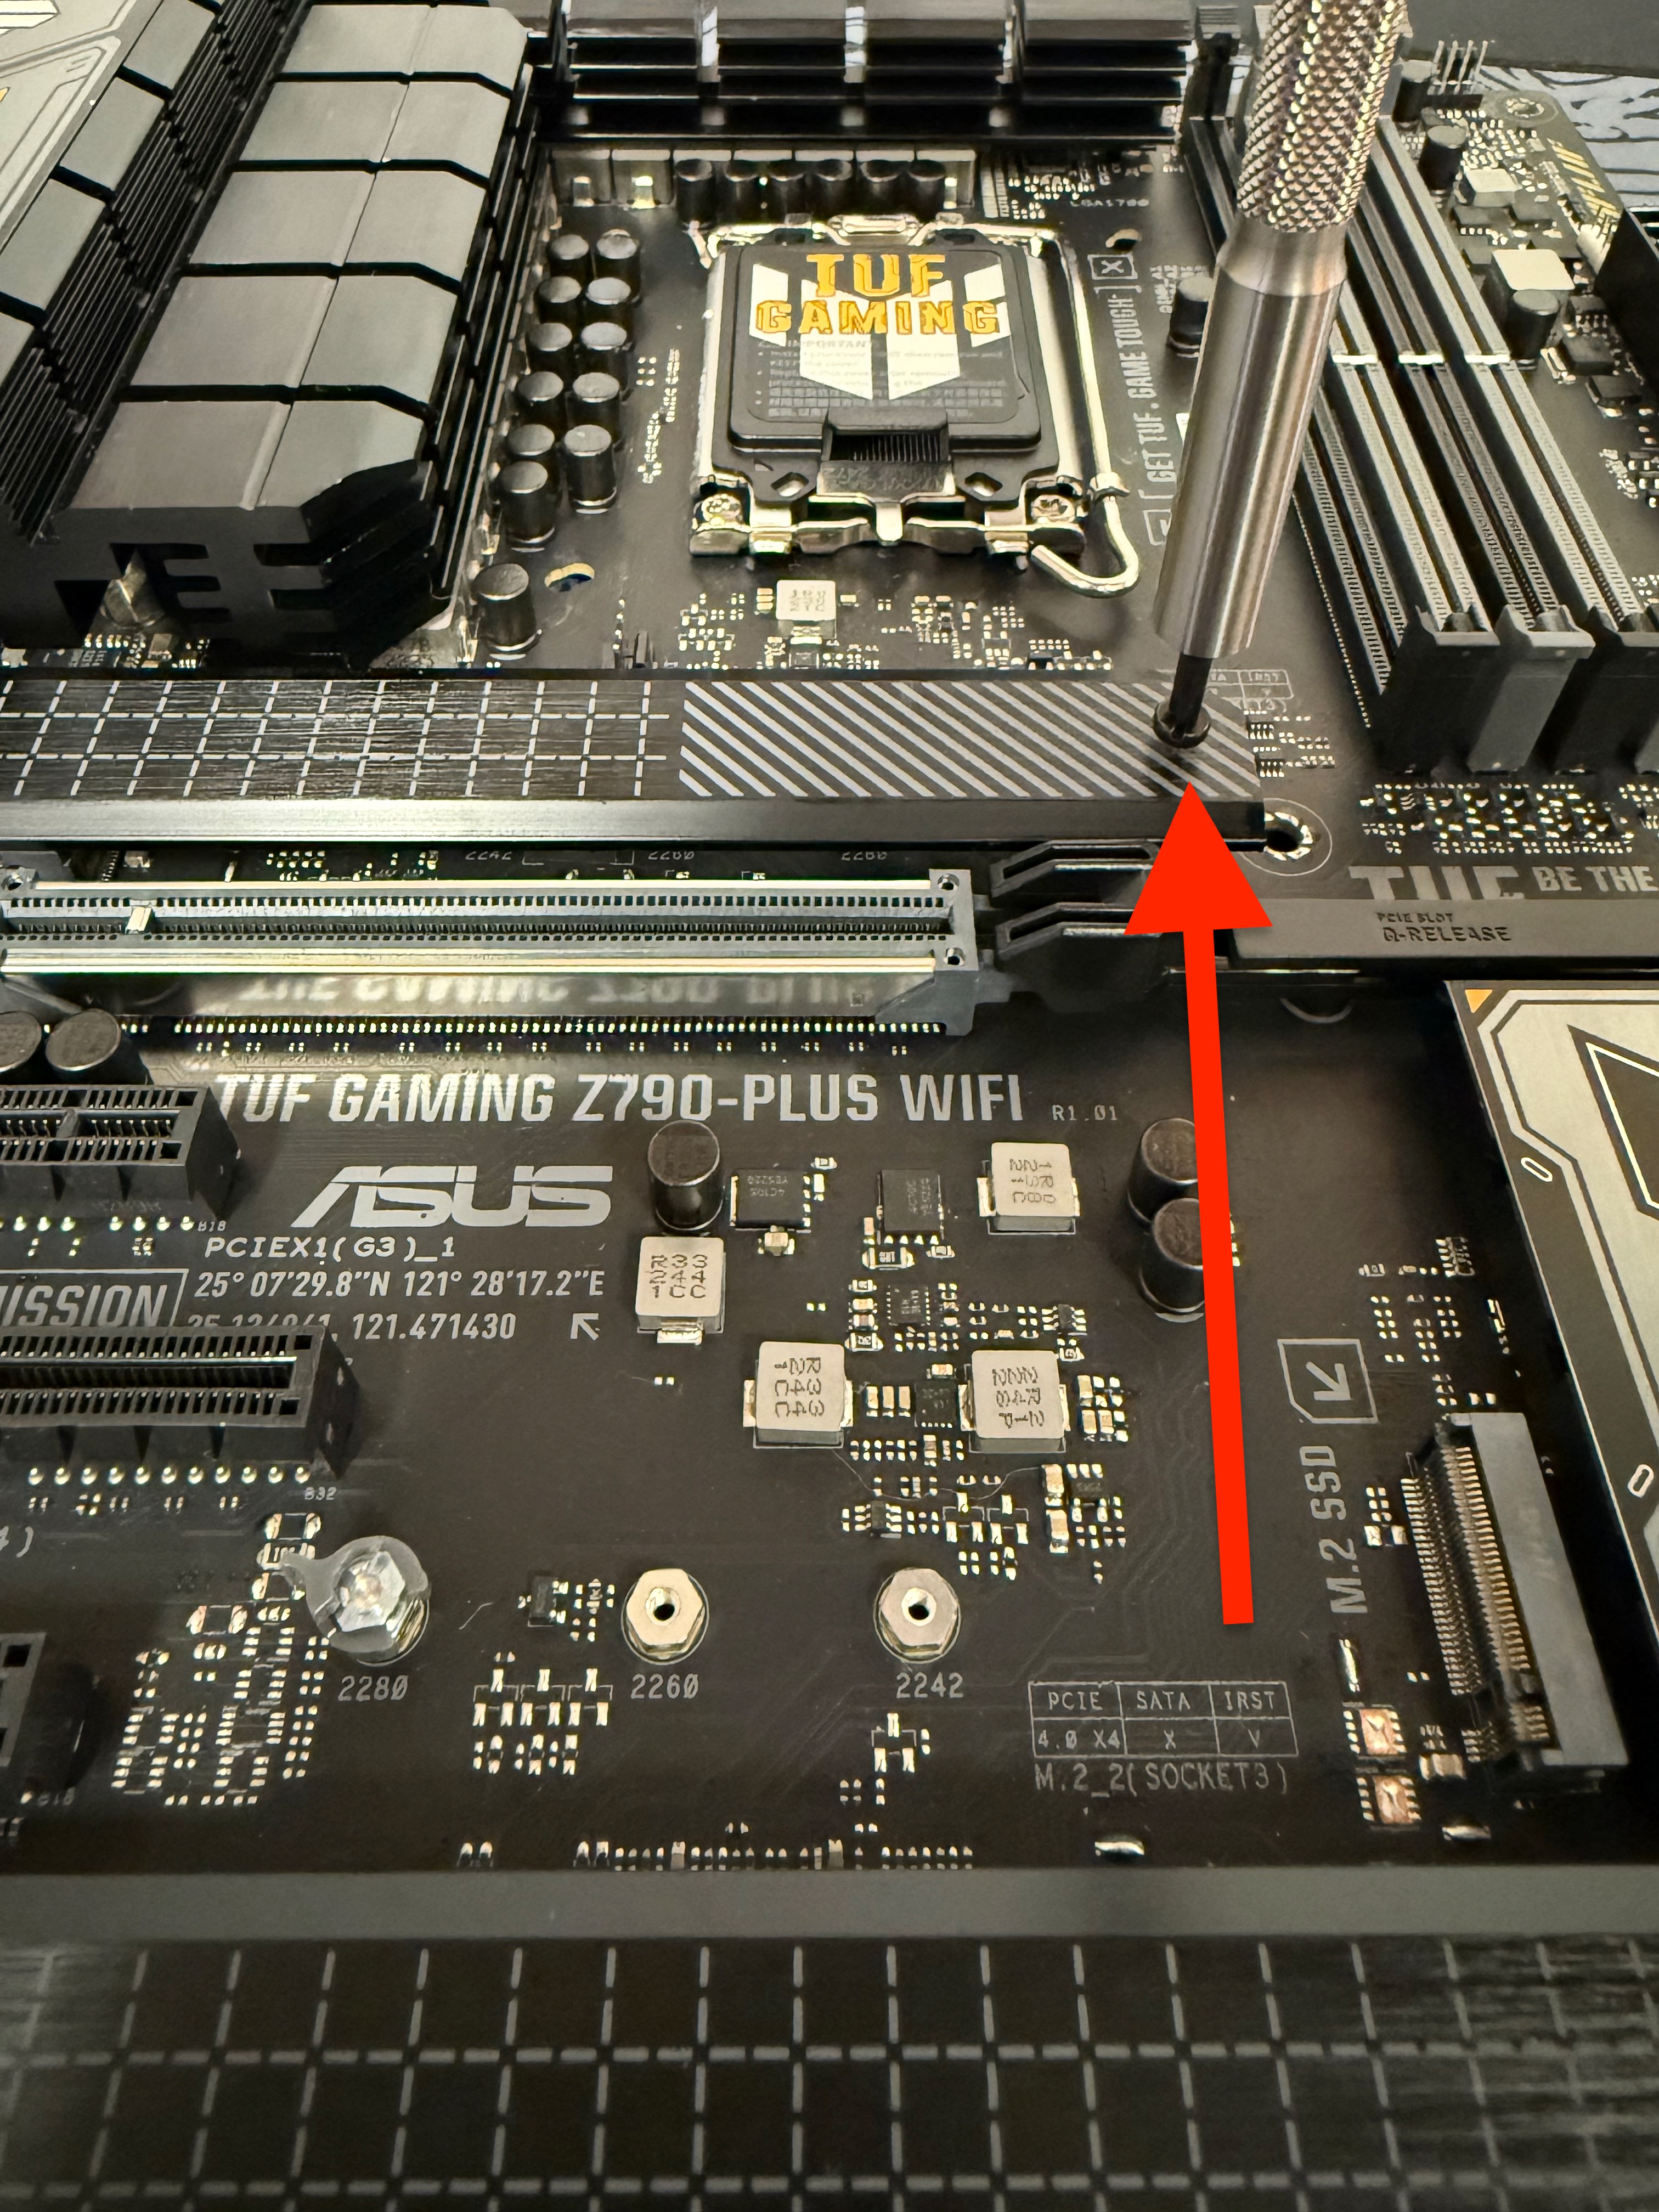 Locate any remaining heatsink screws |
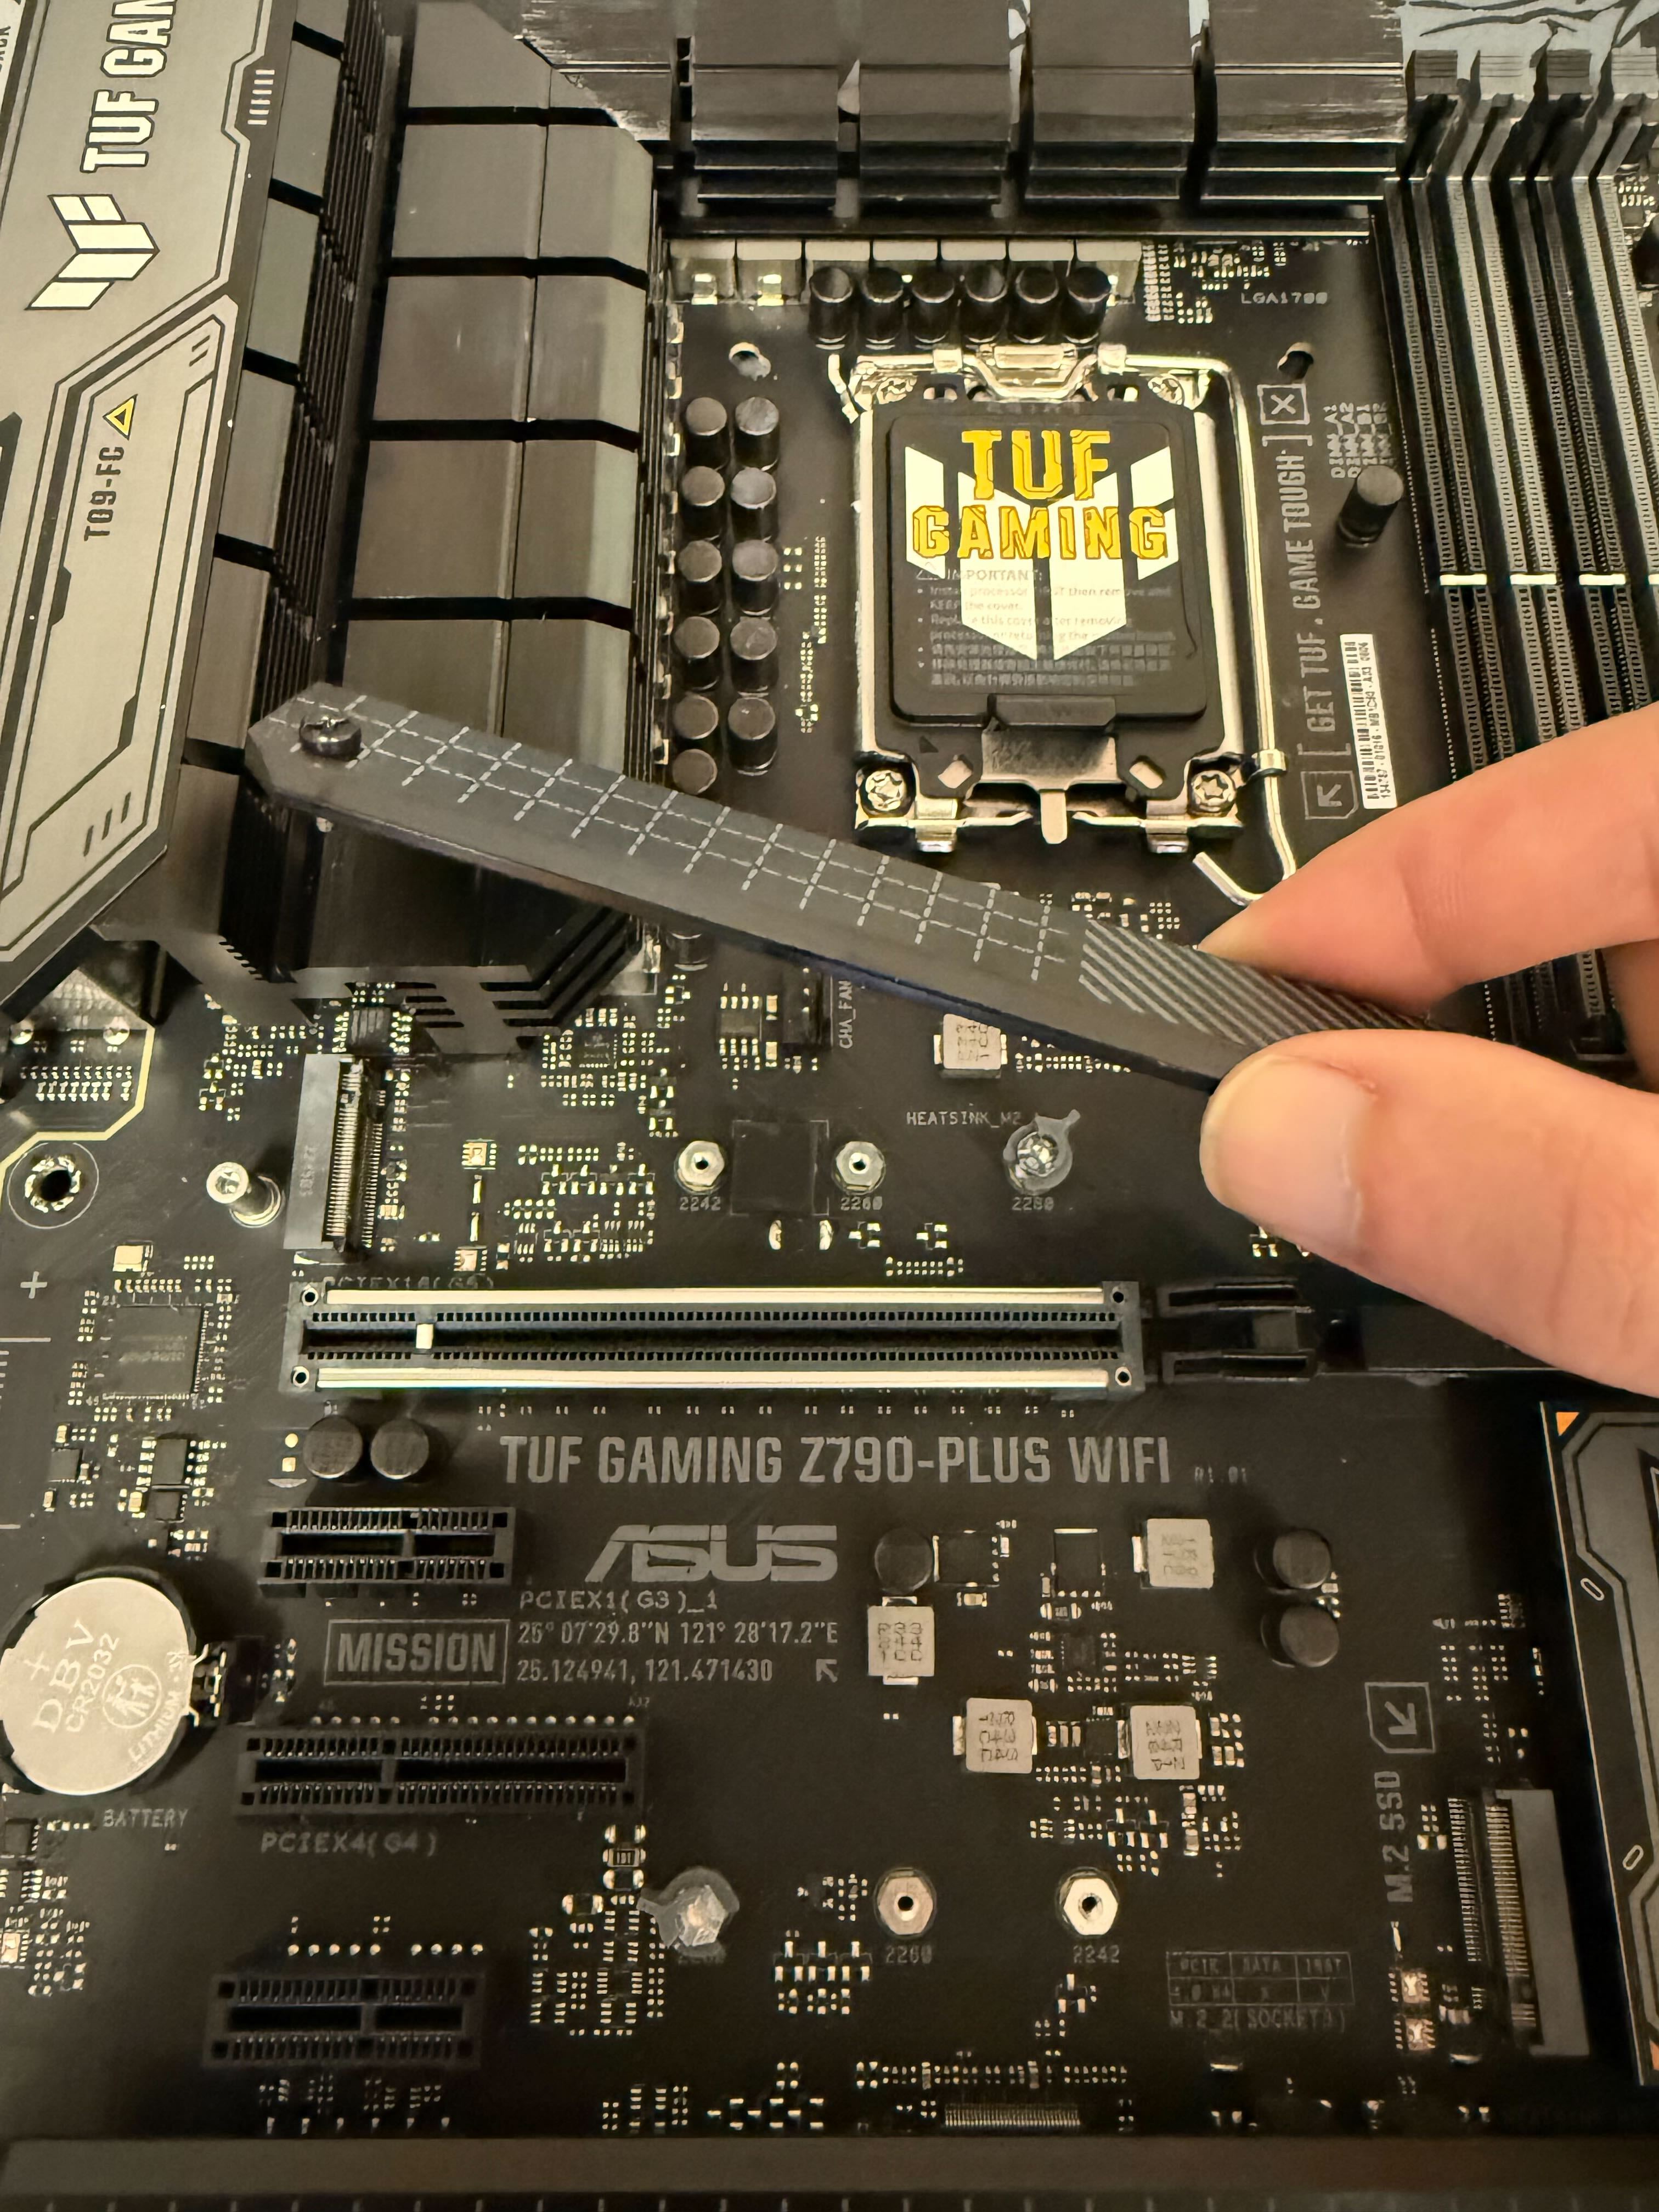 Lift off the heatsink to access the M.2 port | 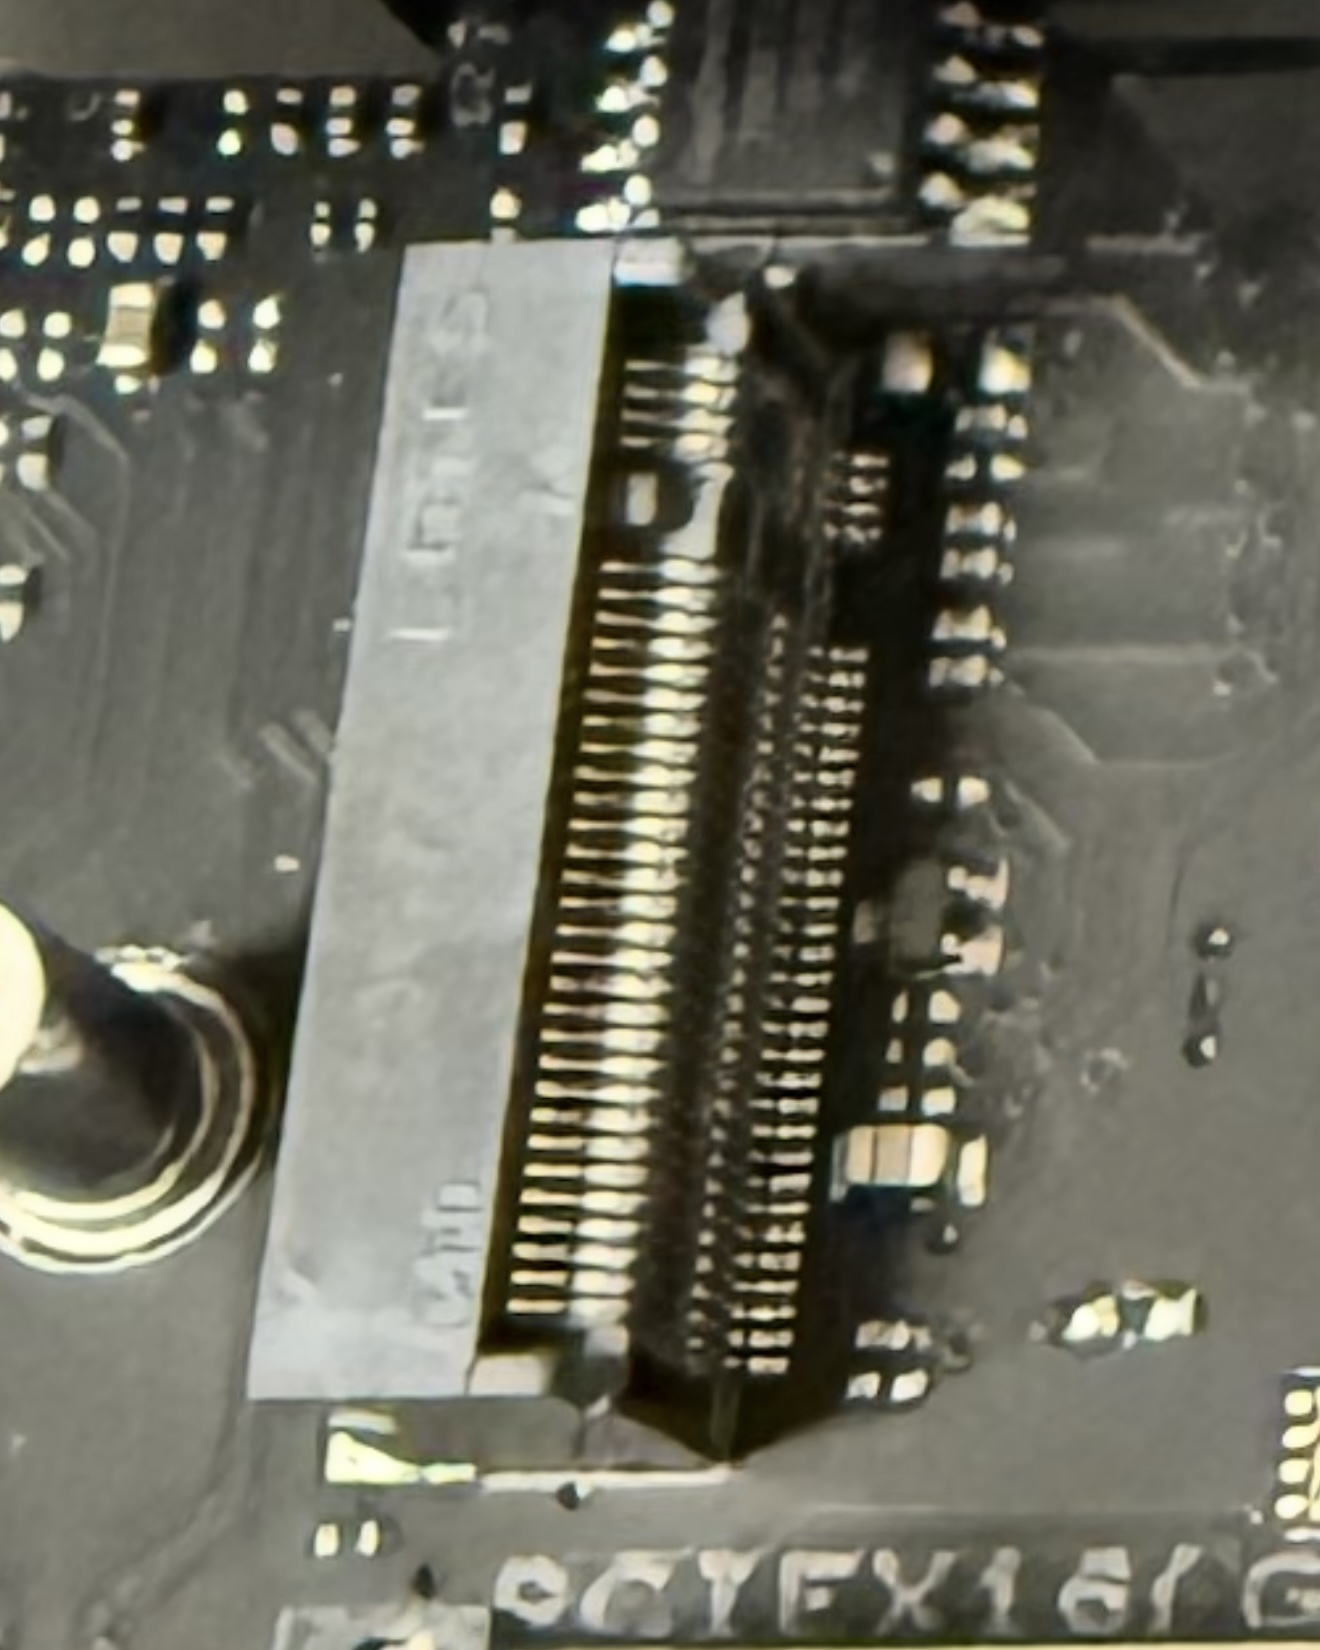 Locate the M.2 port |
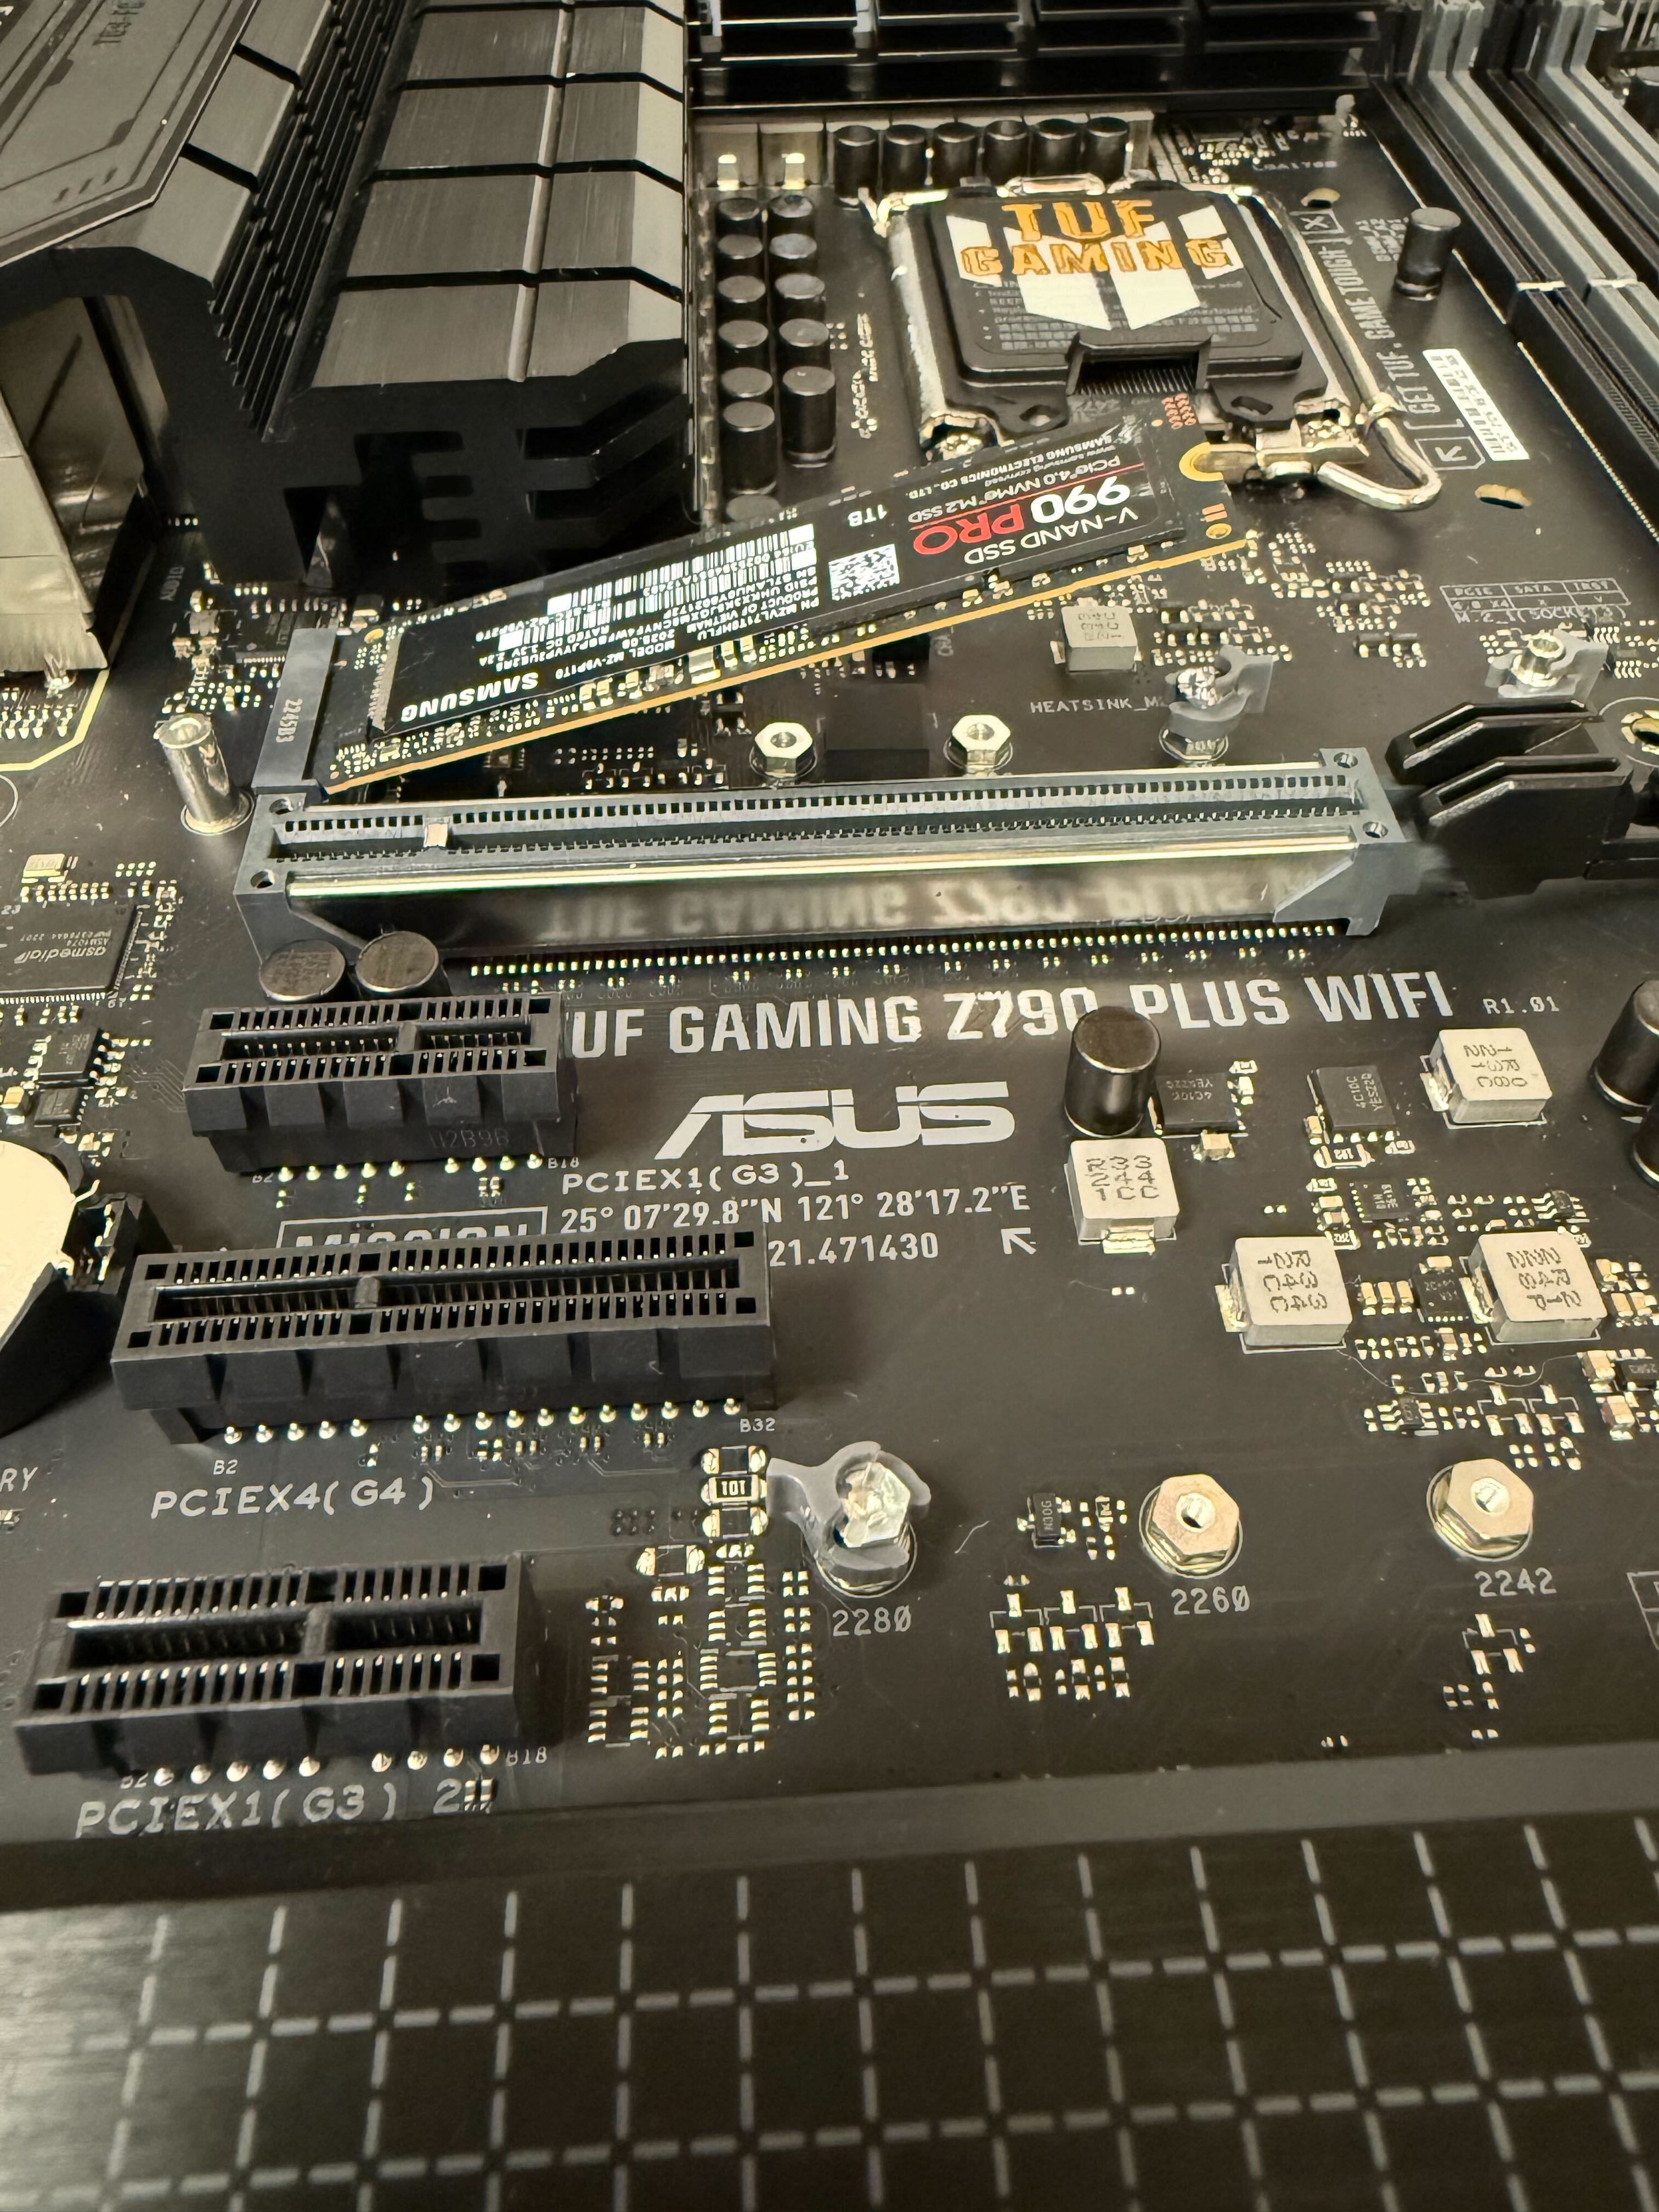 Install the M.2 into the slot |  Push the M.2 down |
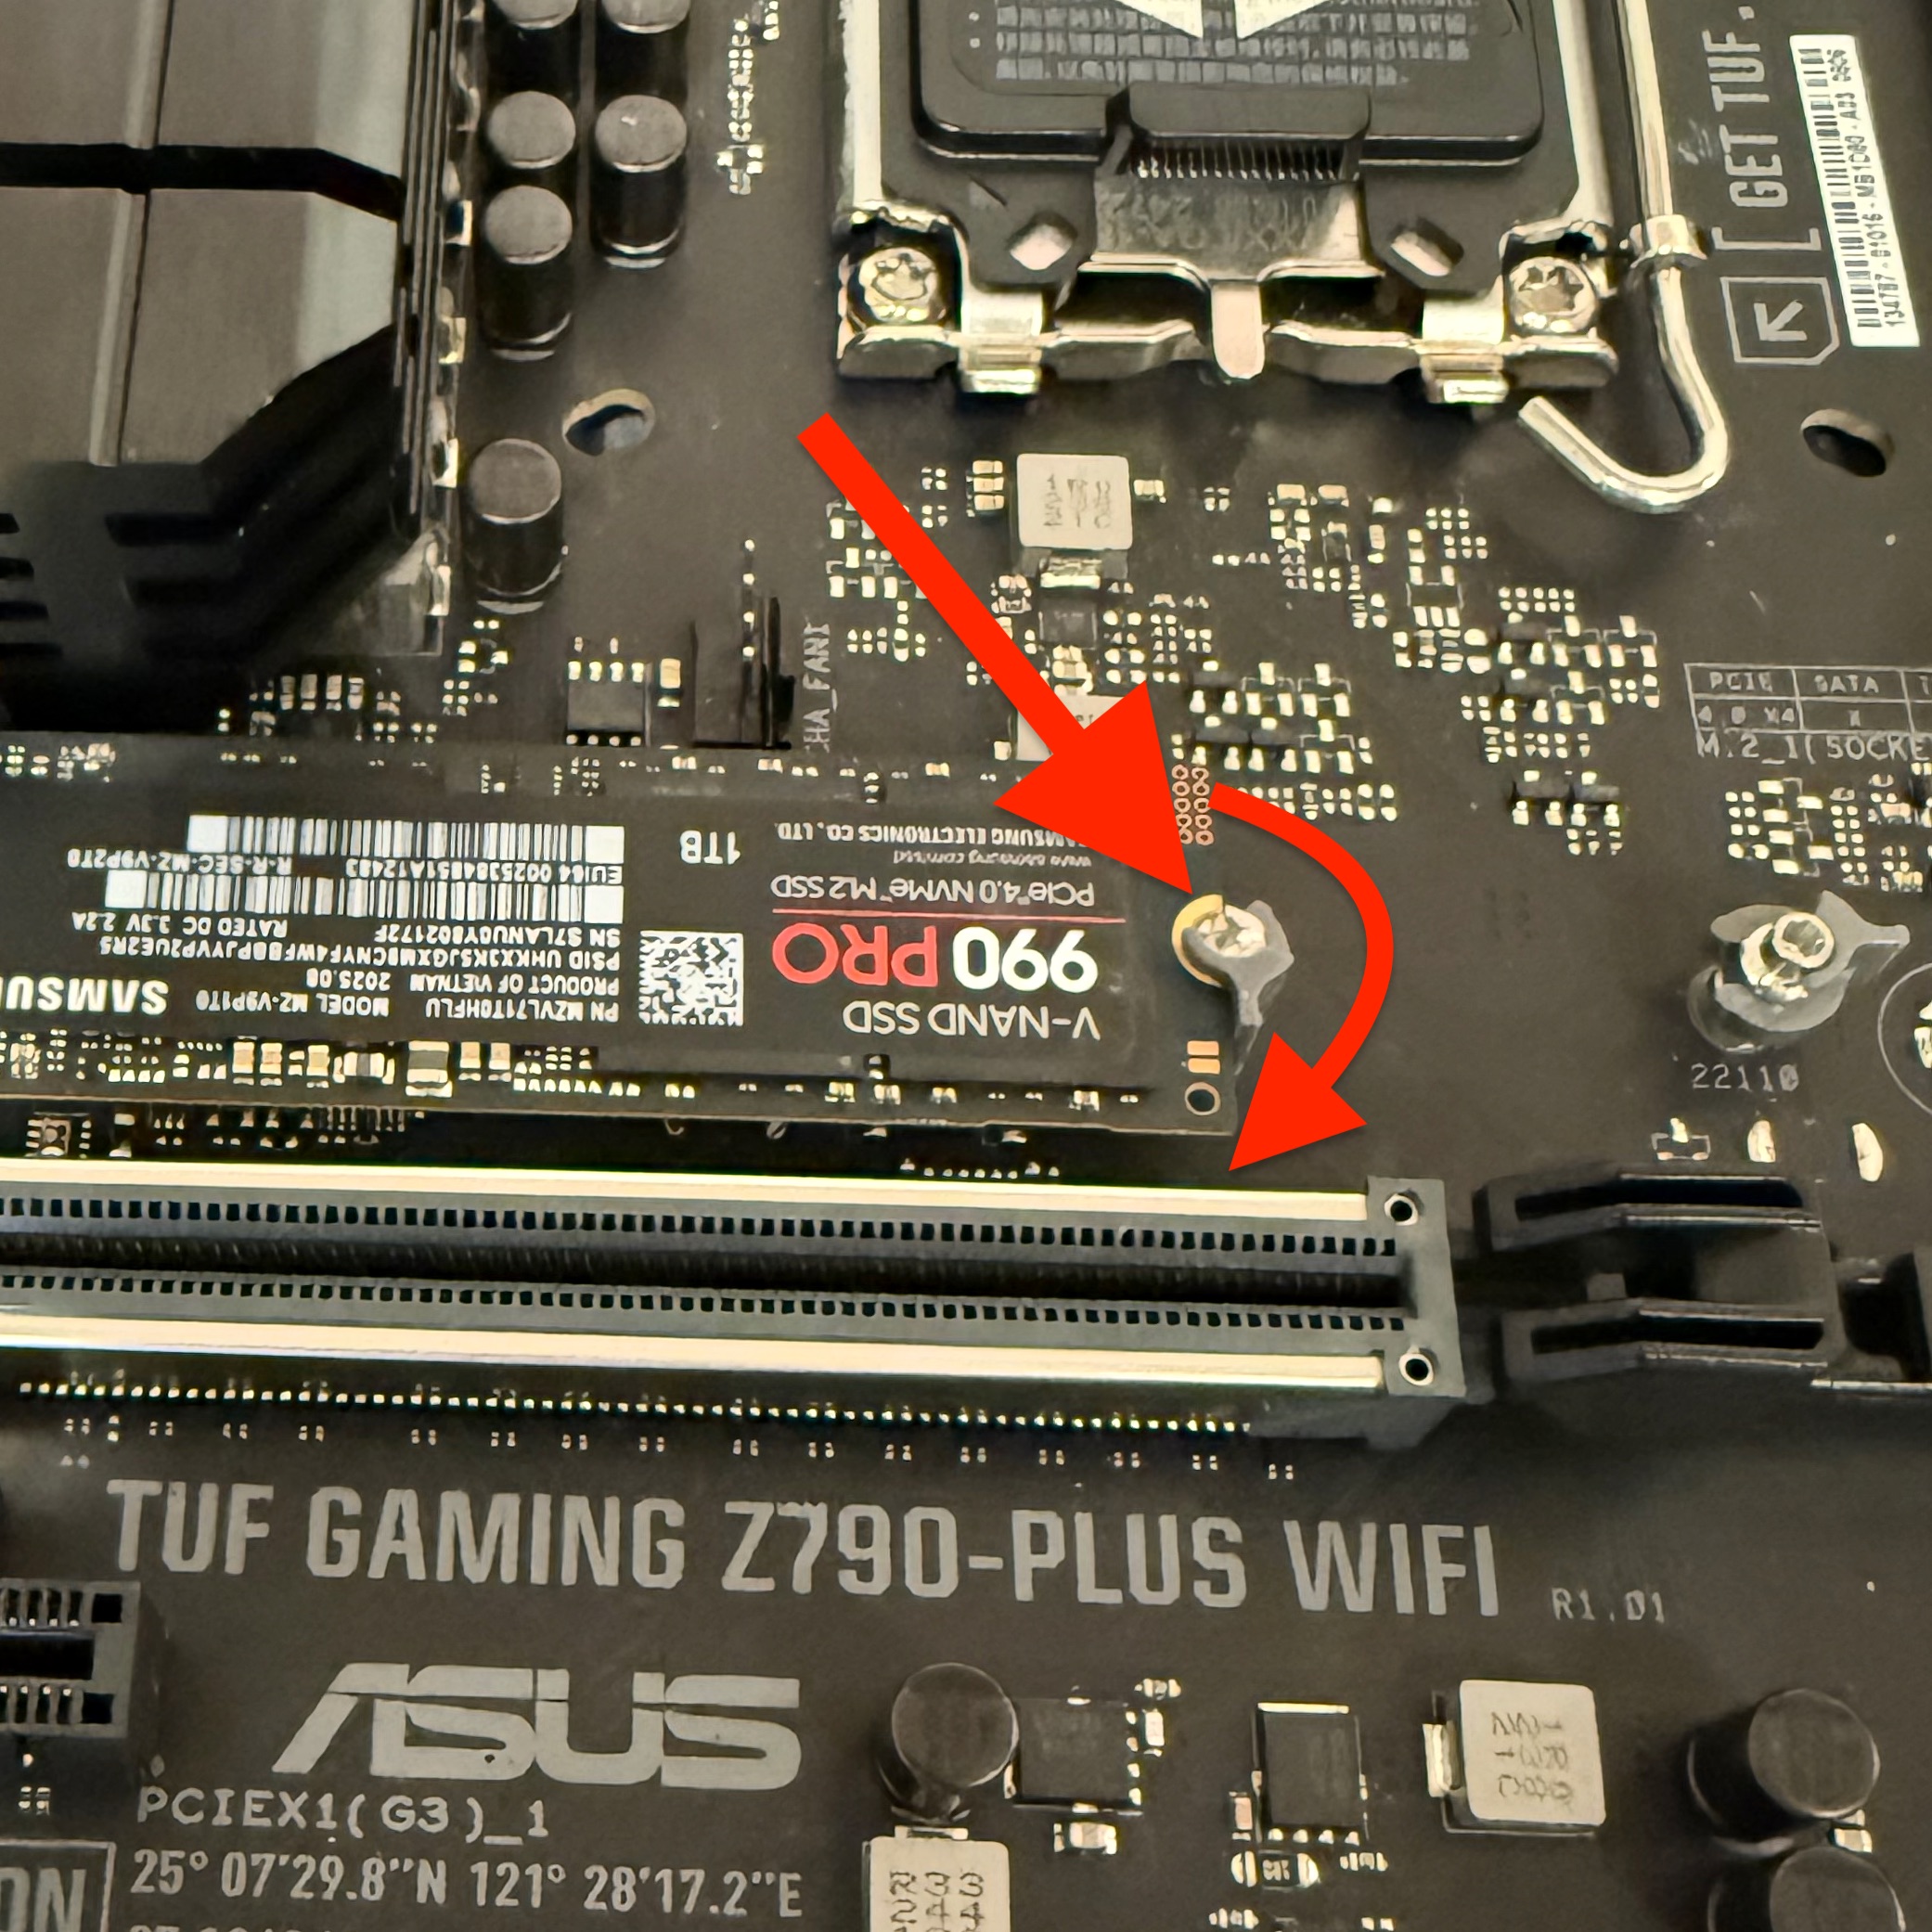 Some motherboards will have a twist latch | 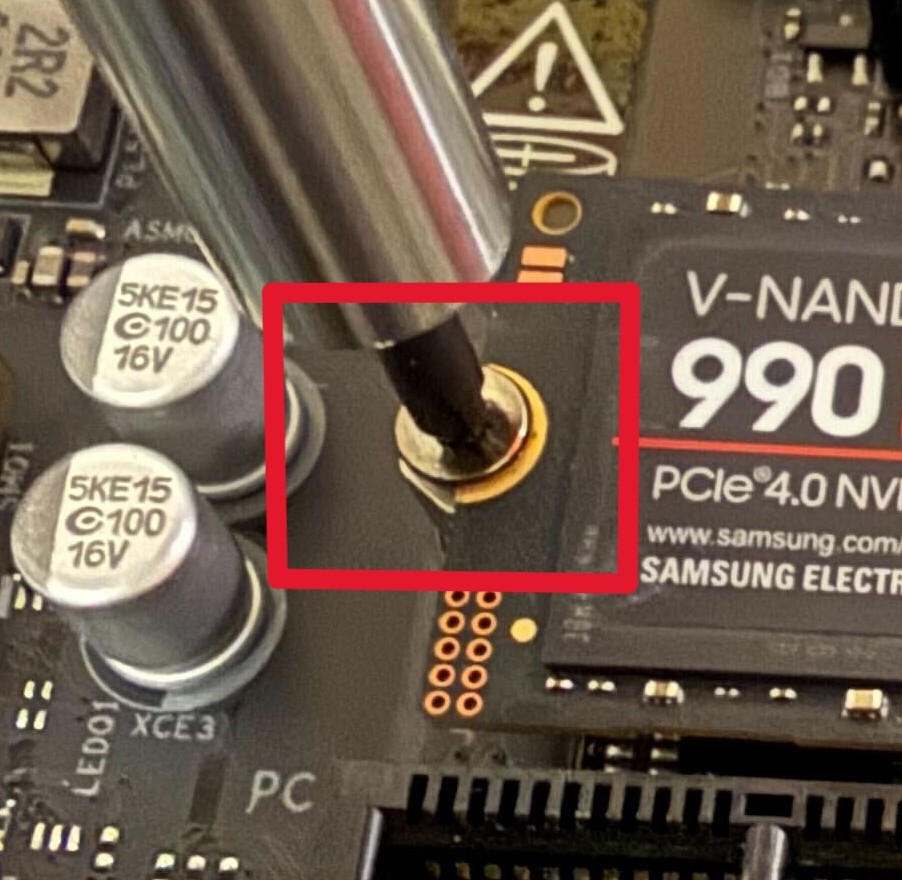 Some motherboards will require a screw |
 If you removed any heatsinks, be sure to reinstall them. If you’re installing an SSD into a new M.2 slot, remember to peel off the protective plastic film from the thermal pad before securing the heatsink