How to update drivers via ASUS DriverHubUpdated 5 months ago

Whether you’ve just built a new PC, reinstalled Windows, or want to ensure everything is running smoothly, keeping your drivers up to date is essential. Outdated drivers can cause a range of issues, from performance drops to hardware not functioning properly. Luckily, ASUS makes this super simple with their tool called DriverHub. It automatically detects your motherboard model, shows you available driver updates, and even links up with Armoury Crate.
Let’s walk through the process step by step.
STEP ONE: DOWNLOAD AND INSTALL ASUS DRIVERHUB
Head to the official ASUS DriverHub page here
Click Download Now
Once downloaded, open the .exe file
Accept the user agreement
Click Finish once the installation is successful.

STEP TWO: USE DRIVERHUB TO UPDATE YOUR DRIVERS
Once installed, launch ASUS DriverHub. Inside DriverHub, you’ll see five main sections. The main one we will be using is Available Updates, the rest we will not be using.
Click Available Updates.
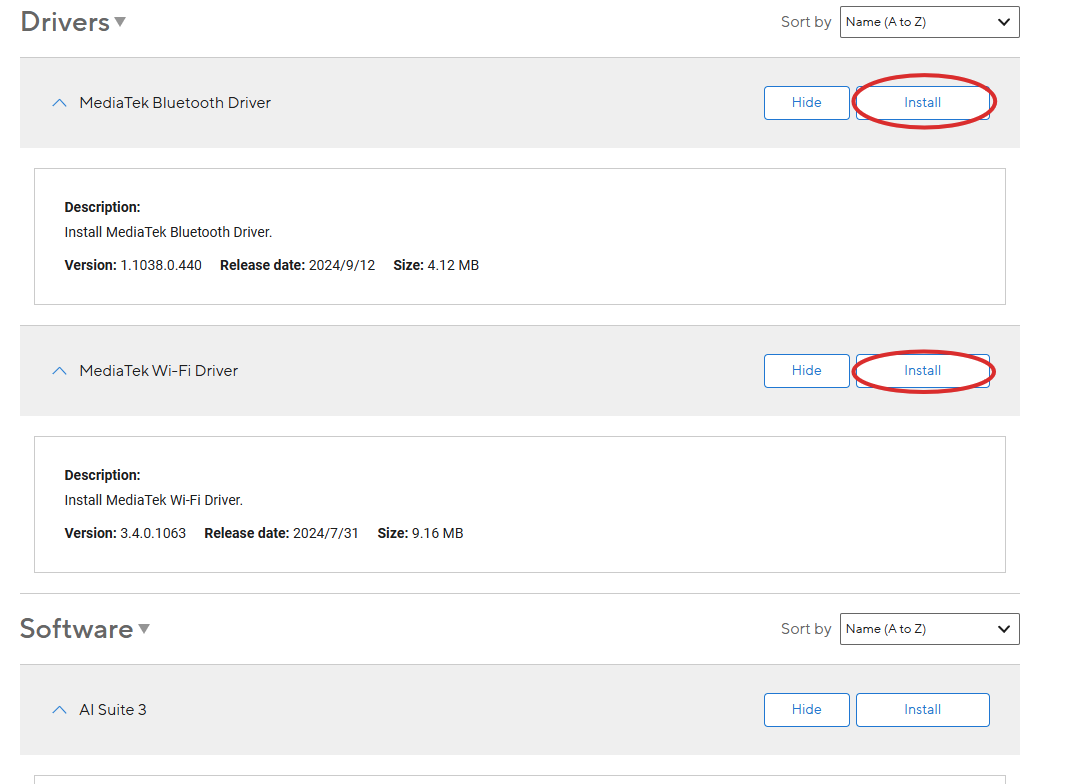
You’ll see a list of drivers that we want to install, along with extra software applications that we DO NOT want to install
We recommend hiding all software applications to remove them from this list entirely. Then select ONLY the drivers by pressing the "Install" button
Once the installation finishes, it will ask if you want to Restart Now or Restart Later.
Once your computer has restarted, you have applied the new drivers!
And that’s it! Once your computer has restarted, you’ve successfully set up and used ASUS DriverHub. Whether you're resolving an issue or simply giving your system some care, keeping your drivers up to date is always a smart choice. Thanks to the ASUS DriverHub, the process is quick, straightforward, and perfect for users of all experience levels.