.png)
How to test your RAM with MemTest86Updated 3 months ago
 MemTest86 is a free tool that runs from a USB drive before Windows loads, which lets it thoroughly test every part of your memory. This guide covers creating the MemTest86 USB drive, booting into the test, and reading your results.
WHAT YOU WILL NEED:
- A USB flash drive (1GB or larger)
- A working Windows PC to prepare the drive
- A few hours of time — the full test can take 2–6 hours depending on how much RAM you have
⚠️ CREATING THE MEMTEST86 USB WILL ERASE EVERYTHING ON THE DRIVE! Make sure there are no important files on it before you begin.
CREATING THE MEMTEST86 USB DRIVE
- Download MemTest86 Free from the official PassMark website: https://www.memtest86.com/download.htm
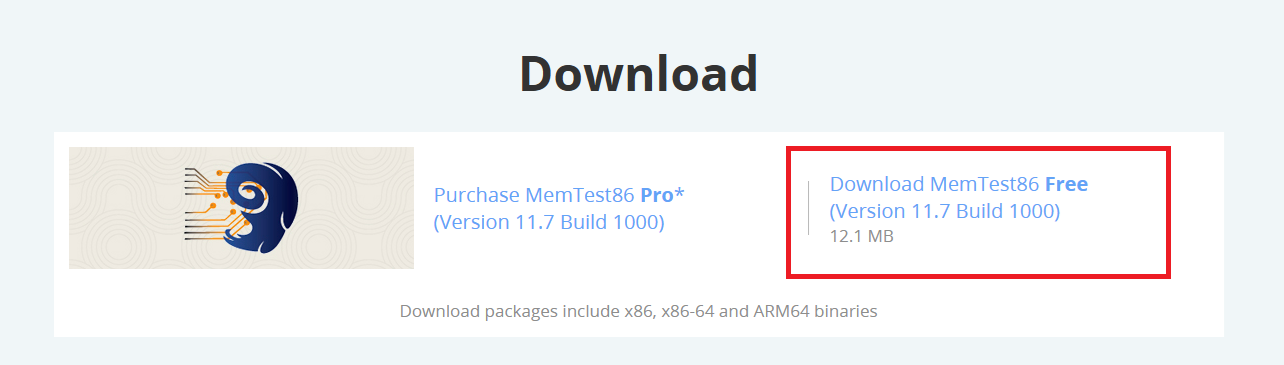
- Once downloaded, right-click the ZIP file and select Extract All

- Plug in your USB drive
- Open the extracted folder and run imageUSB.exe
- In imageUSB, check the box next to your USB drive in Step 1
- Make sure Write image to USB drive is selected in Step 2 — the memtest86-usb.img file should already be filled in under Step 3
- Click Write and confirm — the process only takes a minute or two
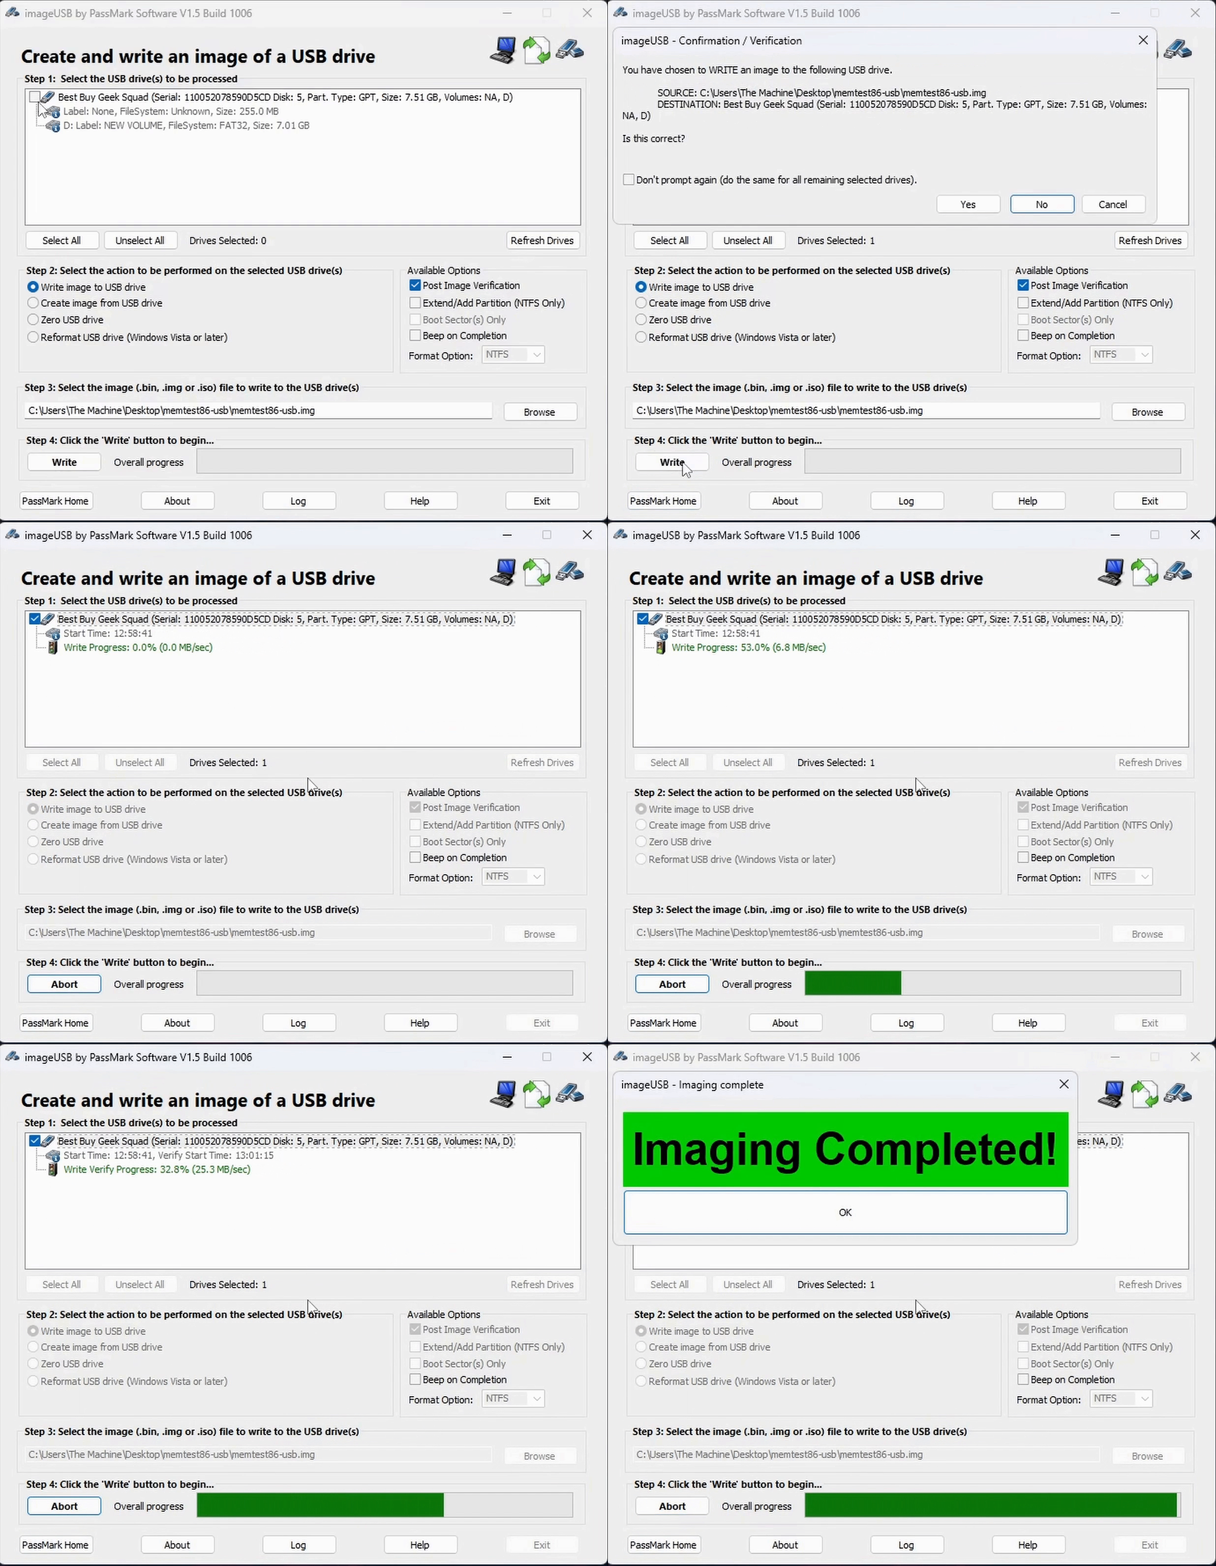
Once imageUSB says the write is complete, your MemTest86 drive is ready to go.
BOOTING FROM THE USB DRIVE
- Shut your PC down completely and plug the USB drive into a port on the back of the PC
- Power the system on and repeatedly tap your motherboard's boot menu key as soon as it starts:
ASROCK: F11 | ASUS: F8 | MSI: F11 | GIGABYTE: F12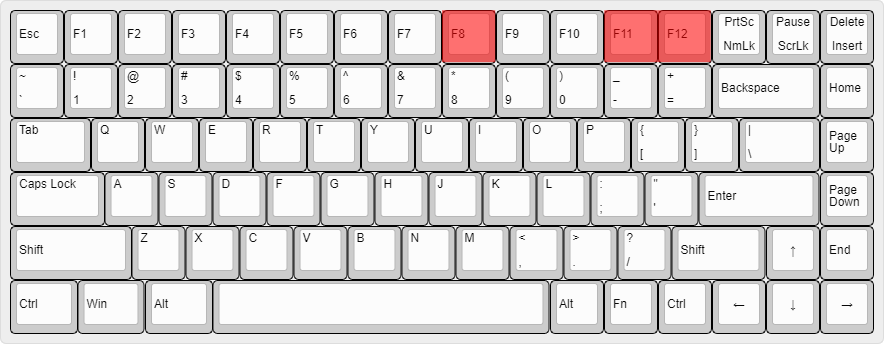
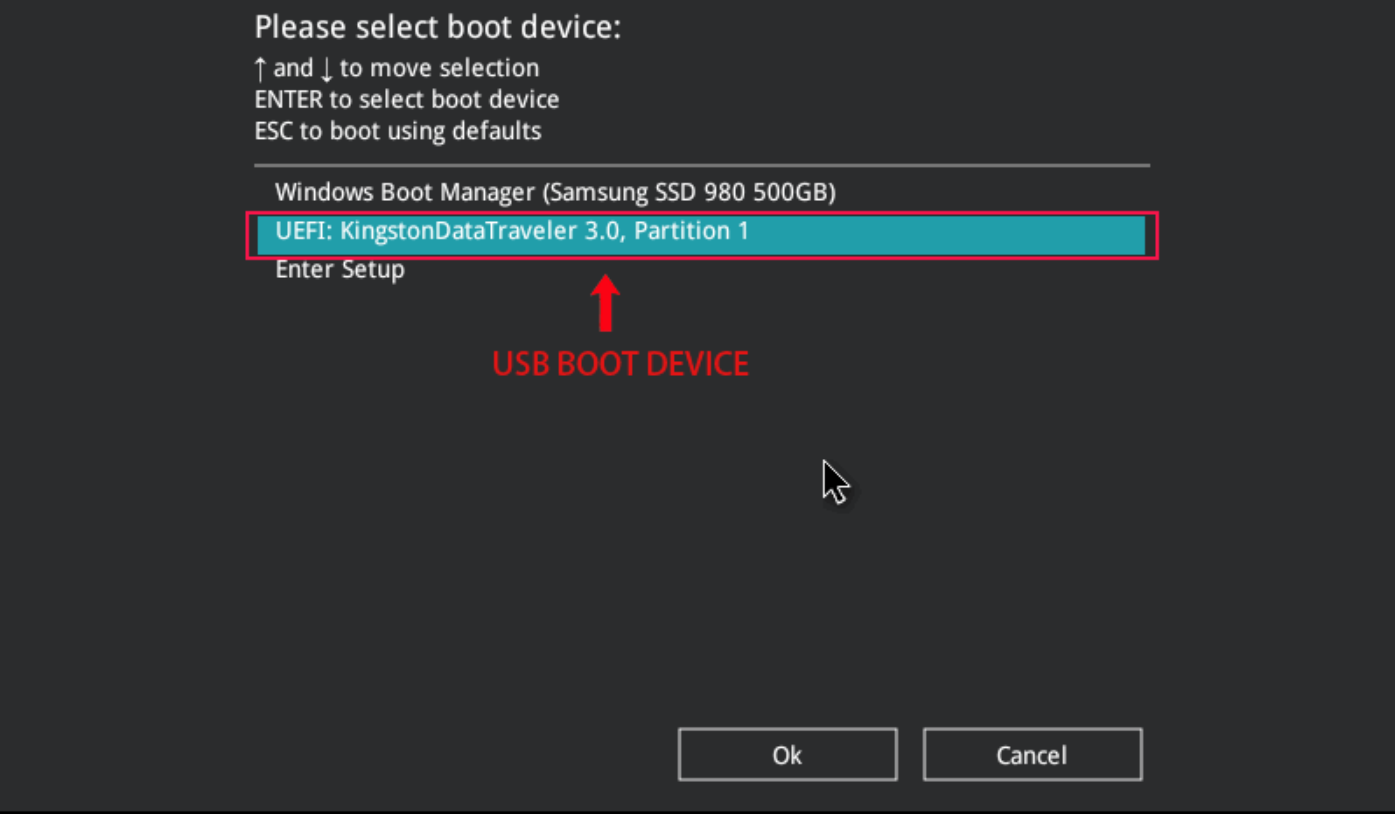
- Select your USB drive from the boot menu — it may show up as UEFI: [your drive's name]
- MemTest86 will load automatically
PLEASE NOTE: If our support team asked you to test with EXPO/XMP enabled or disabled, make sure to set that in your BIOS before booting into MemTest86.
RUNNING THE TEST
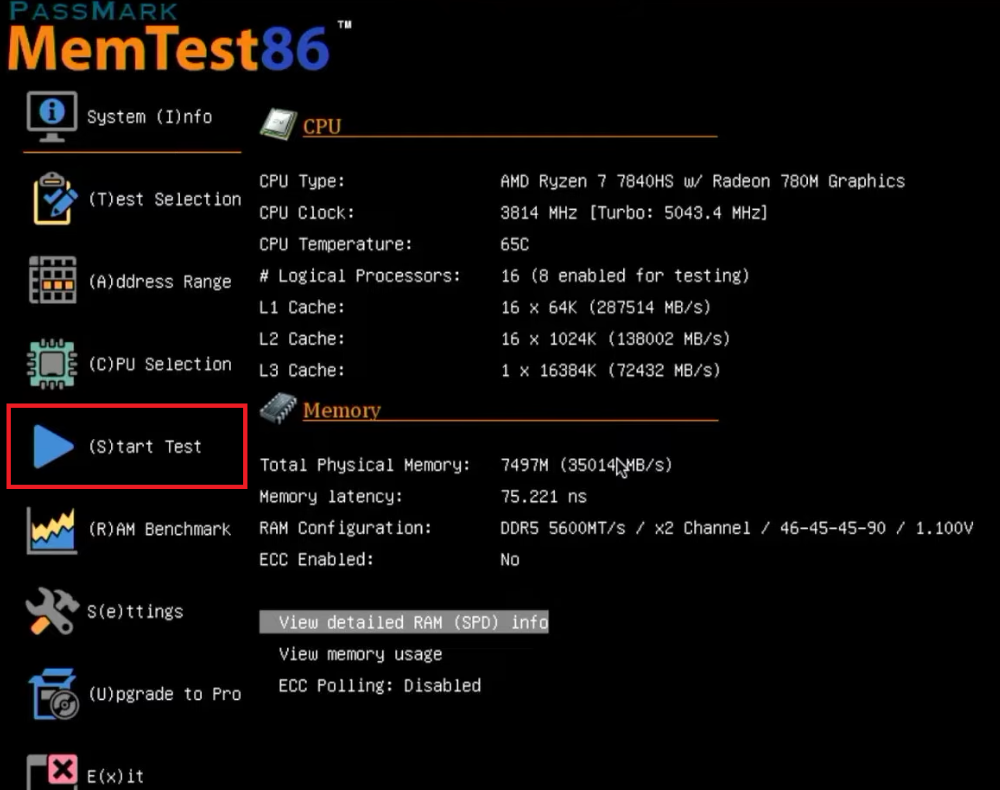
- On the MemTest86 main screen, the test will start automatically after 10 seconds, or you can press Start Test right away
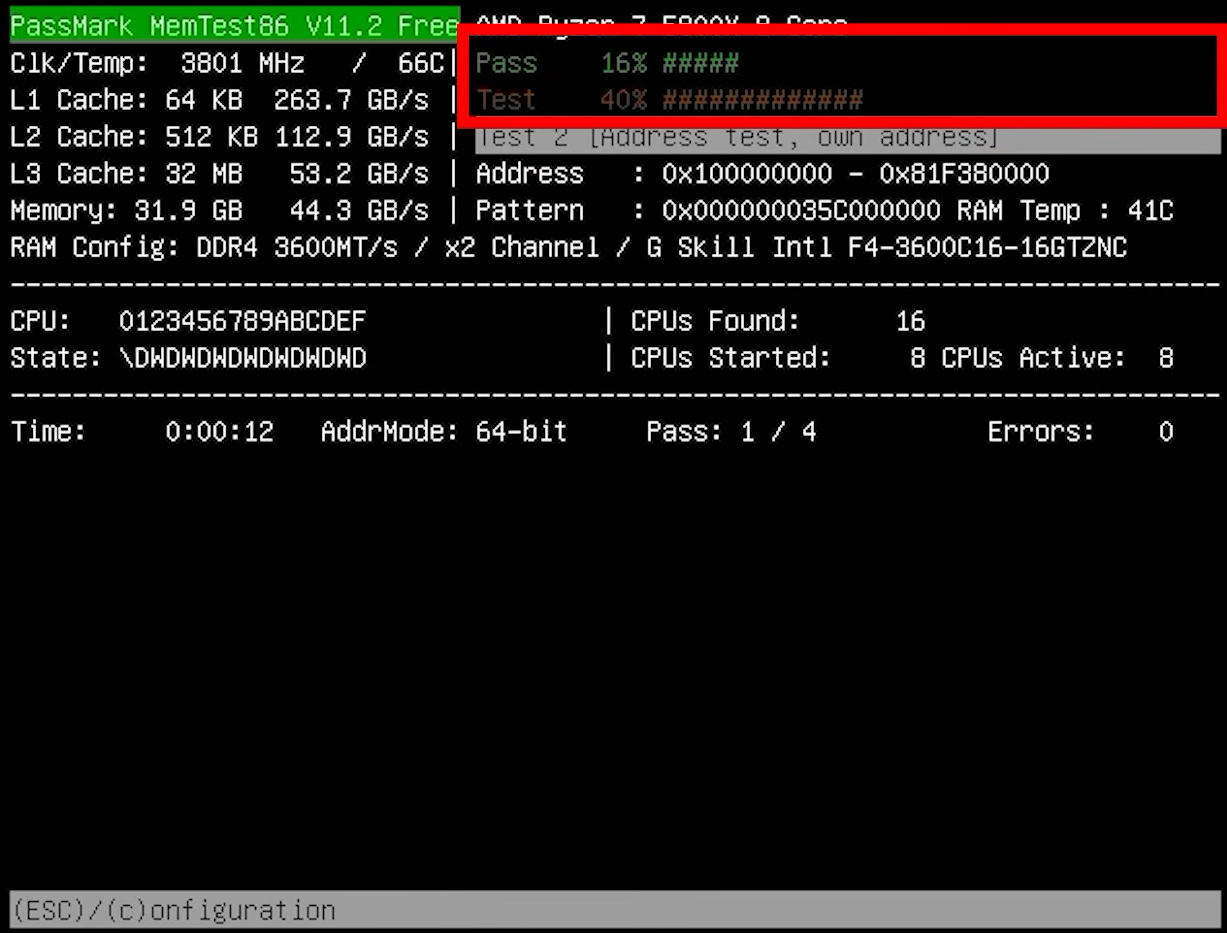
- The default test runs 4 full passes and typically takes several hours
LET THE TEST FINISH ALL 4 PASSES! Errors can take multiple passes to appear, so an incomplete test is not a clean bill of health. A great time to run it is overnight.
 |  |
READING YOUR RESULTS
- When the test finishes, MemTest86 will show a summary screen with a PASS or FAIL result
- 0 errors across all 4 passes means your RAM is healthy
- Any errors at all (shown in red during the test) mean your memory is unstable — even a single error counts as a fail
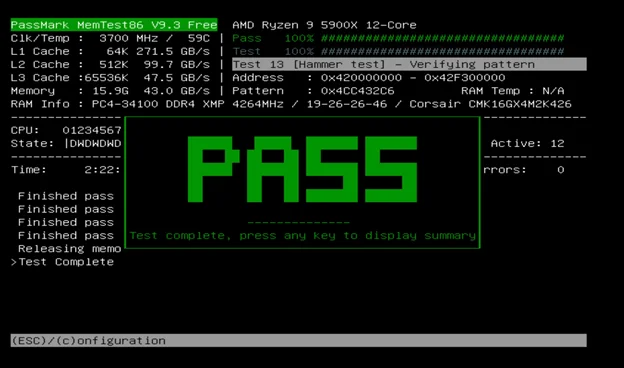
If your test passed but your system is still crashing, the RAM likely isn't the cause and it's worth looking at other components — feel free to reach out to our support team and we can help narrow it down.
IF YOUR TEST FOUND ERRORS
Don't panic — errors don't always mean the RAM itself is dead. Here's what to do next:
- Enter your BIOS and disable EXPO/XMP so the memory runs at its stock speed, then re-run the full MemTest86 test
- If the test passes at stock speeds, the overclocking profile is unstable rather than the RAM being faulty
- If it still fails, test each RAM stick one at a time in the slot recommended by your motherboard manual to identify which stick is bad
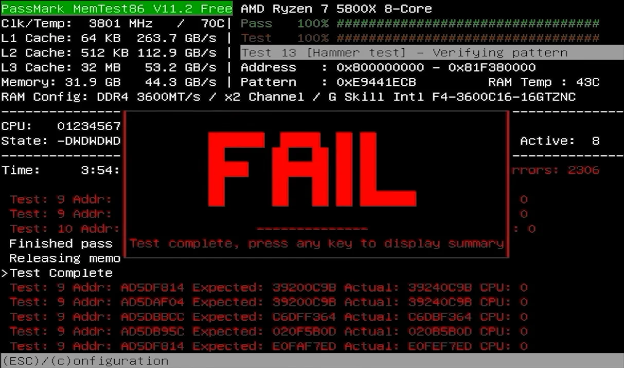
If your system was purchased from META PCS and your memory is failing MemTest86, reach out to our support team with your test results and we will help you confirm the diagnosis and go over your next steps.