How to drain and fill coolant for your watercooled PCUpdated 5 months ago
The video above is a complete walkthrough on a Lian Li O11 Evo and soft line build. If you have a hard line build, or a build in a different case from us, please contact us for assistance.
Keeping your custom water-cooled PC maintained is key to ensuring reliable performance and long-term component health. In this video, we’ll walk you through the basic steps of maintaining your water-cooling system — including the tools needed for the job, draining, flushing, filling, and general upkeep tips to keep your system running cool and quiet.
WRITTEN GUIDE
TOOLS FOR THE JOB
First, let's gather the tools needed to do the job. Some tools vary based on the watercooling hardware in your system (EK or Alphacool). If you have any questions or need clarification for any of the items listed below, please reach out to us at [email protected].
 | |
TOOL | PURPOSE |
| Drain tube | Guides old coolant into the milk jug or bucket |
| 6mm Allen wrench - EK Flathead screwdriver - ALPHACOOL | To remove cap fittings |
| Coolant fill bottle | To fill up your reservoir with new coolant |
| 1L of coolant | New, clean, and fresh coolant |
| Paper towels | Cleaning up during and after the project |
| Milk jug or bucket | Catches drained coolant |
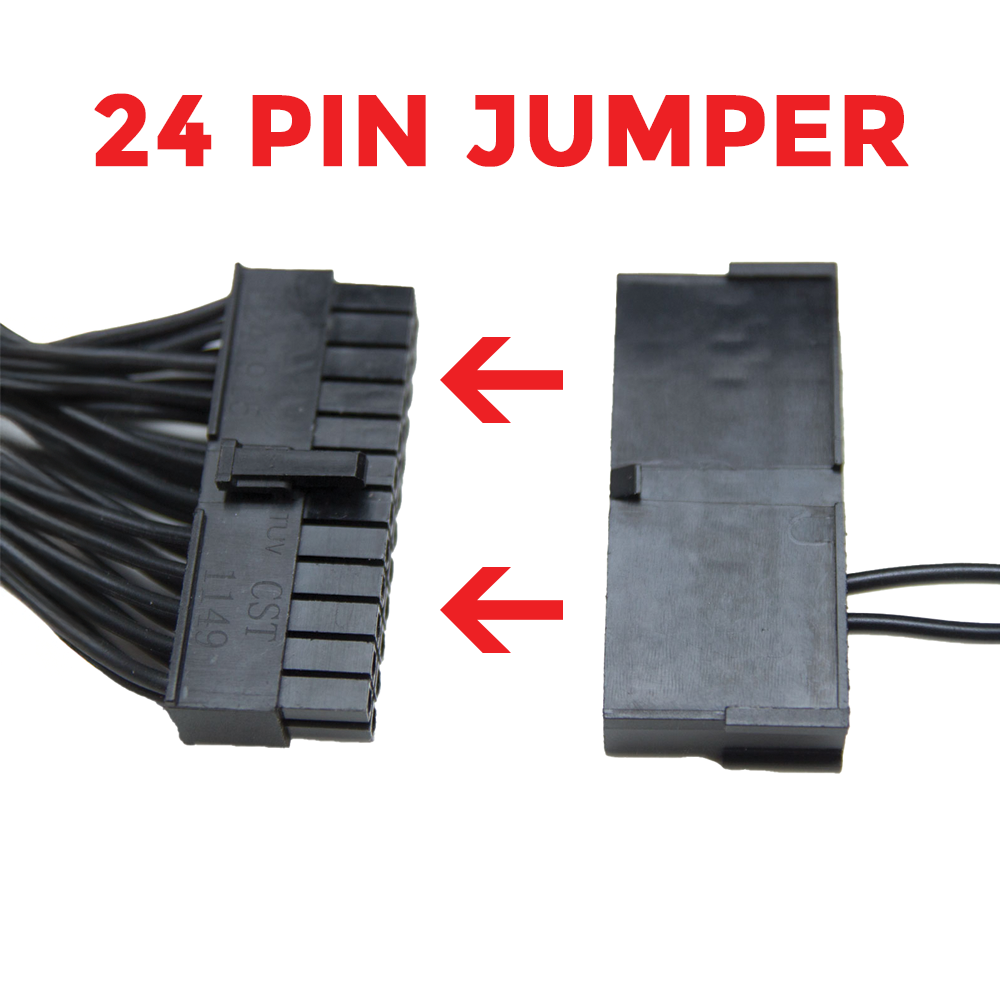
| 24 pin cable jumper | Safer power cycling during filling process |
 |  |
DRAINING THE LOOP
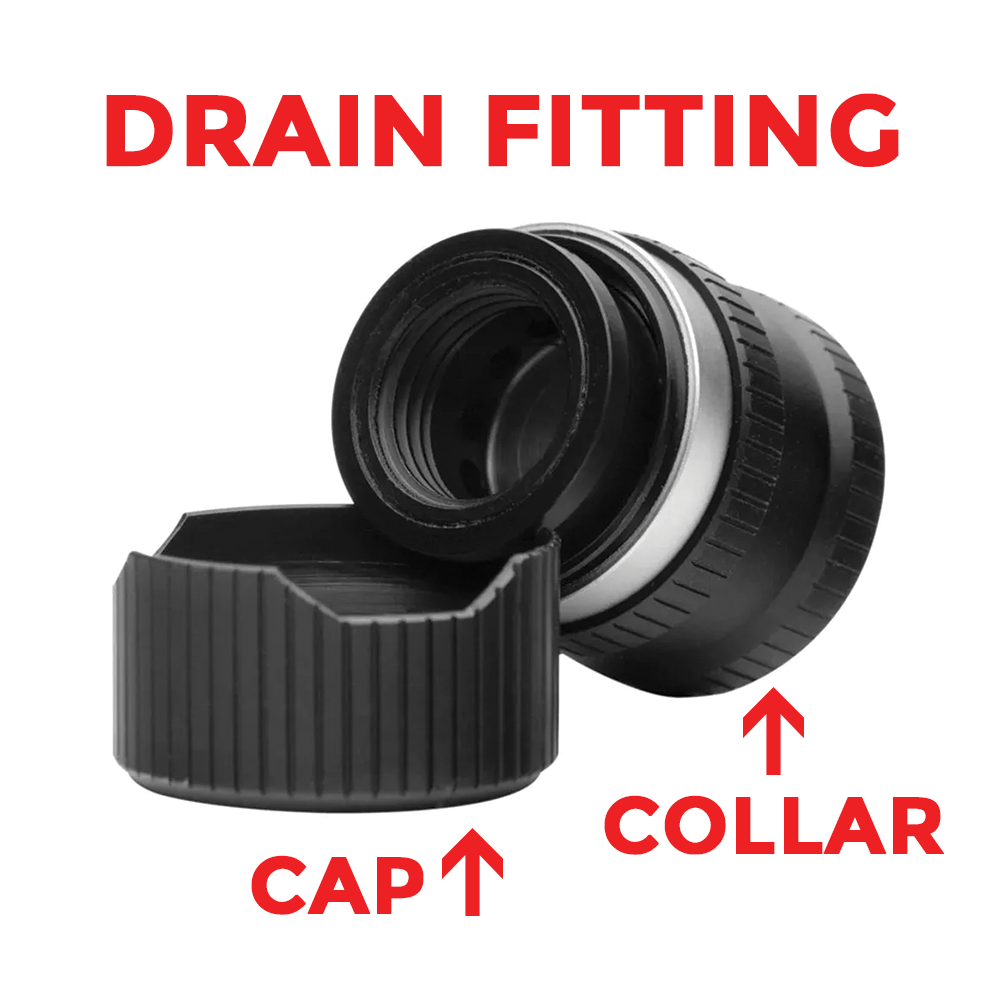
- Unscrew only the cap from the drain fitting at the bottom of the reservoir and thread in the drain tube; do not slide the collar of the drain towards you yet -- this is what actually opens it
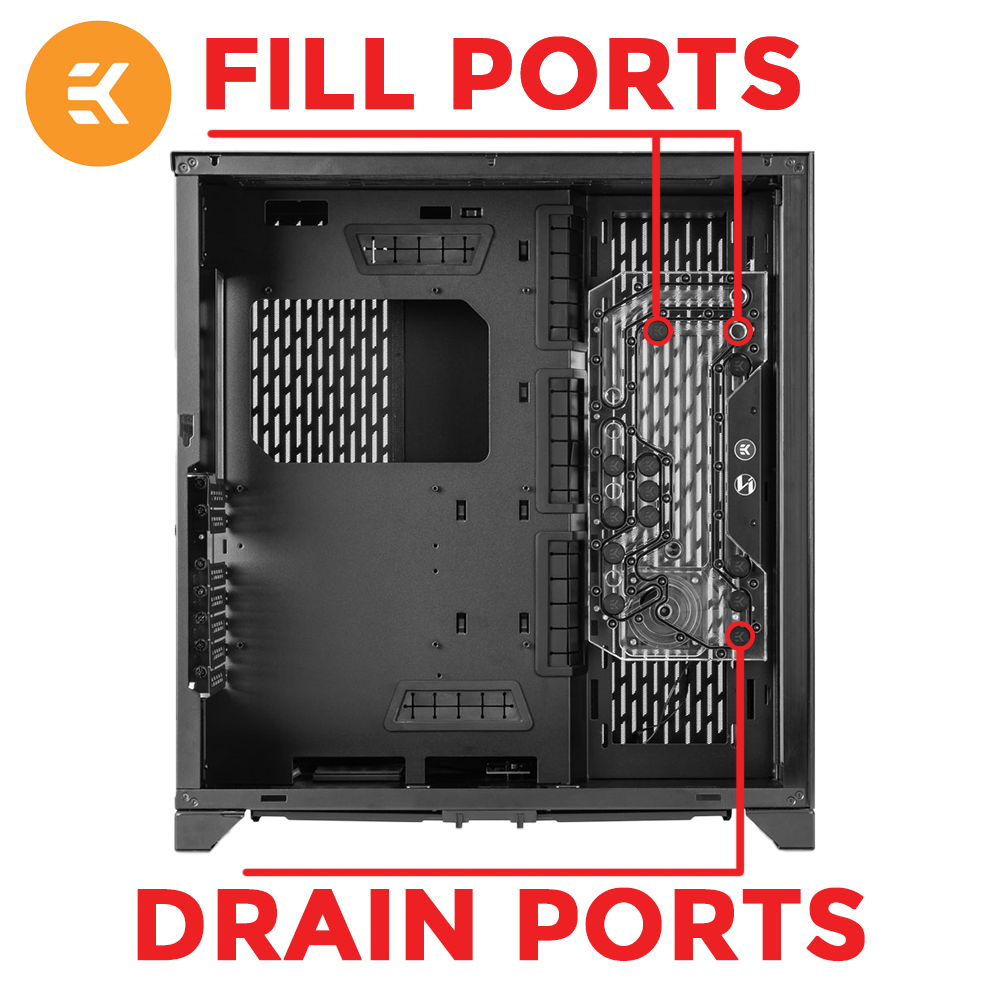
- Remove one of the top cap fittings from the top of the reservoir to allow air in
- Once the drain tube is ready to pour into a container, slide the drain fitting towards you to release the water
- Most of the loop will work itself out with just gravity, but you will also need to tilt the system front to back. This is to work out any more water that can easily escape from the top radiator and blocks. Repeat this process, closing the drain in between
- Once you can tell that most of the water is out, you can close the drain again
 |  |
 |  |
FLUSHING THE LOOP
If you are using a solid or opaque coolant, you may want to perform a full system flush to remove some of the cloudiness or buildup left over from the previous coolant. For a quicker service, you can skip this step.
- Ensure the bottom drain hole is closed and capped off
- Remove 24 pin motherboard cable and attach the jumper to the end
- Prepare 1L of distilled water in the fill bottle. If using EK's Super Flush, please follow their directions on the bottle
- With the top reservoir cap open, carefully fill with water until it stops about an inch below the level you are filling
- Power cycle the system, watching to see when all the water has moved out of the reservoir before flipping the power supply off. Avoid letting the pump run without water for too long, as this can damage the motor
- Repeat these steps until water is consistently cycling in the loop
- Repeat the steps on how to drain the loop to prepare your system for new coolant
💡Tip: If you notice that a lot of water is still in the upper tubes, you might be able to remove a tube from the top of the loop near the radiator and blow air into it, forcing the remaining water out
FILLING THE LOOP
- Ensure the bottom drain is closed and capped off
- Remove 24 pin motherboard cable and attach the jumper to the end.
- Prepare 1L of your new coolant in the fill bottle
- With the top reservoir cap open, carefully fill with water until it stops about an inch below the level you are filling
- Power cycle the system, watching to see when all the water has moved out of the reservoir before turning the power supply off. Avoid letting the pump run without water for too long, as this can damage the motor
- Repeat these steps until the new coolant is consistently cycling in the loop, some additional tilting will help work out any trapped air bubbles (only tilt in a manner that does not allow liquid to leak from fill ports)
- With the system unplugged, reattach the 24 pin cable to the motherboard and you are safe to power back on
💡Tip: Keep and eye on the coolant level for 6-12 hours, some residual air will work itself out requiring a bit more coolant to top off the reservoir.