.png)
How do I format a USB drive to FAT32Updated 3 months ago
This article walks you through how to properly format a USB flash drive to FAT32, specifically for use with BIOS updates.
⚠ Warning: formatting erases everything on the drive
WHAT YOU WILL NEED
A USB flash drive that is 32GB or smaller. Most BIOS update tools only recognize FAT32-formatted drives up to 32GB. Larger flash drives often will not work, even if they appear to format correctly.
If you don’t already have a compatible flash drive, inexpensive 32GB USB flash drives are widely available online, including on Amazon and other major retailers.
FORMATTING A USB IN WINDOWS
- Open File Explorer
- Go to This PC
- Right-click the USB drive you are wanting to format and select "Format..."
- Under File System drop down, choose FAT32
- Select quick format
- Click start → confirm when prompted
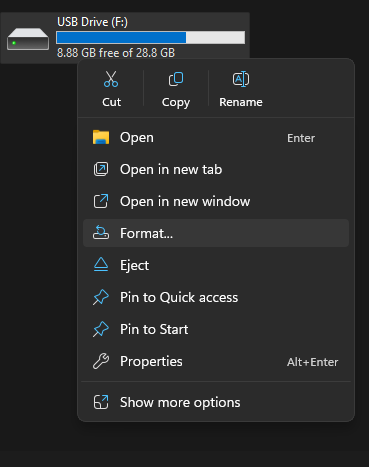 | 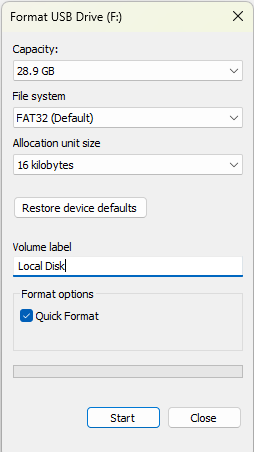 |
IF FAT32 IS NOT LISTED IN WINDOWS
If FAT32 does not appear in the File System drop down, your drive is likely larger than 32GB. Windows will not offer FAT32 for these drives, but you can still format them using the free FAT32 GUI Formatter tool below.
- Download the FAT32 GUI Formatter HERE
- Right-click the downloaded file and select Run as administrator
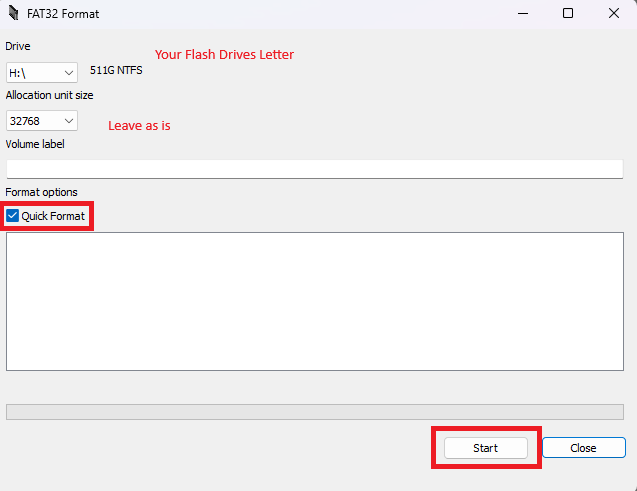
- Under Drive, select your USB drive letter — double-check this is the correct drive!
- Leave Allocation unit size at the default setting
- Check the Quick Format box
- Click Start → click OK when warned that all data will be erased
- Once it shows Done, click Close — your drive is now FAT32
⚠️ Note: even after formatting, some BIOS update tools may still not recognize drives larger than 32GB. If your BIOS does not detect the drive, use a 32GB or smaller flash drive instead.