ASROCK BIOS Flashback GuideUpdated 8 months ago
ASRock motherboards with a BIOS Flashback feature let you update the BIOS using only a power supply and a USB drive — no CPU, RAM, or GPU required. This is especially helpful if your system won’t boot with a new processor or if you need to recover from a corrupted BIOS.
Follow the steps below carefully to ensure a smooth update.
⚠️Note: TPM will be reset after performing BIOS Flashback. Please suspend Bitlocker and any encryption or security feature that rely on TPM before proceeding
⚠️ Important: Using an incorrect BIOS file or interrupting power during the update can cause damage to your motherboard. Always double-check your exact motherboard manufacturer model and follow the steps carefully
WRITTEN GUIDE
STEP ONE: DOWNLOAD AND PEPARE THE BIOS FILE
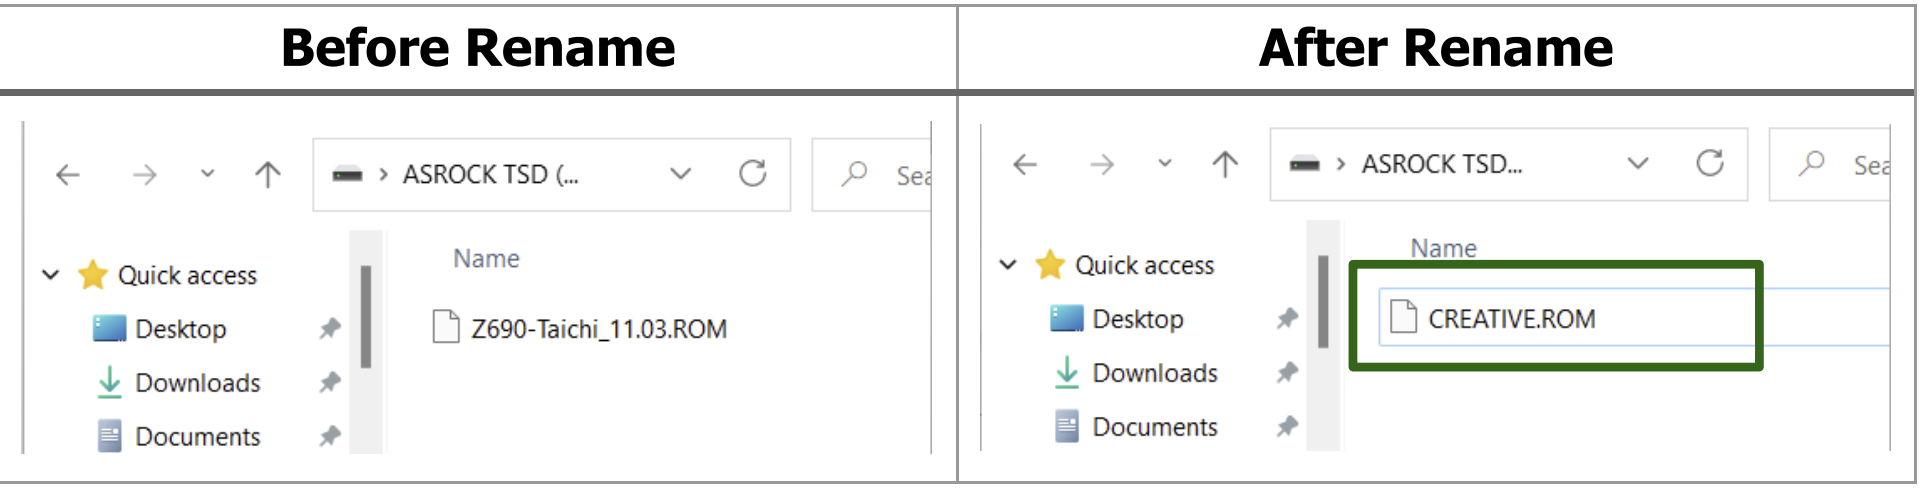
- Download the latest BIOS file for your motherboard from ASRock's Support Page
- Extract BIOS file from the zip file
- Rename the BIOS .ROM file to “CREATIVE.ROM”
STEP TWO: PREPARE THE USB FLASH DRIVE
- Format your flash drive, use the MBR partition style and format to FAT32
- Copy the renamed BIOS file to the root of the USB flash drive
⚠️Warning: formatting a flash drive will delete all data on the drive
STEP THREE: CONNECT THE USB FLASH DRIVE TO THE MOTHERBOARD
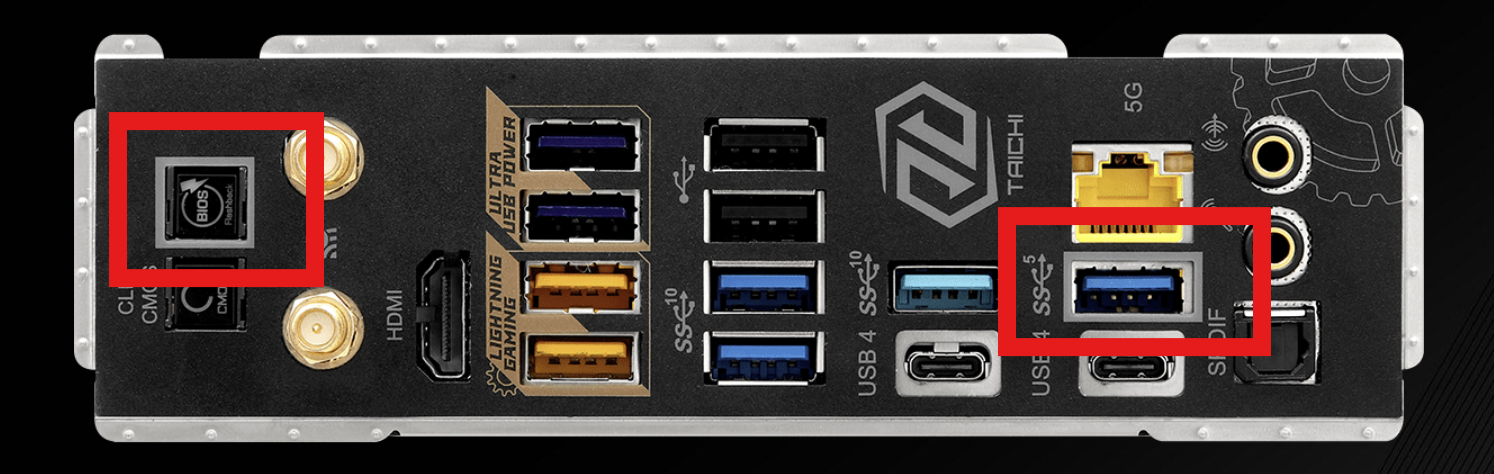
- Locate the dedicated BIOS Flashback USB port on the rear I/O of your ASRock motherboard
- This port is usually labeled “BIOS” or has a small outline around it that matches the outline of the BIOS button
- Insert the USB flash drive into this specific port
STEP FOUR: START THE FLASHBACK PROCESS
- Power your system off, but leave the power cable connected and the power supply switch on
- Find the BIOS Flashback button on the rear I/O panel
- Press and hold the button for 3 seconds until the LED begins to blink
- Release the button — the update process has started
- The LED will continue blinking while the BIOS is updating -- this can take several minutes
- DO NOT REMOVE THE USB DRIVE OR TURN ON THE SYSTEM DURING THE UPDATE
💡Tip: If the LED light turns solid green, this means that the BIOS Flashback is not operating properly. Please make sure that you plug the USB drive to the USB BIOS Flashback port and that you have downloaded the correct BIOS file, and it was properly renamed.
STEP FIVE: COMPLETE THE UPDATE
- When the LED stops blinking and turns off, the update is complete
- After BIOS flashing is complete, turn off the PC power supply switch for about two minutes
- Power your system on normally
- After updating the BIOS, please allow additional boot time for your RAM timings to be configured. This is a normal, one-time process that occurs after updating a BIOS or when memory training is required
STEP SIX: ENABLE XMP/EXPO SETTINGS IN BIOS
- Boot to the BIOS (F2 on startup)
- Ensure you are in Advanced Mode (toggle with F7)
- For Intel processor systems: Go to OC Tweaker > DRAM Configuration > Load XMP Setting > update from Auto to Profile 1
- For AMD processor systems: Go to OC Tweaker > DRAM Profile Configuration > DRAM Profile Setting > update from Auto to Profile 1
- If Profile 1 is not one of the available saved profiles you will need to select one of the available saved profiles given.
💡Tip: The original order will state the recommend RAM speed. Most DDR5 RAM DIMMs are set to 5600, 6000, or 6400 MT/s
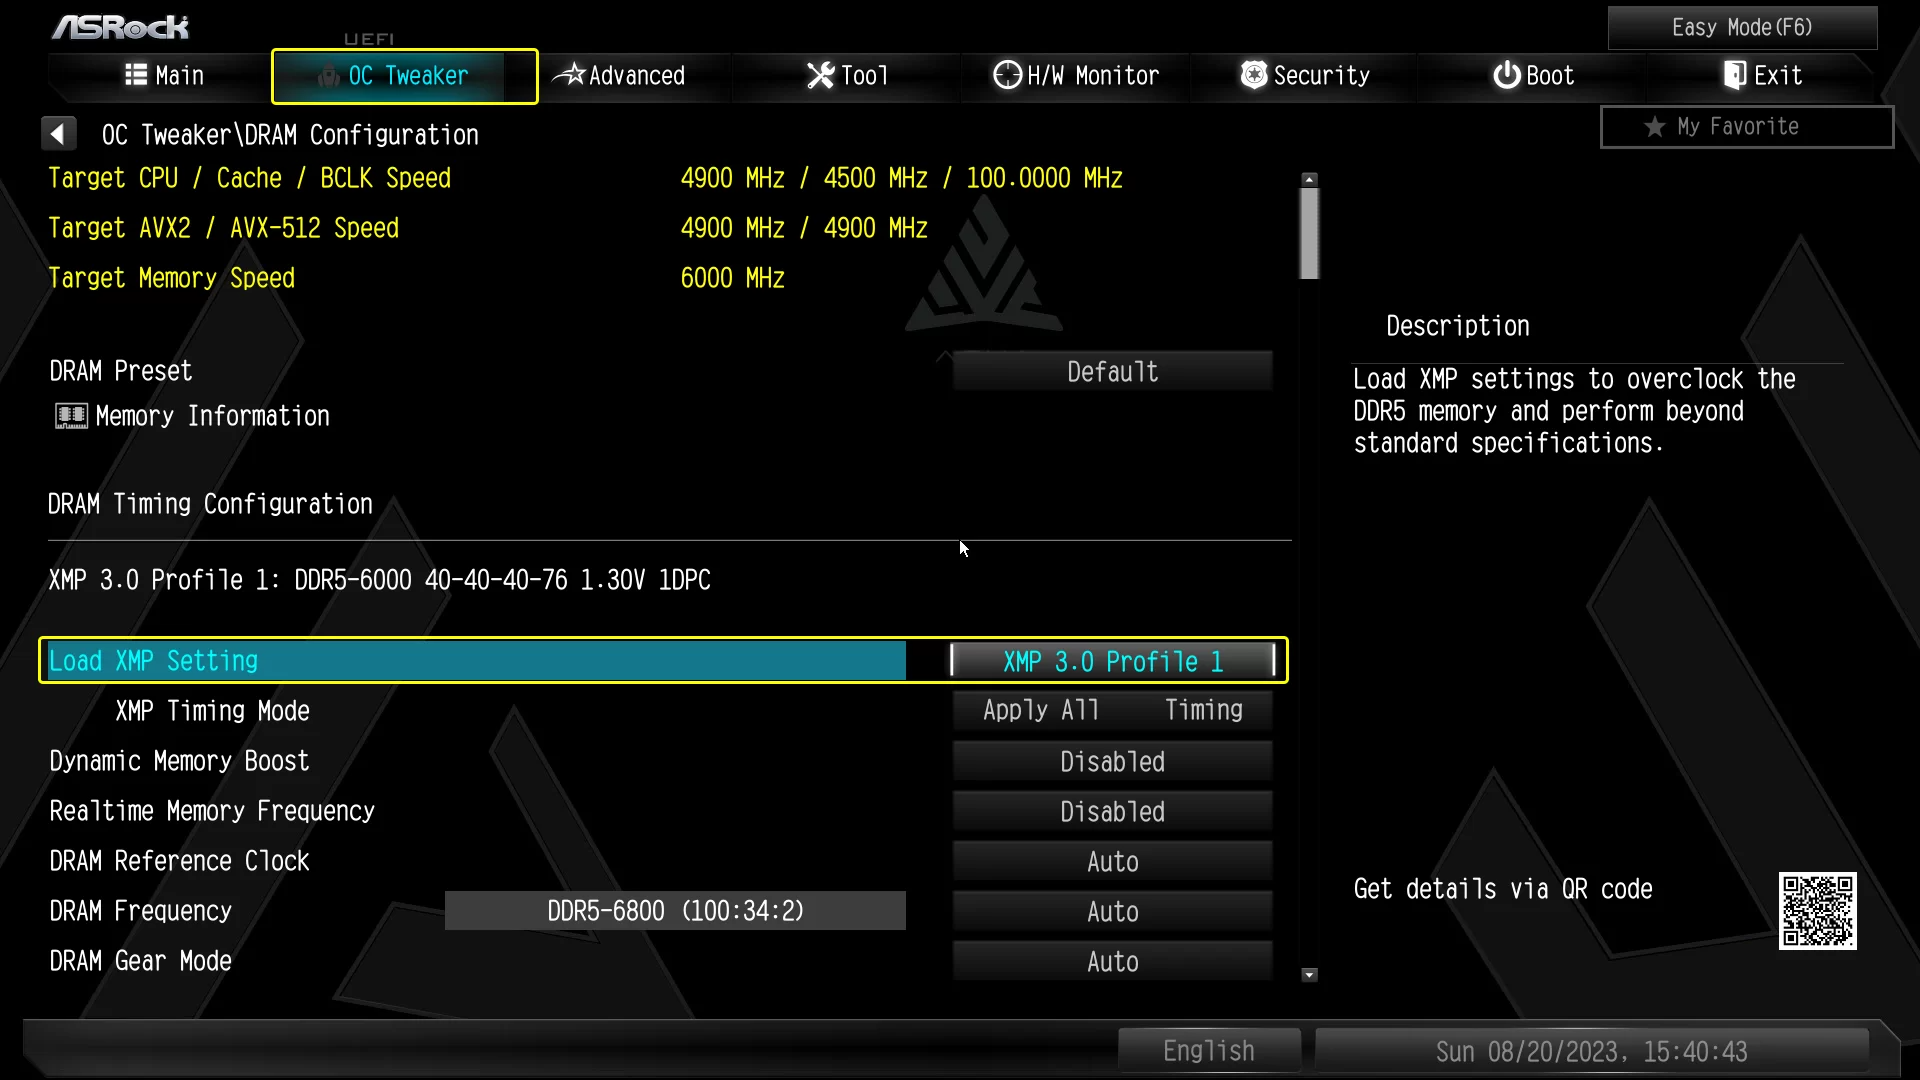 Intel XMP Profile setting in BIOS
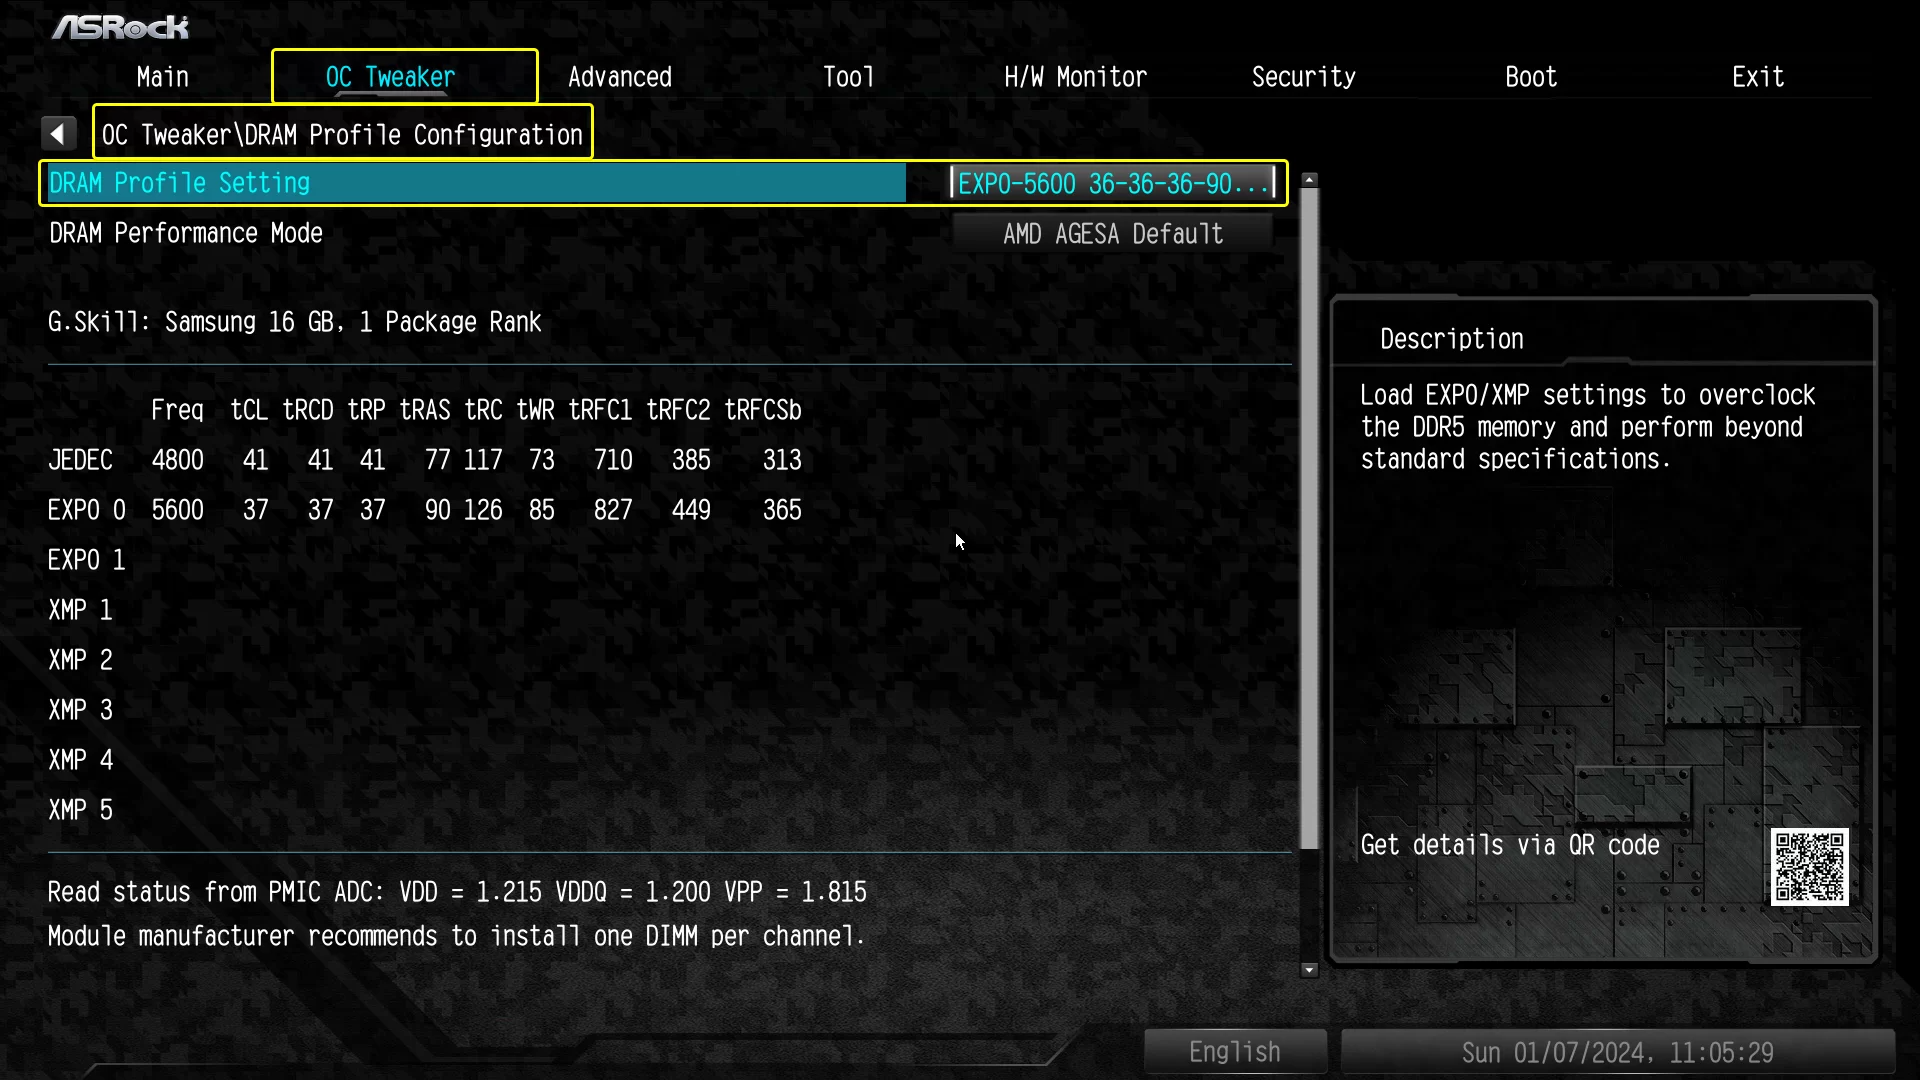 AMD EXPO setting in BIOS
TROUBLESHOOTING
- LED does not blink: check that the file was renamed correctly and the USB is formatted to FAT32
- LED blinks quickly and then stops: wrong BIOS file or incorrect renaming
- Update seems stuck: some updates take 5–10 minutes; wait until the LED stops blinking